![]() BM 2610012089
BM 2610012089
Basic Saw Operations
Auxiliary fence
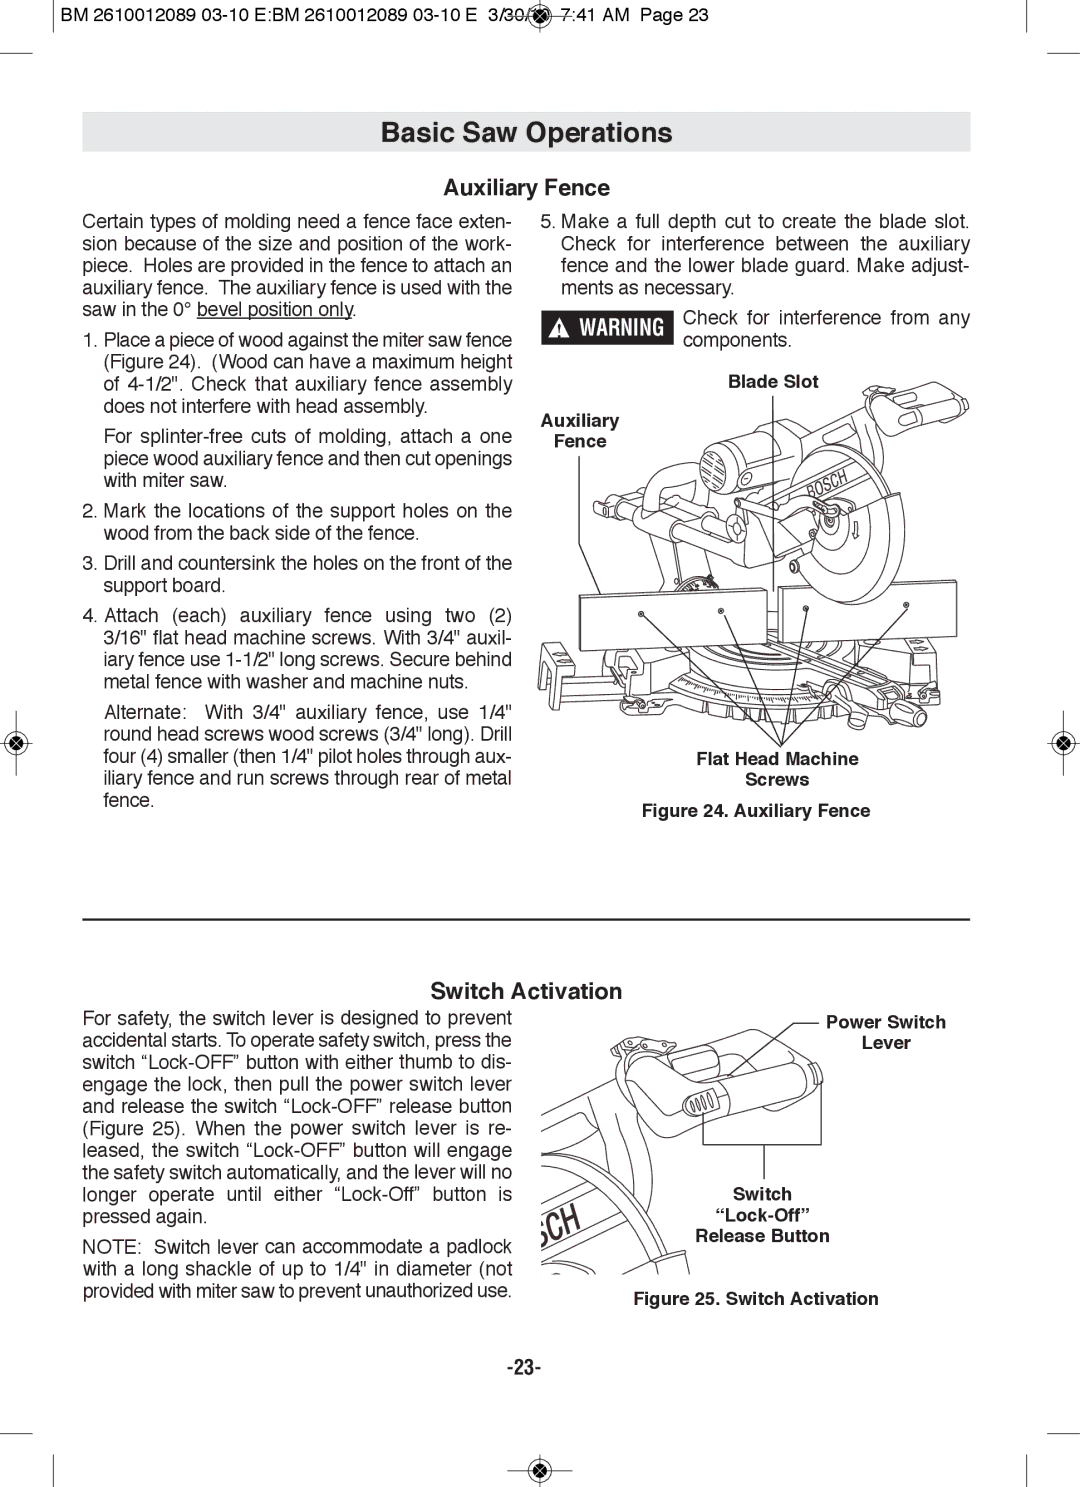
Certain types of molding need a fence face exten- sion because of the size and position of the work- piece. Holes are provided in the fence to attach an auxiliary fence. The auxiliary fence is used with the saw in the 0° bevel position only.
5.Make a full depth cut to create the blade slot. Check for interference between the auxiliary fence and the lower blade guard. Make adjust- ments as necessary.
1. | Place a piece of wood against the miter saw fence |
| (Figure 24). (Wood can have a maximum height |
| of |
| does not interfere with head assembly. |
| For |
| piece wood auxiliary fence and then cut openings |
| with miter saw. |
2. | Mark the locations of the support holes on the |
| wood from the back side of the fence. |
3. | Drill and countersink the holes on the front of the |
| support board. |
4. | Attach (each) auxiliary fence using two (2) |
| 3/16" flat head machine screws. With 3/4" auxil- |
| iary fence use |
| metal fence with washer and machine nuts. |
| Alternate: With 3/4" auxiliary fence, use 1/4" |
| round head screws wood screws (3/4" long). Drill |
!WARNING
Auxiliary
fence
Check for interference from any components.
Blade Slot
four (4) smaller (then 1/4" pilot holes through aux- |
iliary fence and run screws through rear of metal |
fence. |
flat Head Machine
Screws
figure 24. Auxiliary fence
Switch Activation
For safety, the switch lever is designed to prevent accidental starts. To operate safety switch, press the switch
NOTE: Switch lever can accommodate a padlock with a long shackle of up to 1/4" in diameter (not provided with miter saw to prevent unauthorized use.
power Switch
lever
Switch
Release Button
