Quick VLAN Walkthrough
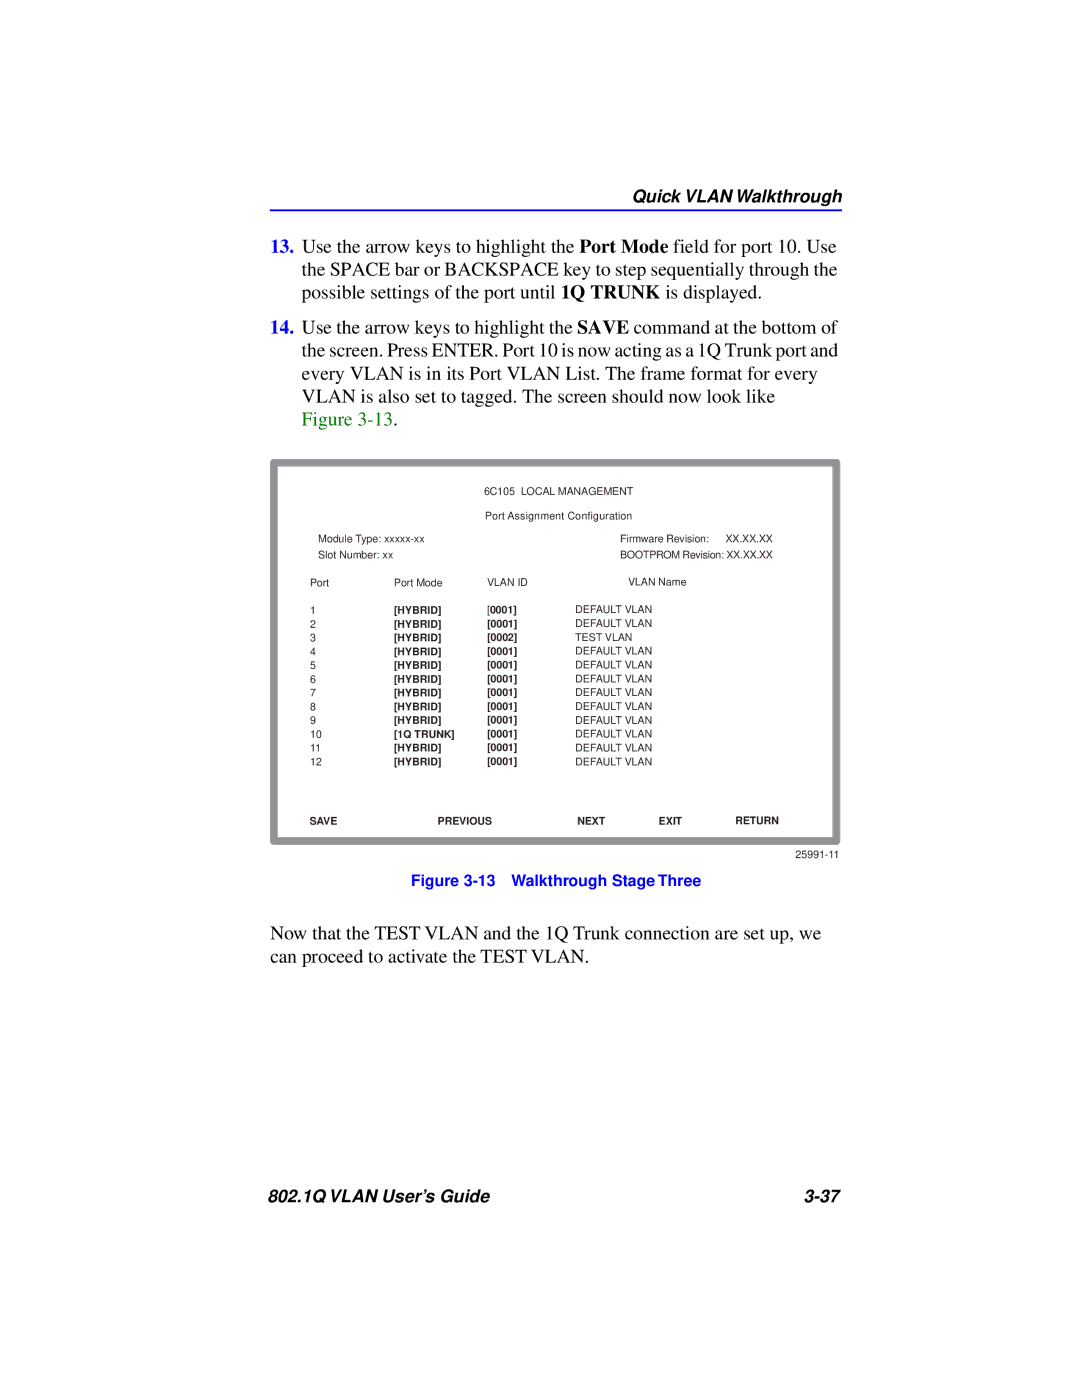
13.Use the arrow keys to highlight the Port Mode field for port 10. Use the SPACE bar or BACKSPACE key to step sequentially through the possible settings of the port until 1Q TRUNK is displayed.
14.Use the arrow keys to highlight the SAVE command at the bottom of the screen. Press ENTER. Port 10 is now acting as a 1Q Trunk port and every VLAN is in its Port VLAN List. The frame format for every VLAN is also set to tagged. The screen should now look like Figure
|
|
|
|
|
|
|
|
|
|
| 6C105 LOCAL MANAGEMENT |
|
|
| |
|
|
| Port Assignment Configuration |
|
|
| |
| Module Type: |
| Firmware Revision: | XX.XX.XX |
| ||
| Slot Number: xx |
|
| BOOTPROM Revision: XX.XX.XX |
| ||
| Port | Port Mode | VLAN ID | VLAN Name |
|
| |
| 1 | [HYBRID] | [0001] | DEFAULT VLAN |
|
|
|
| 2 | [HYBRID] | [0001] | DEFAULT VLAN |
|
|
|
| 3 | [HYBRID] | [0002] | TEST VLAN |
|
|
|
| 4 | [HYBRID] | [0001] | DEFAULT VLAN |
|
|
|
| 5 | [HYBRID] | [0001] | DEFAULT VLAN |
|
|
|
| 6 | [HYBRID] | [0001] | DEFAULT VLAN |
|
|
|
| 7 | [HYBRID] | [0001] | DEFAULT VLAN |
|
|
|
| 8 | [HYBRID] | [0001] | DEFAULT VLAN |
|
|
|
| 9 | [HYBRID] | [0001] | DEFAULT VLAN |
|
|
|
| 10 | [1Q TRUNK] | [0001] | DEFAULT VLAN |
|
|
|
| 11 | [HYBRID] | [0001] | DEFAULT VLAN |
|
|
|
| 12 | [HYBRID] | [0001] | DEFAULT VLAN |
|
|
|
| SAVE | PREVIOUS | NEXT | EXIT | RETURN |
| |
|
|
|
|
|
|
|
|
|
|
|
|
|
|
|
|
Figure 3-13 Walkthrough Stage Three
Now that the TEST VLAN and the 1Q Trunk connection are set up, we can proceed to activate the TEST VLAN.
802.1Q VLAN User’s Guide |
