Rackmount Installation
Rack Mounting the SEHI
Refer to Figure
1.Remove the four cover screws (two from each side) located along the front edges of each side of the SEHI.
Do not remove the cover from the
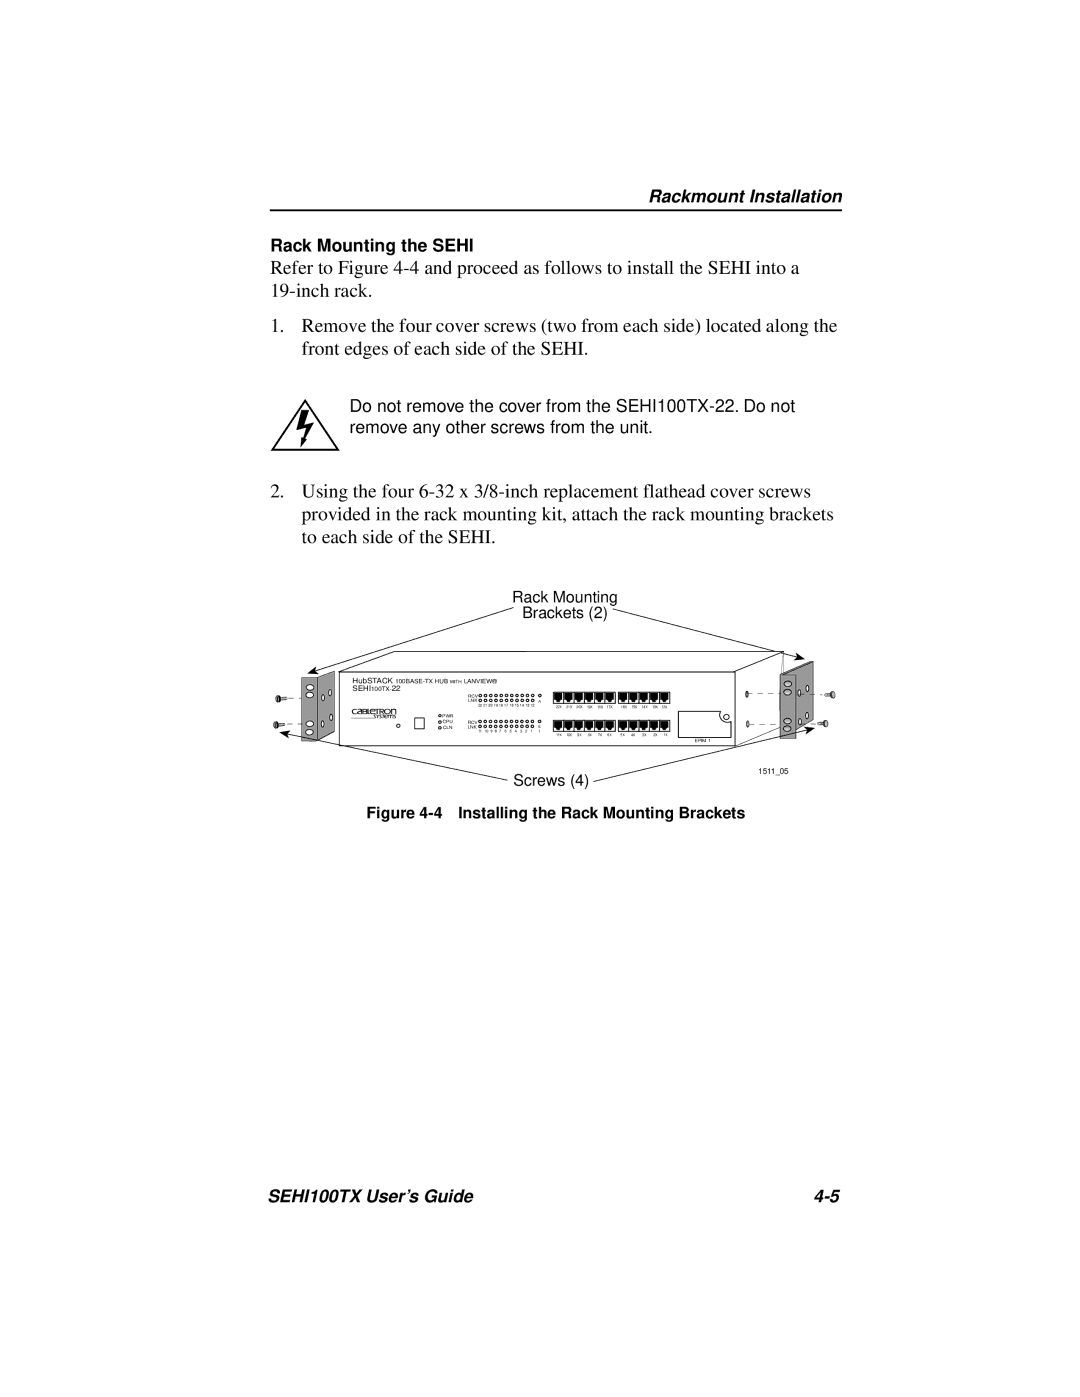
2.Using the four
Rack Mounting
Brackets (2)
HubSTACK 100BASE-TX HUB WITH LANVIEW® SEHI100TX-22
| RCV |
|
|
|
|
|
|
|
| LNK |
|
|
|
|
|
| A |
| 22 21 20 19 18 17 16 15 14 13 12 |
| ||||||
PWR |
|
|
|
|
|
|
|
|
CPU | RCV |
|
|
|
|
|
|
|
CLN | LNK |
|
|
|
|
|
| E |
| 11 10 9 8 7 | 6 | 5 | 4 | 3 | 2 | 1 | 1 |
|
|
|
|
|
|
|
|
|
|
|
|
|
|
|
|
|
|
|
|
|
|
22X | 21X | 20X | 19X | 18X | 17X | 16X | 15X | 14X | 13X | 12X |
|
|
|
|
|
|
|
|
|
|
|
|
|
|
|
|
|
|
|
|
|
|
|
|
|
|
|
|
|
|
|
|
|
11X | 10X | 9X | 8X | 7X | 6X | 5X | 4X | 3X | 2X | 1X |
EPIM 1
1511_05
Screws (4)
Figure 4-4 Installing the Rack Mounting Brackets
SEHI100TX User’s Guide |