Configuring Fast Dials on the Web
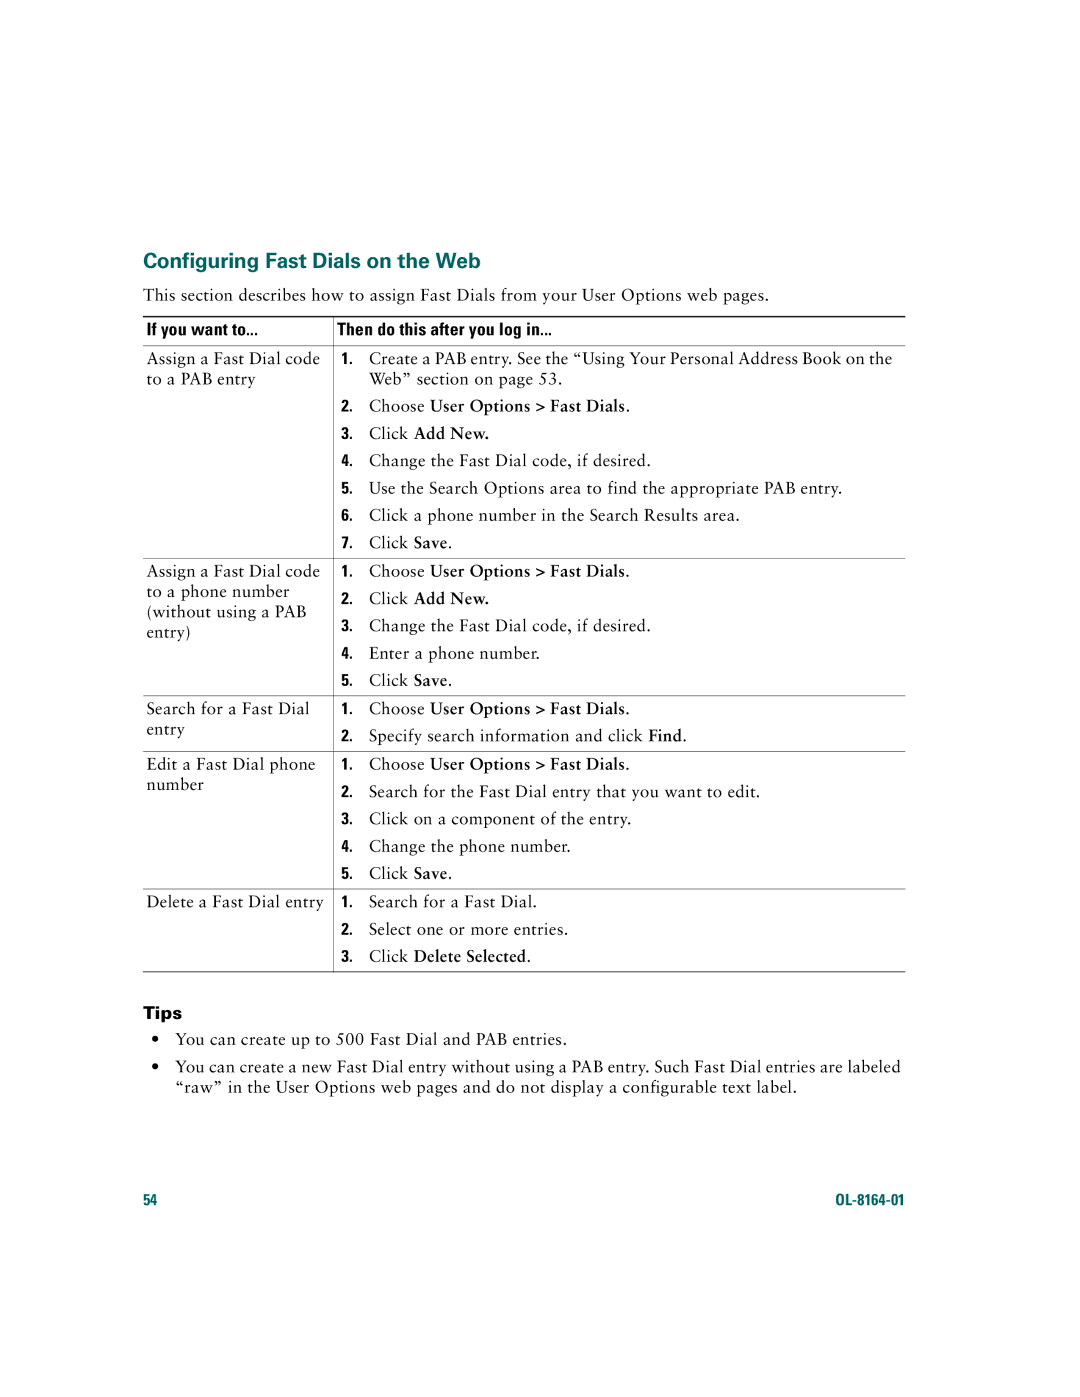
This section describes how to assign Fast Dials from your User Options web pages.
If you want to... | Then do this after you log in... | ||
|
| ||
Assign a Fast Dial code | 1. Create a PAB entry. See the “Using Your Personal Address Book on the | ||
to a PAB entry |
| Web” section on page 53. | |
| 2. | Choose User Options > Fast Dials. | |
| 3. | Click Add New. | |
| 4. | Change the Fast Dial code, if desired. | |
| 5. | Use the Search Options area to find the appropriate PAB entry. | |
| 6. | Click a phone number in the Search Results area. | |
| 7. | Click Save. | |
|
| ||
Assign a Fast Dial code | 1. Choose User Options > Fast Dials. | ||
to a phone number | 2. | Click Add New. | |
(without using a PAB | |||
3. | Change the Fast Dial code, if desired. | ||
entry) | |||
|
| ||
| 4. | Enter a phone number. | |
| 5. | Click Save. | |
|
| ||
Search for a Fast Dial | 1. Choose User Options > Fast Dials. | ||
entry | 2. | Specify search information and click Find. | |
| |||
|
| ||
Edit a Fast Dial phone | 1. Choose User Options > Fast Dials. | ||
number | 2. | Search for the Fast Dial entry that you want to edit. | |
| |||
| 3. | Click on a component of the entry. | |
| 4. | Change the phone number. | |
| 5. | Click Save. | |
|
| ||
Delete a Fast Dial entry | 1. Search for a Fast Dial. | ||
| 2. | Select one or more entries. | |
| 3. | Click Delete Selected. | |
|
|
| |
Tips
•You can create up to 500 Fast Dial and PAB entries.
•You can create a new Fast Dial entry without using a PAB entry. Such Fast Dial entries are labeled “raw” in the User Options web pages and do not display a configurable text label.
54 |
|
