•When mounting a chassis in an open rack, ensure that the rack frame does not block the intake or exhaust ports. If the chassis is installed on slides, check the position of the chassis when it is seated in the rack.
•Baffles can isolate exhaust air from intake air, which also helps to draw cooling air through the chassis. The best placement of the baffles depends on the airflow patterns in the rack, which can be found by experimenting with different configurations.
•When equipment installed in a rack (particularly in an enclosed rack) fails, try operating the equipment by itself, if possible. Power down other equipment in the rack (and in adjacent racks) to allow the unit under test a maximum of cooling air and clean power.
•Install the chassis and external devices to which it will connect in a contiguous stack.
Required Tools and Equipment
You need the following tools and equipment to
•Number 2 Phillips screwdriver (not included)
•Medium
•Screws for attaching the chassis to the rack (not included)
•Standard
•Screws for attaching the brackets to the chassis (included)
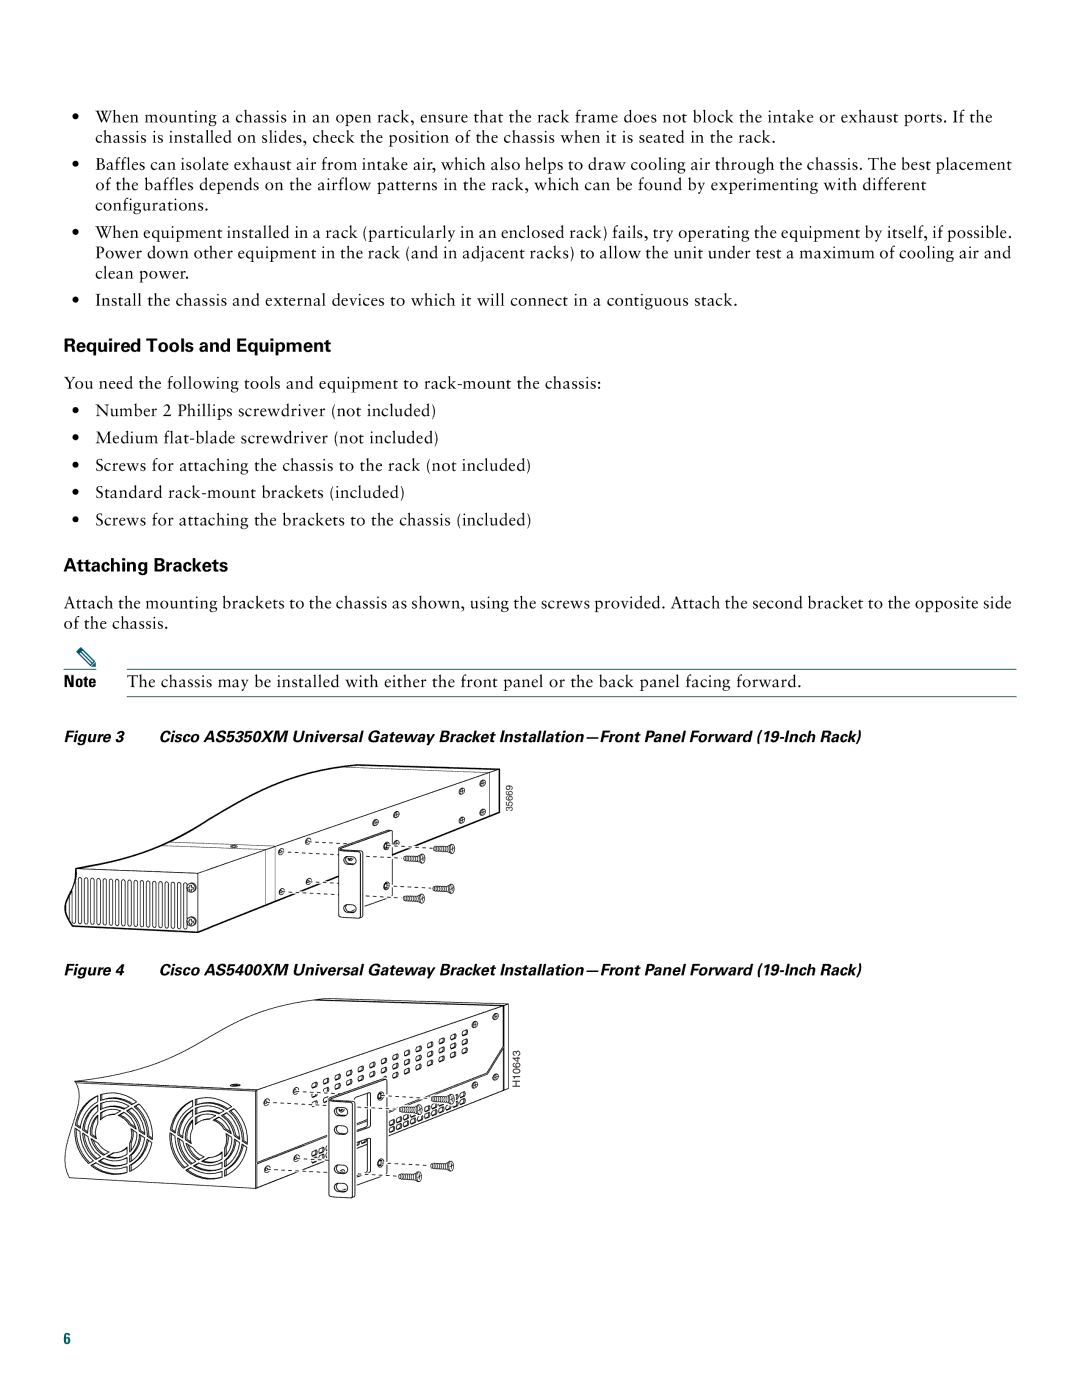
Attaching Brackets
Attach the mounting brackets to the chassis as shown, using the screws provided. Attach the second bracket to the opposite side of the chassis.
Note The chassis may be installed with either the front panel or the back panel facing forward.
Figure 3 Cisco AS5350XM Universal Gateway Bracket Installation—Front Panel Forward (19-Inch Rack)
35669
Figure 4 Cisco AS5400XM Universal Gateway Bracket Installation—Front Panel Forward (19-Inch Rack)
H10643 |
6