Installation in a Rack
Install the chassis in the rack.
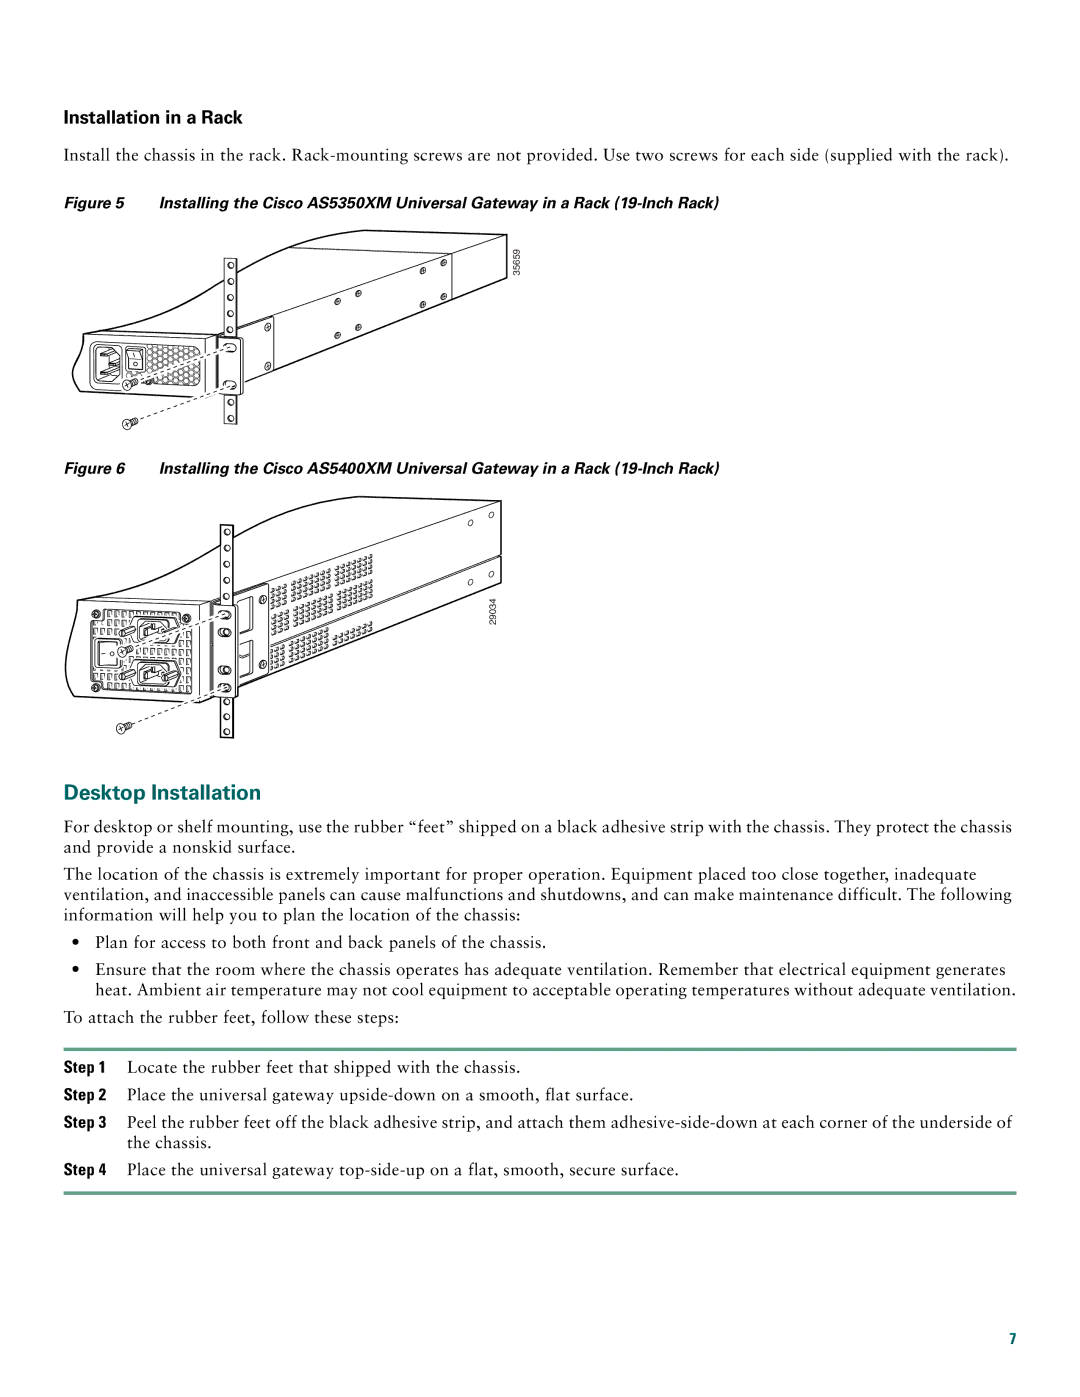
Figure 5 Installing the Cisco AS5350XM Universal Gateway in a Rack (19-Inch Rack)
35659
Figure 6 Installing the Cisco AS5400XM Universal Gateway in a Rack (19-Inch Rack)
29034
Desktop Installation
For desktop or shelf mounting, use the rubber “feet” shipped on a black adhesive strip with the chassis. They protect the chassis and provide a nonskid surface.
The location of the chassis is extremely important for proper operation. Equipment placed too close together, inadequate ventilation, and inaccessible panels can cause malfunctions and shutdowns, and can make maintenance difficult. The following information will help you to plan the location of the chassis:
•Plan for access to both front and back panels of the chassis.
•Ensure that the room where the chassis operates has adequate ventilation. Remember that electrical equipment generates heat. Ambient air temperature may not cool equipment to acceptable operating temperatures without adequate ventilation.
To attach the rubber feet, follow these steps:
Step 1 Locate the rubber feet that shipped with the chassis.
Step 2 Place the universal gateway
Step 3 Peel the rubber feet off the black adhesive strip, and attach them
Step 4 Place the universal gateway
7