CF2001P
NEXT
3. Installing the Units
■Installing the Imaging Units
1. Grasp the handle of the front door, and then carefully swing the door open to the right as shown.
4.Remove the packing material from the imag- ing unit slot.
C4004U144AA
C4004U011AA
2.Pinch the release lever for the yellow imag- ing unit. (The colors of the imaging units are, from the left, yellow, magenta, cyan, and black.)
C4004U047AA
3. Swing the release lever toward you.
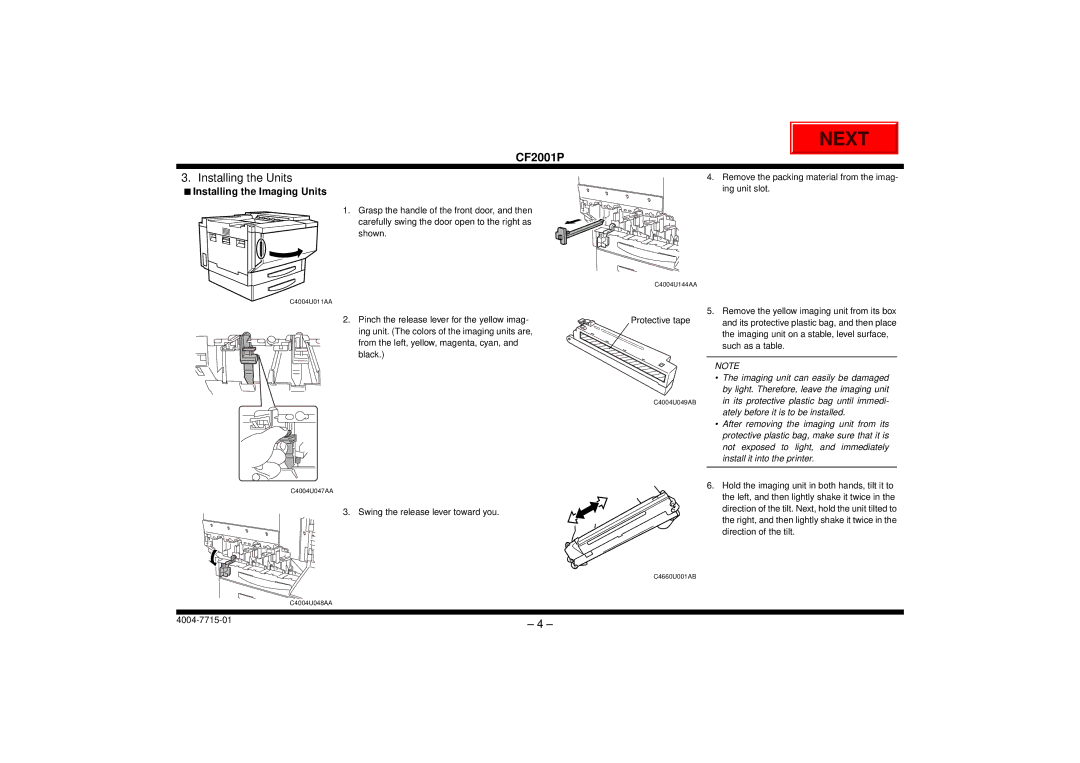
Protective tape
C4004U049AB
5.Remove the yellow imaging unit from its box and its protective plastic bag, and then place the imaging unit on a stable, level surface, such as a table.
NOTE
•The imaging unit can easily be damaged by light. Therefore, leave the imaging unit in its protective plastic bag until immedi- ately before it is to be installed.
•After removing the imaging unit from its protective plastic bag, make sure that it is not exposed to light, and immediately install it into the printer.
6.Hold the imaging unit in both hands, tilt it to the left, and then lightly shake it twice in the direction of the tilt. Next, hold the unit tilted to the right, and then lightly shake it twice in the direction of the tilt.
C4660U001AB
C4004U048AA
– 4 – | |
|