Chapter 2 Getting Started
Installing the Cisco Video Surveillance 2630 IP Dome
3
4
5
6
Camera unit screws (2)
Privacy shield
Dome assembly
TORX security screws (3)
Step 2 Remove the Privacy shield by squeezing it inward to release it from the four tabs that hold it into place (see Figure
Step 3 Remove the camera unit from the base plate by using a
Step 4 Use the template provided to mark the locations in the mounting surface for four screw holes, and for one cabling hole, if cables come through the surface.
Step 5 Drill 4 holes for screws.
The screw holes should be the appropriate size for the mounting hardware that you are using. Step 6 Take one of these actions:
•If cables run through the surface, drill a hole for the cables.
•If cables run parallel to the surface, unscrew the cable entry plug from the desired entry hole in the side of the conduit base. Then screw the cable entry plug into the bottom cable entry hole.
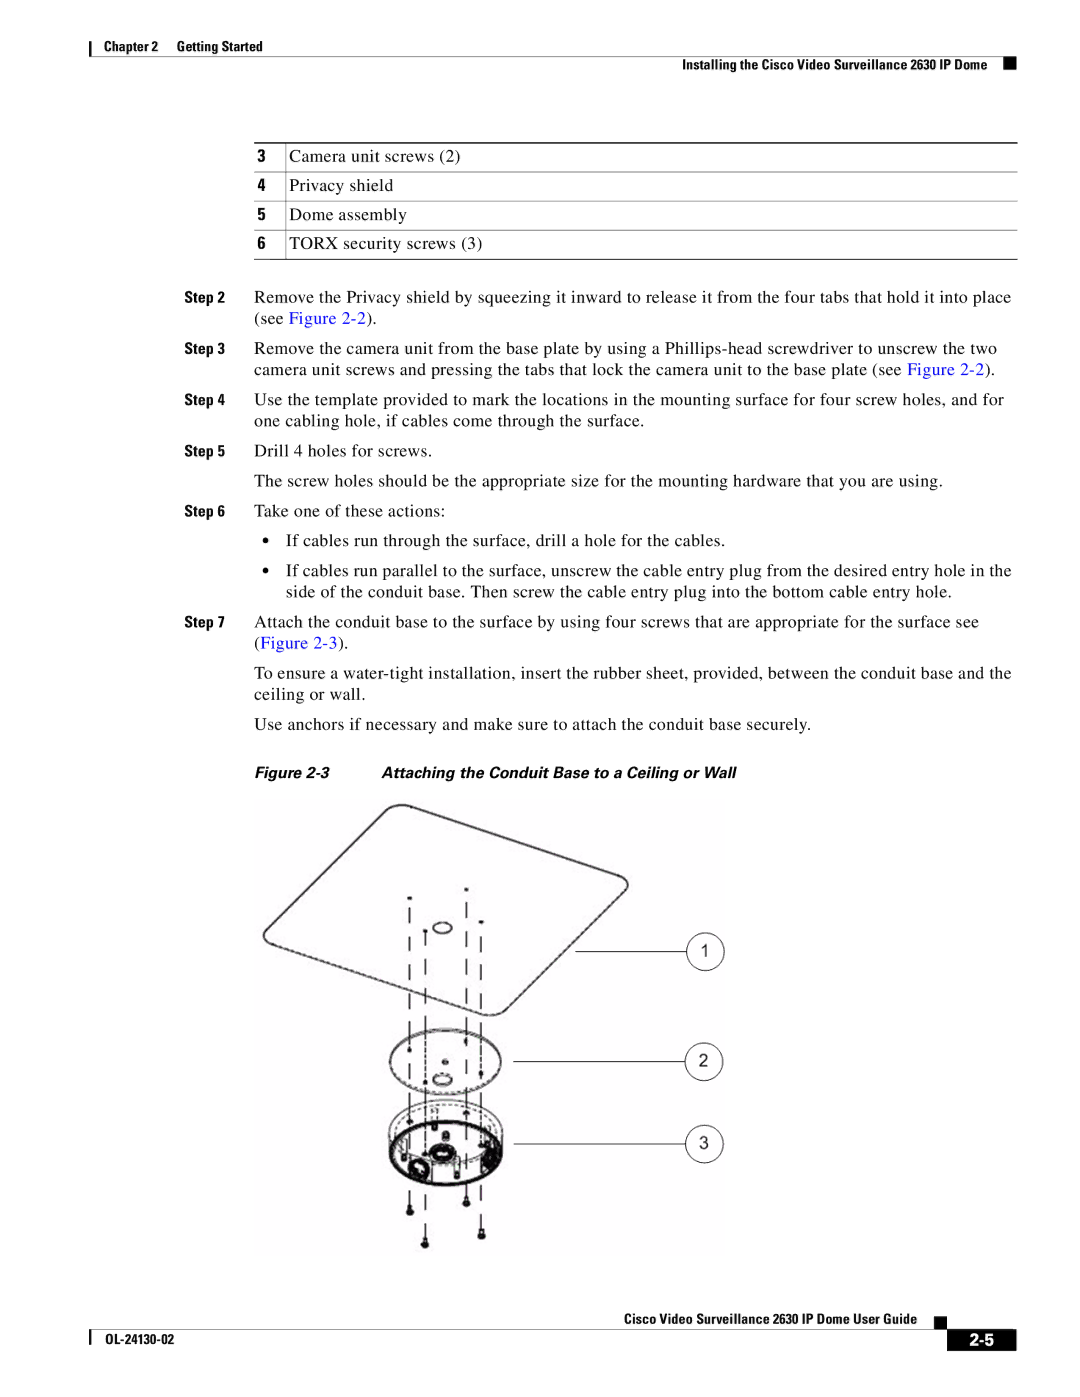
Step 7 Attach the conduit base to the surface by using four screws that are appropriate for the surface see (Figure
To ensure a
Use anchors if necessary and make sure to attach the conduit base securely.
Figure 2-3 Attaching the Conduit Base to a Ceiling or Wall
Cisco Video Surveillance 2630 IP Dome User Guide
|
| ||
|
|