Chapter 2 Getting Started
Performing the Initial Setup of the IP Camera
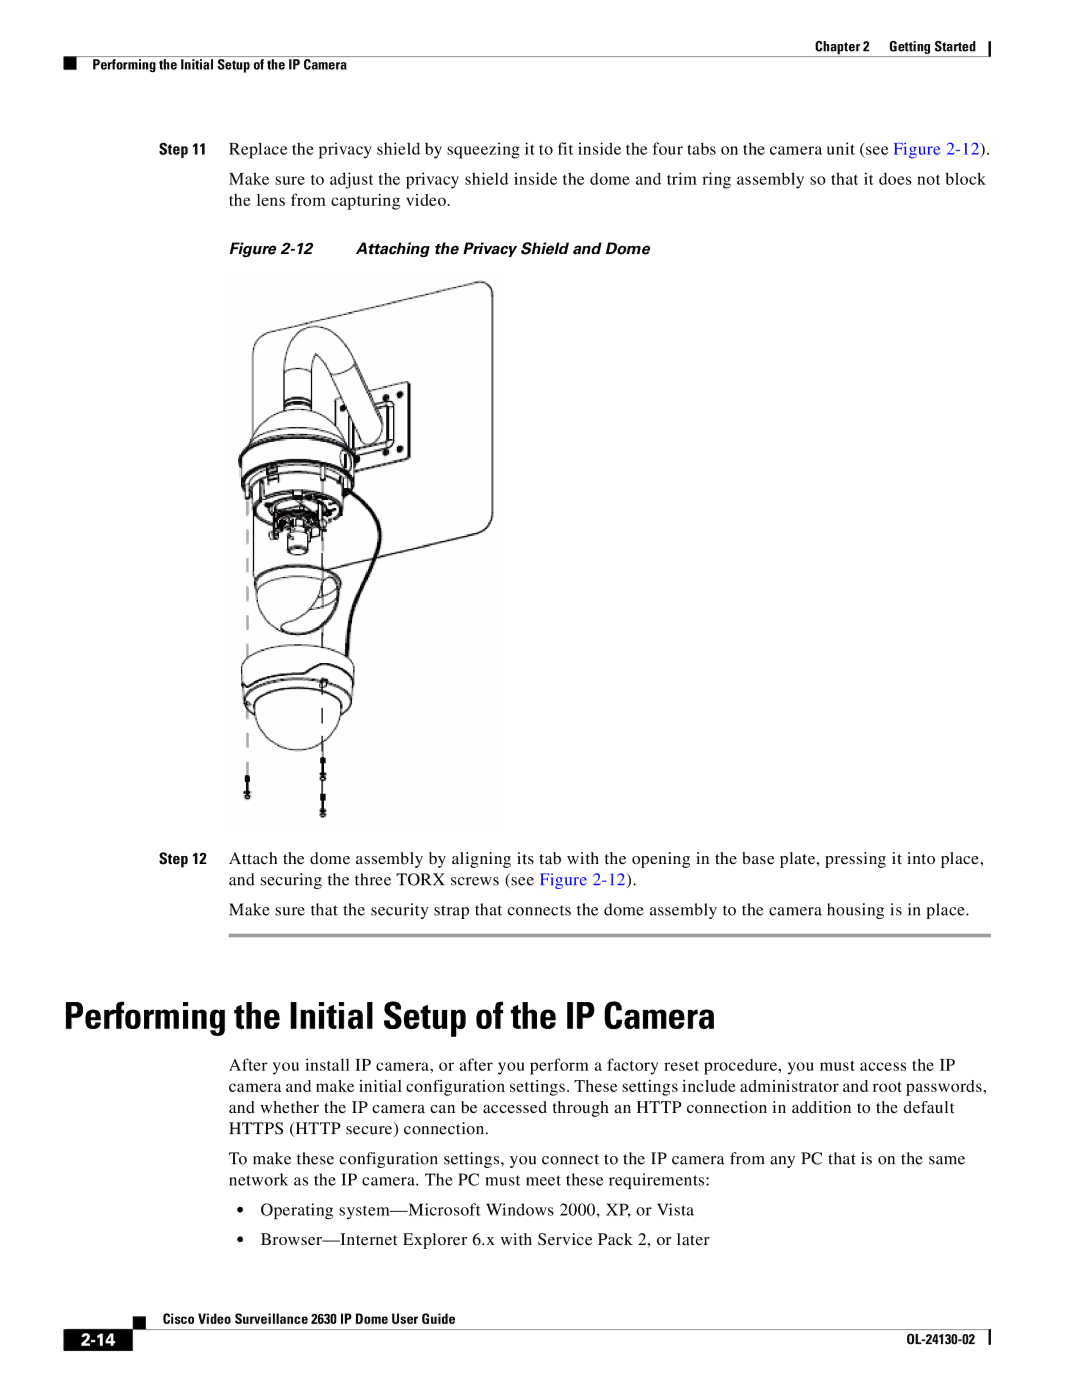
Step 11 Replace the privacy shield by squeezing it to fit inside the four tabs on the camera unit (see Figure
Make sure to adjust the privacy shield inside the dome and trim ring assembly so that it does not block the lens from capturing video.
Figure 2-12 Attaching the Privacy Shield and Dome
Step 12 Attach the dome assembly by aligning its tab with the opening in the base plate, pressing it into place, and securing the three TORX screws (see Figure
Make sure that the security strap that connects the dome assembly to the camera housing is in place.
Performing the Initial Setup of the IP Camera
After you install IP camera, or after you perform a factory reset procedure, you must access the IP camera and make initial configuration settings. These settings include administrator and root passwords, and whether the IP camera can be accessed through an HTTP connection in addition to the default HTTPS (HTTP secure) connection.
To make these configuration settings, you connect to the IP camera from any PC that is on the same network as the IP camera. The PC must meet these requirements:
•Operating
•
| Cisco Video Surveillance 2630 IP Dome User Guide |
|