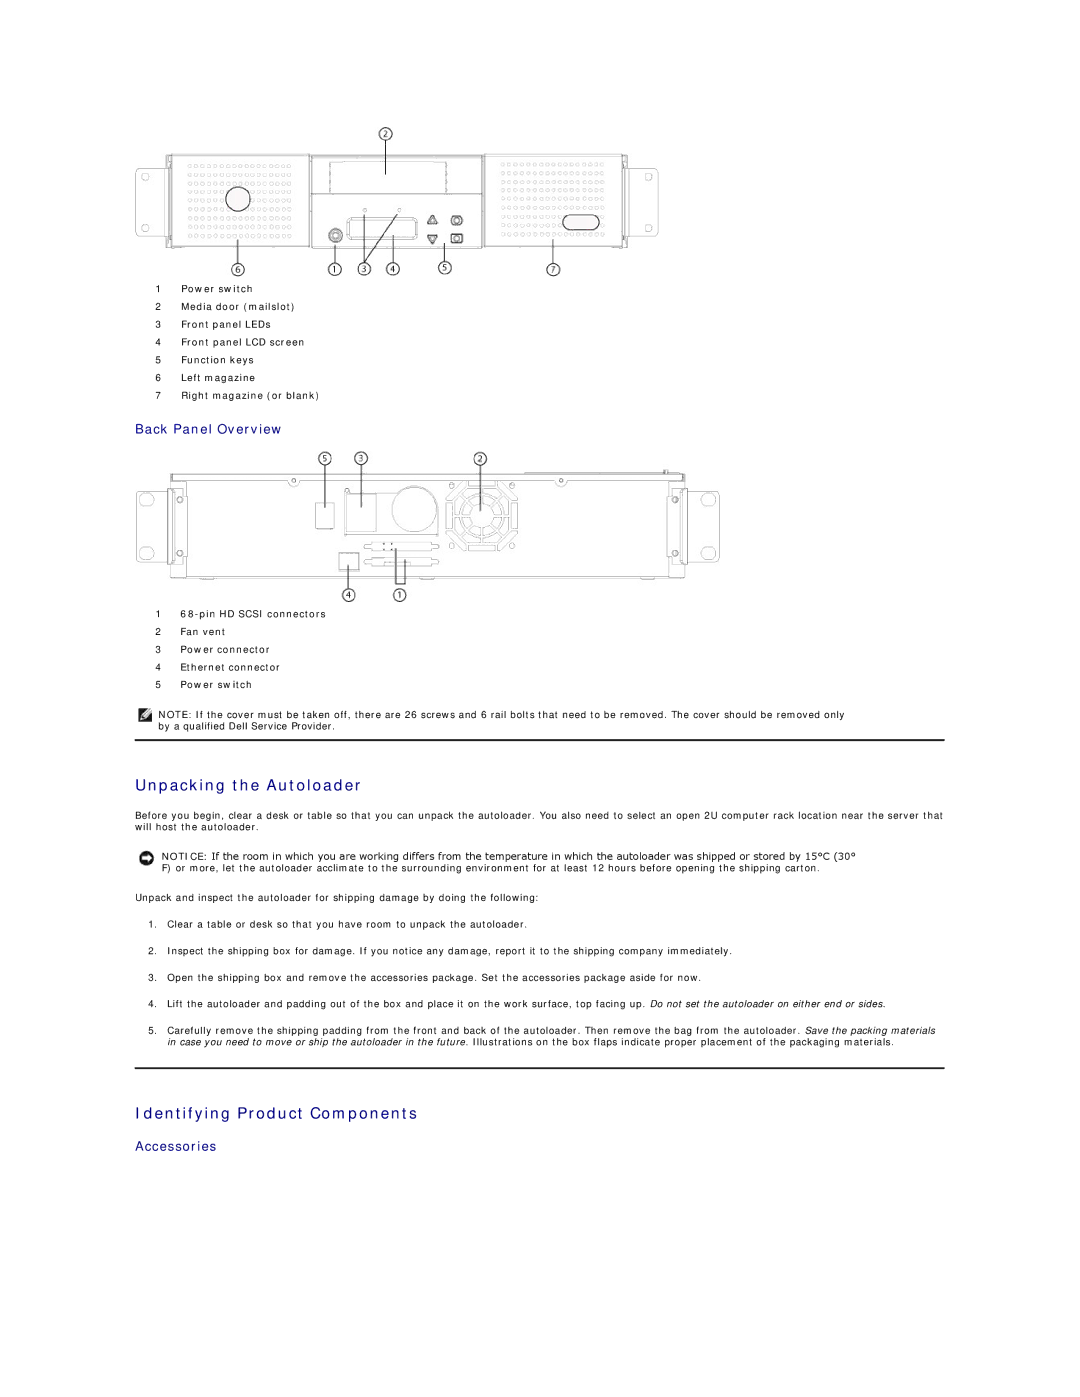
1Power switch
2Media door (mailslot)
3Front panel LEDs
4Front panel LCD screen
5Function keys
6Left magazine
7Right magazine (or blank)
Back Panel Overview
1
2Fan vent
3Power connector
4Ethernet connector
5Power switch
NOTE: If the cover must be taken off, there are 26 screws and 6 rail bolts that need to be removed. The cover should be removed only by a qualified Dell Service Provider.
Unpacking the Autoloader
Before you begin, clear a desk or table so that you can unpack the autoloader. You also need to select an open 2U computer rack location near the server that will host the autoloader.
NOTICE: If the room in which you are working differs from the temperature in which the autoloader was shipped or stored by 15°C (30° F) or more, let the autoloader acclimate to the surrounding environment for at least 12 hours before opening the shipping carton.
Unpack and inspect the autoloader for shipping damage by doing the following:
1.Clear a table or desk so that you have room to unpack the autoloader.
2.Inspect the shipping box for damage. If you notice any damage, report it to the shipping company immediately.
3.Open the shipping box and remove the accessories package. Set the accessories package aside for now.
4.Lift the autoloader and padding out of the box and place it on the work surface, top facing up. Do not set the autoloader on either end or sides.
5.Carefully remove the shipping padding from the front and back of the autoloader. Then remove the bag from the autoloader. Save the packing materials in case you need to move or ship the autoloader in the future. Illustrations on the box flaps indicate proper placement of the packaging materials.