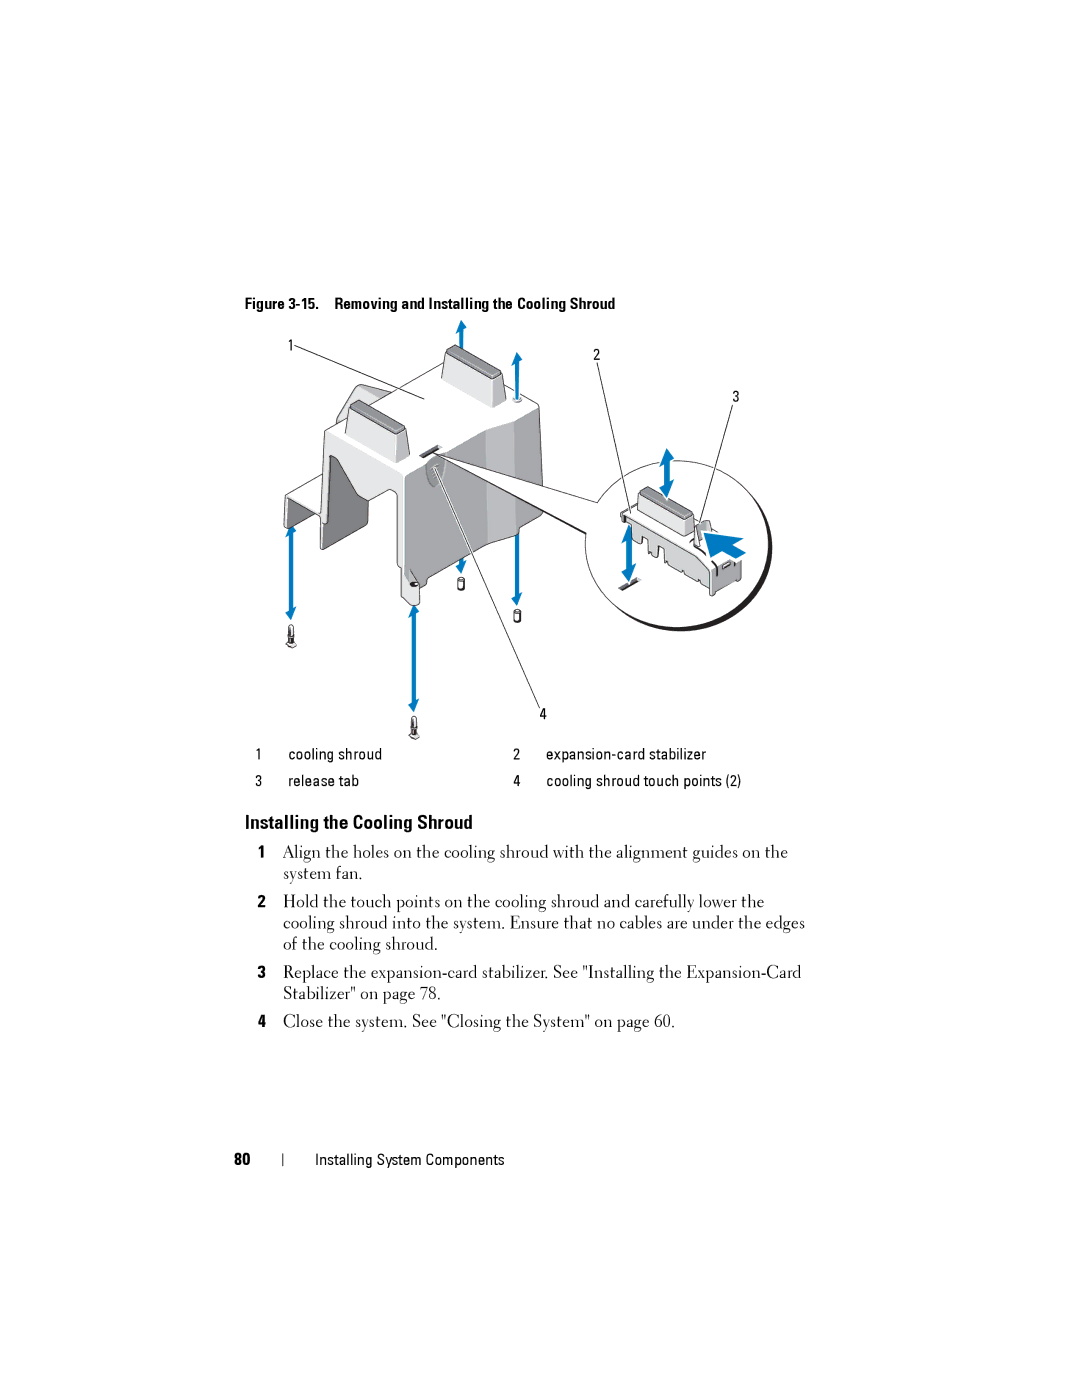
Figure 3-15. Removing and Installing the Cooling Shroud
1 | 2 |
|
3
|
|
| 4 |
1 | cooling shroud | 2 | |
3 | release tab | 4 | cooling shroud touch points (2) |
Installing the Cooling Shroud
1Align the holes on the cooling shroud with the alignment guides on the system fan.
2Hold the touch points on the cooling shroud and carefully lower the cooling shroud into the system. Ensure that no cables are under the edges of the cooling shroud.
3Replace the
4Close the system. See "Closing the System" on page 60.
80
Installing System Components