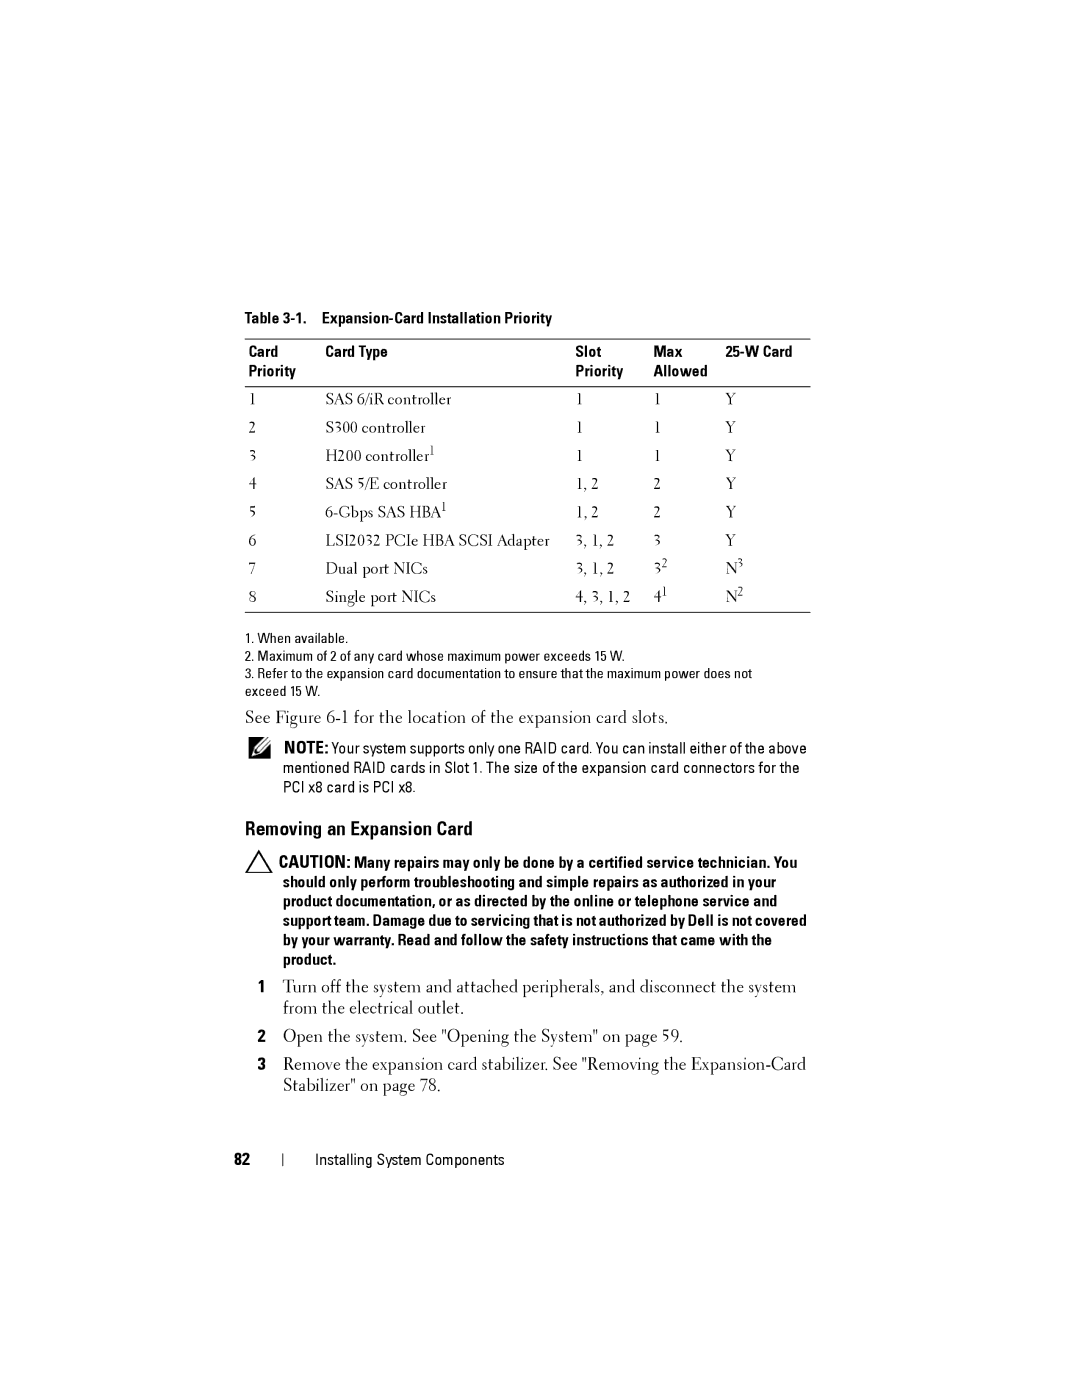
Table
Card | Card Type | Slot | Max | |
Priority |
| Priority | Allowed |
|
|
|
|
|
|
1 | SAS 6/iR controller | 1 | 1 | Y |
2 | S300 controller | 1 | 1 | Y |
3 | H200 controller1 | 1 | 1 | Y |
4 | SAS 5/E controller | 1, 2 | 2 | Y |
5 | 1, 2 | 2 | Y | |
6 | LSI2032 PCIe HBA SCSI Adapter | 3, 1, 2 | 3 | Y |
7 | Dual port NICs | 3, 1, 2 | 32 | N3 |
8 | Single port NICs | 4, 3, 1, 2 | 41 | N2 |
1.When available.
2.Maximum of 2 of any card whose maximum power exceeds 15 W.
3.Refer to the expansion card documentation to ensure that the maximum power does not exceed 15 W.
See Figure
NOTE: Your system supports only one RAID card. You can install either of the above mentioned RAID cards in Slot 1. The size of the expansion card connectors for the PCI x8 card is PCI x8.
Removing an Expansion Card
CAUTION: Many repairs may only be done by a certified service technician. You should only perform troubleshooting and simple repairs as authorized in your product documentation, or as directed by the online or telephone service and support team. Damage due to servicing that is not authorized by Dell is not covered by your warranty. Read and follow the safety instructions that came with the product.
1Turn off the system and attached peripherals, and disconnect the system from the electrical outlet.
2Open the system. See "Opening the System" on page 59.
3Remove the expansion card stabilizer. See "Removing the
82
Installing System Components