Operation, cont’d
For example: When lit steadily, the Input 3 button indicates the following, depending on the number of input buttons the switcher has:
Switchers with 12 input buttons — 47 dB of attenuation when compared to the Input 3 LED blinking quickly (48 dB to 50 dB of attenuation). The blinking Input 4 LED (45 dB to 46 dB of attenuation) is at least 2 dB less than the fast blinking Input 3 LED (48 dB – 46 dB) and at most 5 dB less (50 dB – 45 dB).
Switchers with 16 input buttons — 52 dB of attenuation when compared to the Input 3 LED blinking (53 dB to 55 dB of attenuation). The blinking Input 4 LED (49 dB to 51 dB of attenuation) is at least 2 dB less than the fast blinking Input 3 LED (53 dB – 51 dB) and at most 6 dB less
(55 dB – 49 dB).
See the table on page
Example 9: Viewing and adjusting an output volume level
The following steps show an example in which the audio output volume is viewed and adjusted. The steps show the front panel indications that result from your actions.
Audio output volume is displayed differently on different models. See the table on page
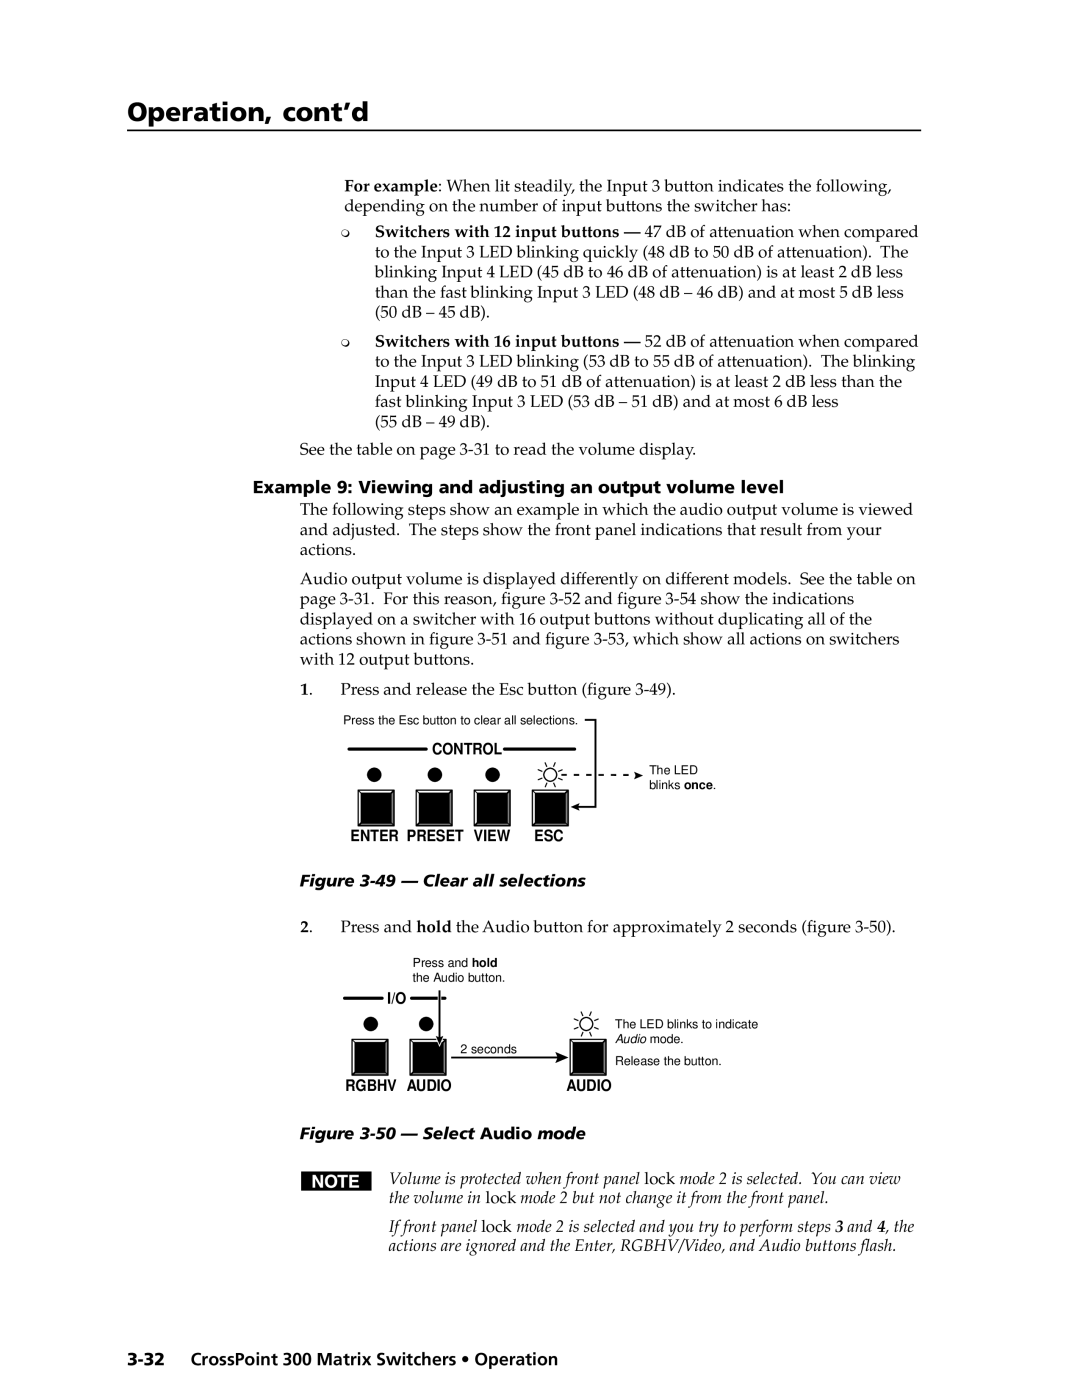
1. | Press and release the Esc button (figure |
Press the Esc button to clear all selections.
CONTROL
The LED blinks once.
ENTER PRESET VIEW ESC
Figure 3-49 — Clear all selections
2. Press and hold the Audio button for approximately 2 seconds (figure
Press and hold the Audio button.
I/O
2 seconds
The LED blinks to indicate Audio mode.
Release the button.
RGBHV AUDIO | AUDIO |
Figure 3-50 — Select Audio mode
Volume is protected when front panel lock mode 2 is selected. You can view the volume in lock mode 2 but not change it from the front panel.
If front panel lock mode 2 is selected and you try to perform steps 3 and 4, the actions are ignored and the Enter, RGBHV/Video, and Audio buttons flash.
