Entering e-mail addresses for alerts
If you have created scheduled events or monitoring tasks on the PCS4, you can write an
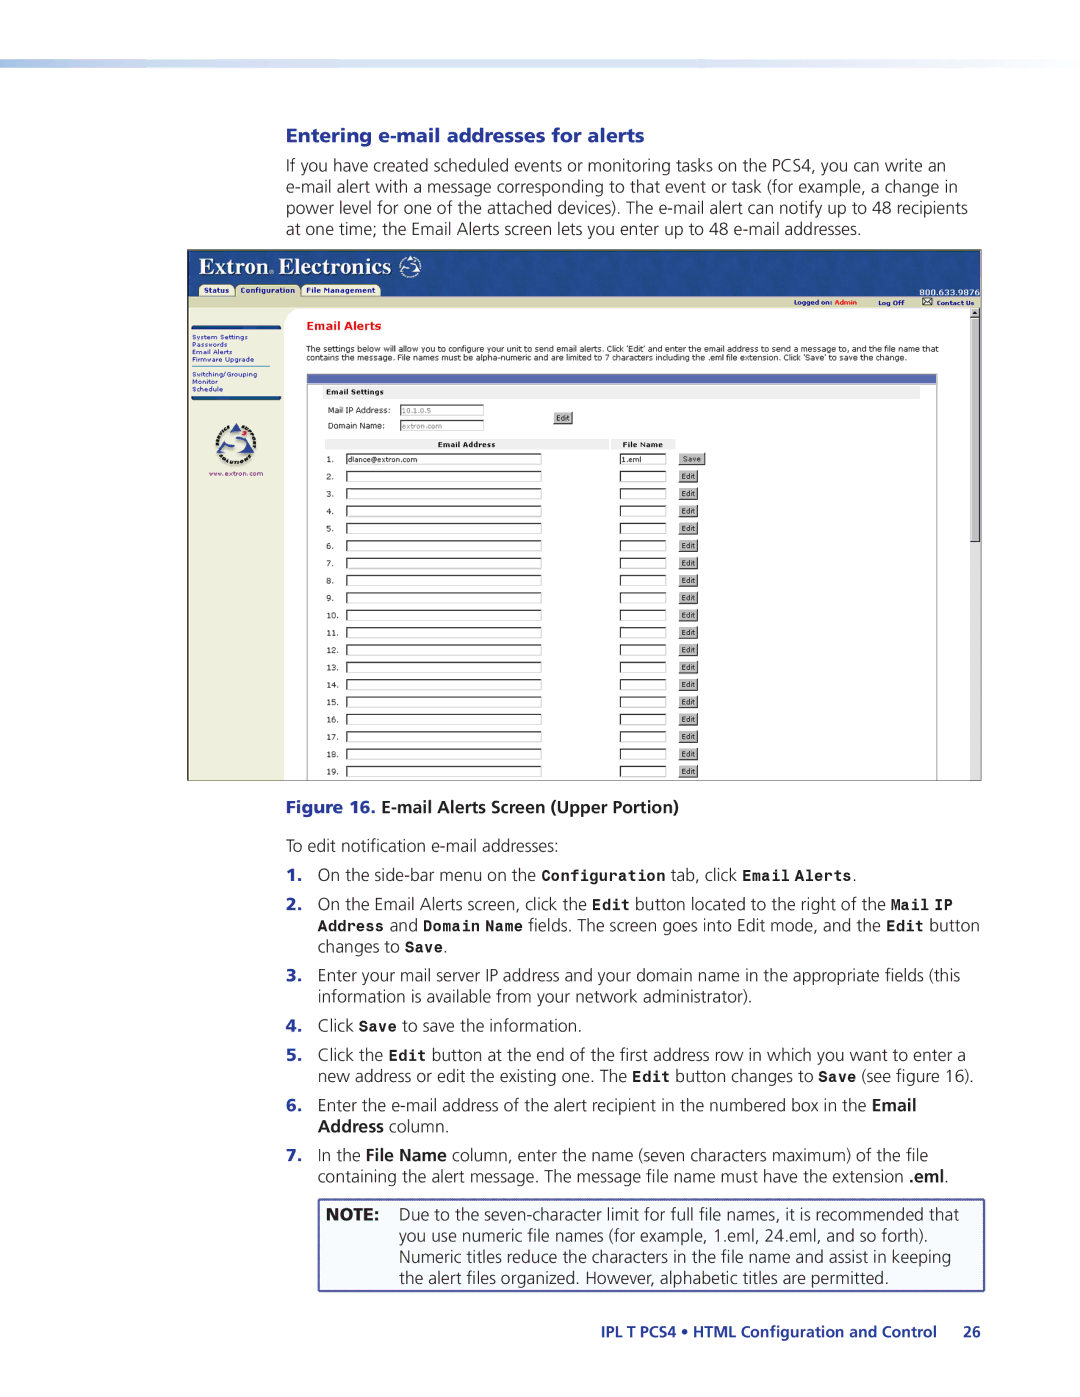
Figure 16. E-mail Alerts Screen (Upper Portion)
To edit notification
1.On the
2.On the Email Alerts screen, click the Edit button located to the right of the Mail IP Address and Domain Name fields. The screen goes into Edit mode, and the Edit button changes to Save.
3.Enter your mail server IP address and your domain name in the appropriate fields (this information is available from your network administrator).
4.Click Save to save the information.
5.Click the Edit button at the end of the first address row in which you want to enter a new address or edit the existing one. The Edit button changes to Save (see figure 16).
6.Enter the
7.In the File Name column, enter the name (seven characters maximum) of the file containing the alert message. The message file name must have the extension .eml.
![]() NOTE: Due to the
NOTE: Due to the
you use numeric file names (for example, 1.eml, 24.eml, and so forth). Numeric titles reduce the characters in the file name and assist in keeping
the alert files organized. However, alphabetic titles are permitted.
IPL T PCS4 • HTML Configuration and Control 26
