Optional Equipment (for qualified installers only) 5 5
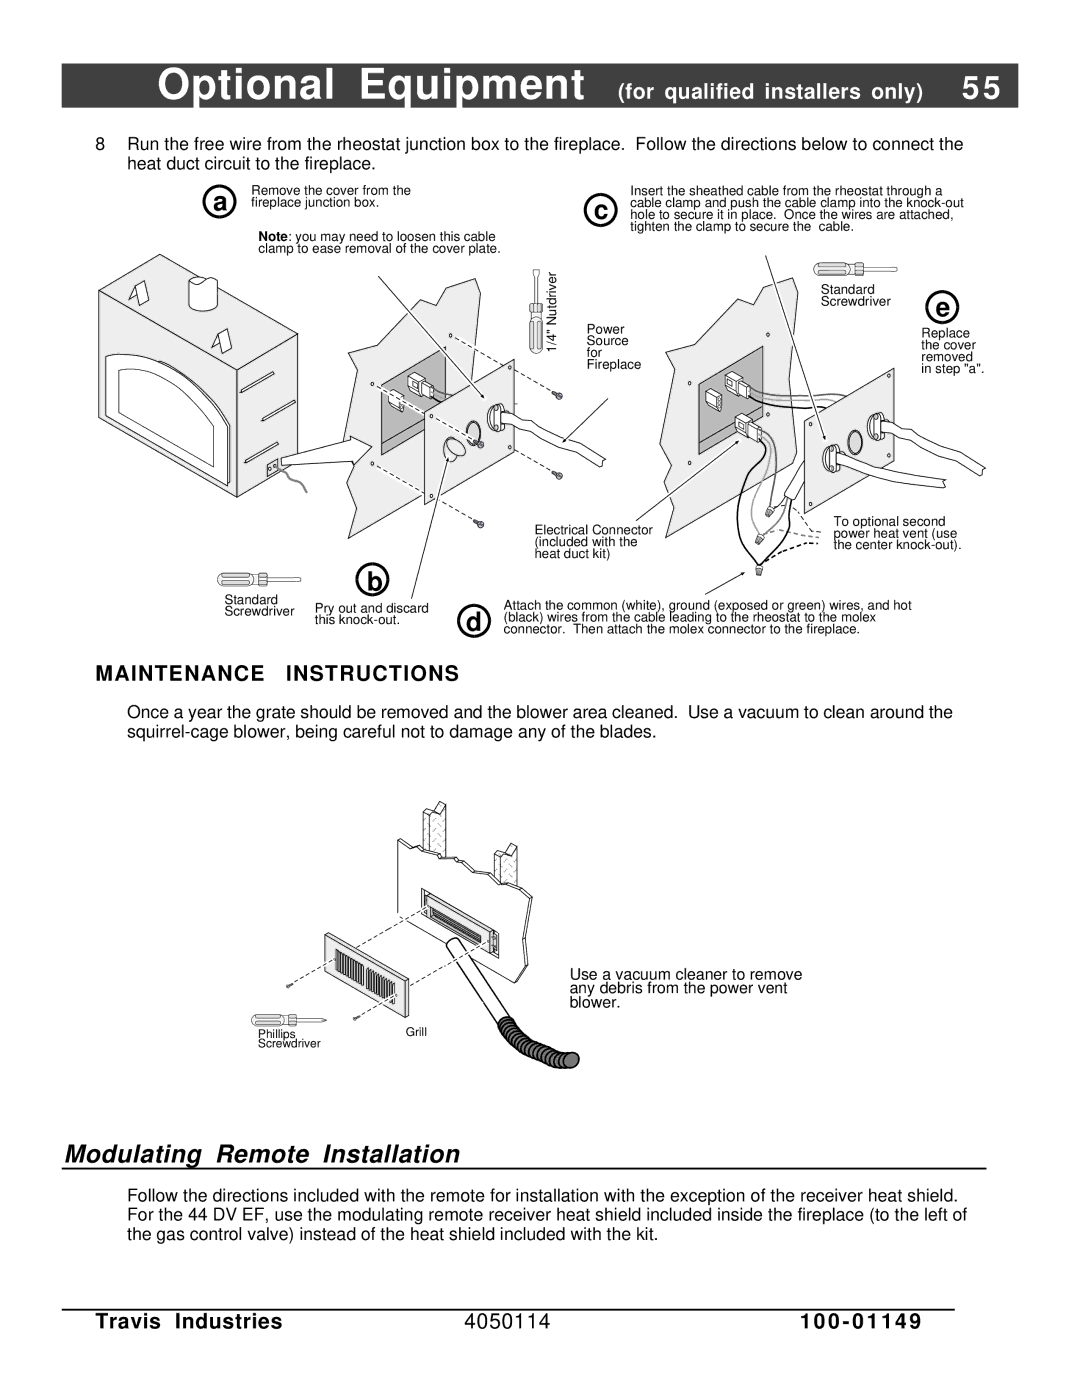
8Run the free wire from the rheostat junction box to the fireplace. Follow the directions below to connect the heat duct circuit to the fireplace.
a | Remove the cover from the |
fireplace junction box. |
Note: you may need to loosen this cable clamp to ease removal of the cover plate.
Insert the sheathed cable from the rheostat through a c cable clamp and push the cable clamp into the
hole to secure it in place. Once the wires are attached, tighten the clamp to secure the cable.
b
Nutdriver | Power | |
1/4" | ||
Source | ||
| for | |
| Fireplace |
Electrical Connector (included with the heat duct kit)
Standard
Screwdriver e
Replace the cover removed in step "a".
To optional second power heat vent (use the center
Standard
Screwdriver Pry out and discard this
Attach the common (white), ground (exposed or green) wires, and hot d (black) wires from the cable leading to the rheostat to the molex
connector. Then attach the molex connector to the fireplace.
MAINTENANCE INSTRUCTIONS
Once a year the grate should be removed and the blower area cleaned. Use a vacuum to clean around the
Phillips Screwdriver
Use a vacuum cleaner to remove any debris from the power vent blower.
Grill
Modulating Remote Installation
Follow the directions included with the remote for installation with the exception of the receiver heat shield. For the 44 DV EF, use the modulating remote receiver heat shield included inside the fireplace (to the left of the gas control valve) instead of the heat shield included with the kit.
Travis Industries | 4050114 | 1 0 0 - 0 1 1 4 9 |