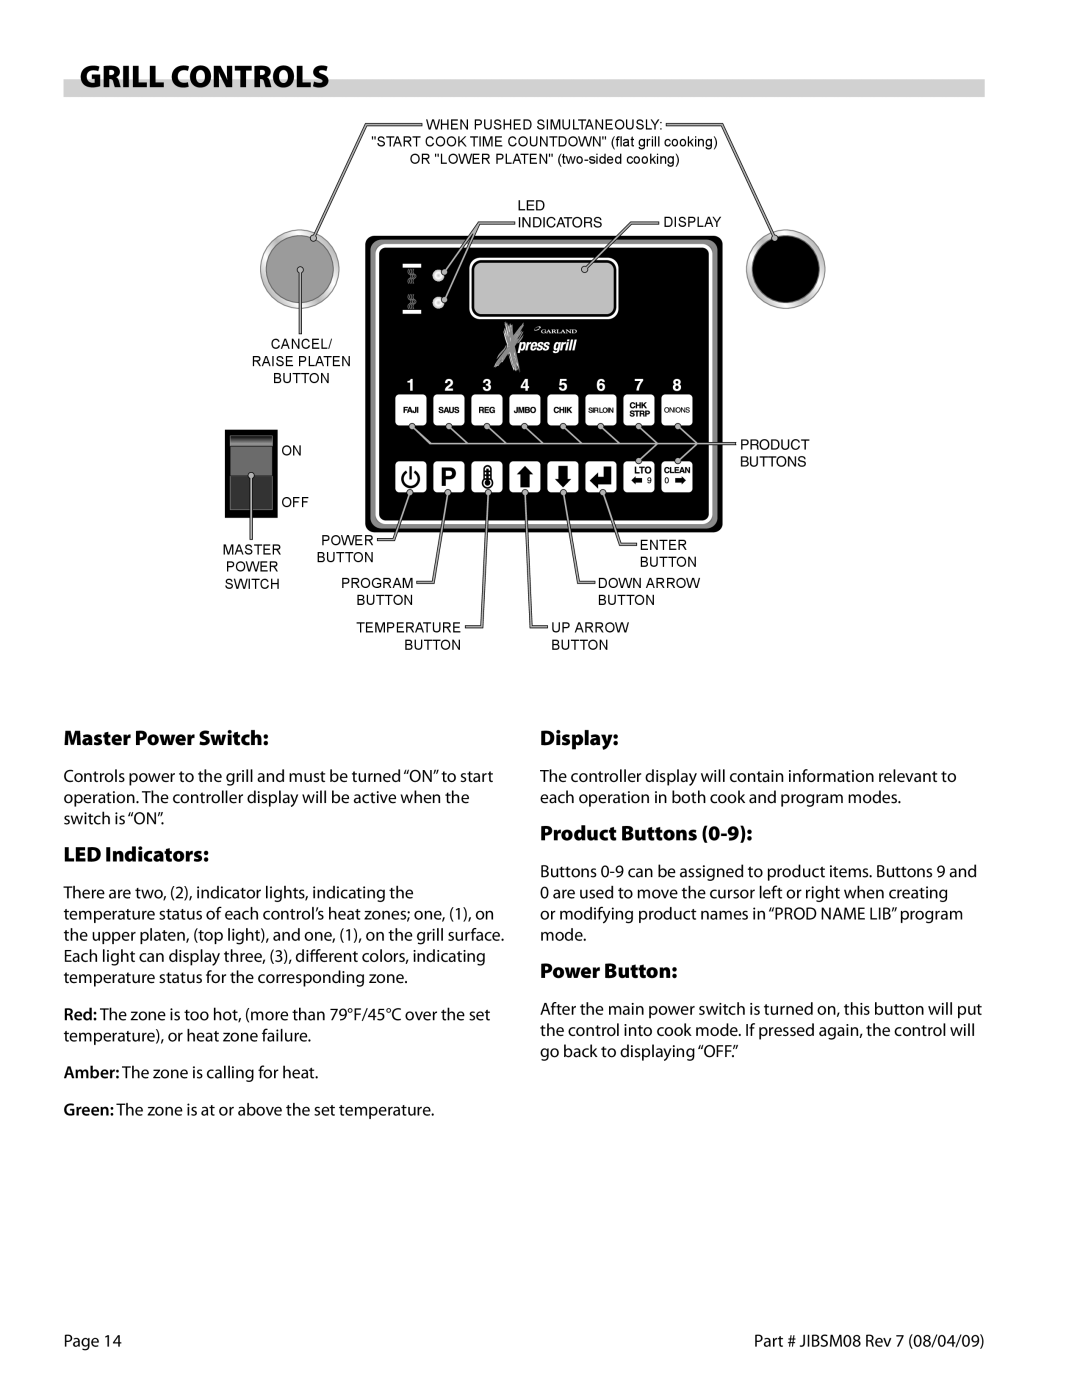
GRILL CONTROLS
WHEN PUSHED SIMULTANEOUSLY:
"START COOK TIME COUNTDOWN" (flat grill cooking)
OR "LOWER PLATEN"
LED
INDICATORS DISPLAY
CANCEL/
RAISE PLATEN
BUTTON
ON |
|
| |
OFF |
|
| |
MASTER | POWER | ENTER | |
BUTTON | |||
BUTTON | |||
POWER | |||
| |||
SWITCH | PROGRAM | DOWN ARROW | |
| BUTTON | BUTTON | |
| TEMPERATURE | UP ARROW | |
| BUTTON | BUTTON |
PRODUCT BUTTONS
Master Power Switch:
Controls power to the grill and must be turned “ON” to start operation. The controller display will be active when the switch is “ON”.
LED Indicators:
There are two, (2), indicator lights, indicating the temperature status of each control’s heat zones; one, (1), on the upper platen, (top light), and one, (1), on the grill surface. Each light can display three, (3), different colors, indicating temperature status for the corresponding zone.
Red: The zone is too hot, (more than 79°F/45°C over the set temperature), or heat zone failure.
Amber: The zone is calling for heat.
Green: The zone is at or above the set temperature.
Display:
The controller display will contain information relevant to each operation in both cook and program modes.
Product Buttons (0-9):
Buttons
Power Button:
After the main power switch is turned on, this button will put the control into cook mode. If pressed again, the control will go back to displaying “OFF.”
Page 14 | Part # JIBSM08 Rev 7 (08/04/09) |