WARNING! Risk of Fire! Maintain specified air space clearances to combustibles.
Failure to comply with these instructions may cause a fire or cause the appliance to overheat.
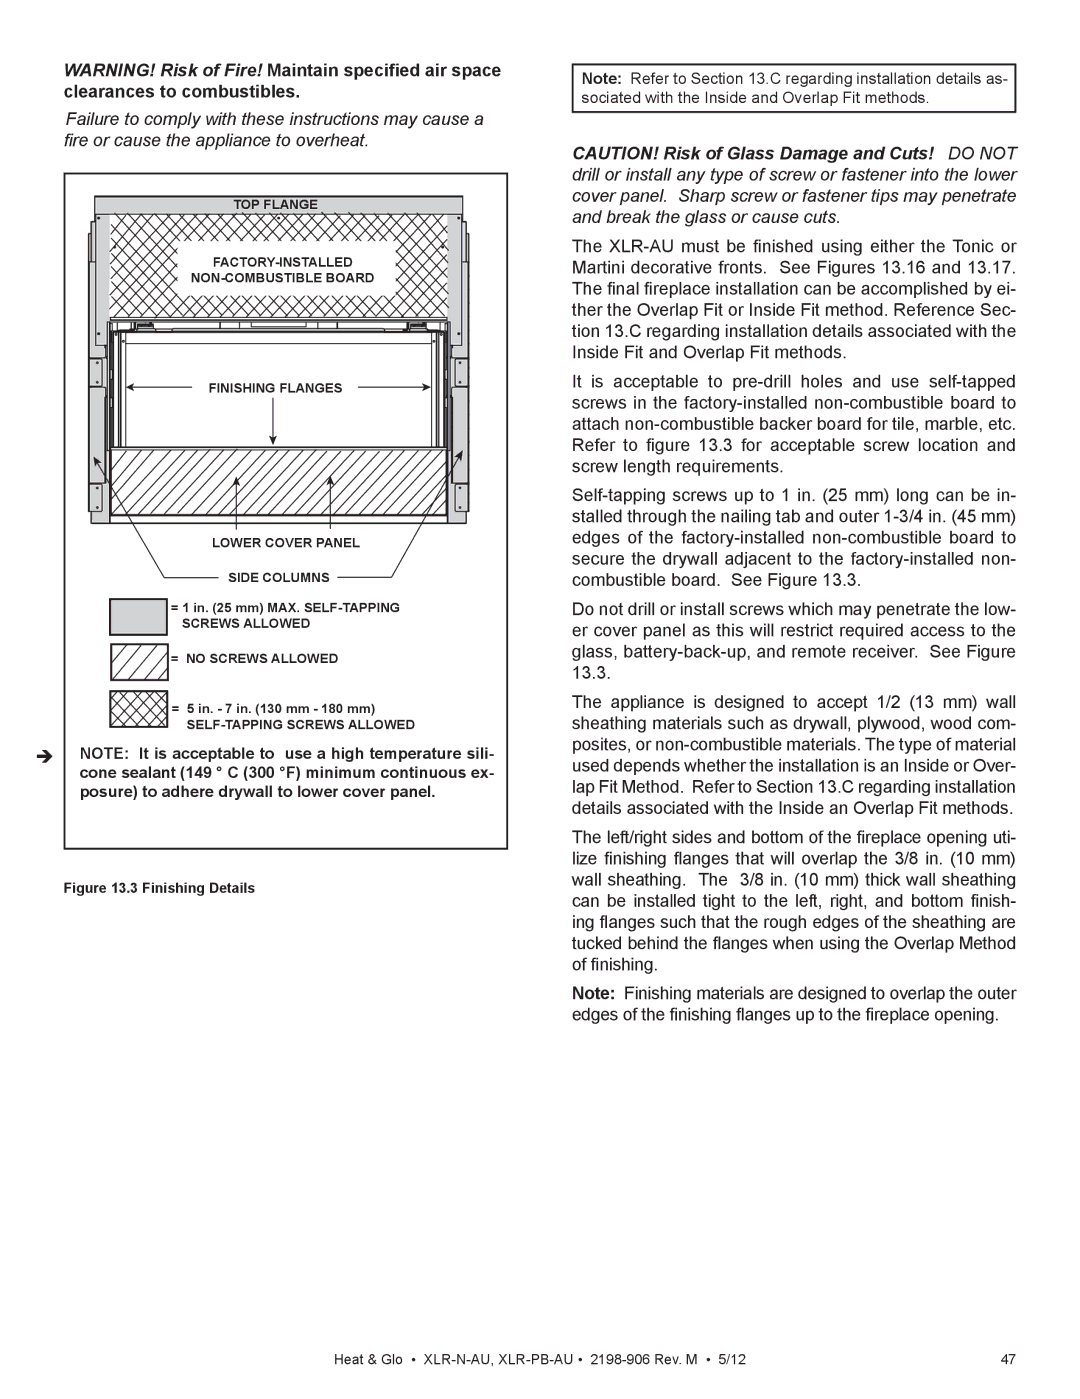
TOP FLANGE |
FINISHING FLANGES |
LOWER COVER PANEL
SIDE COLUMNS
=1 in. (25 mm) MAX.
![]()
![]()
![]() = NO SCREWS ALLOWED
= NO SCREWS ALLOWED
= 5 in. - 7 in. (130 mm - 180 mm) |
NOTE: It is acceptable to use a high temperature sili- cone sealant (149 ° C (300 °F) minimum continuous ex- posure) to adhere drywall to lower cover panel.
Figure 13.3 Finishing Details
Note: Refer to Section 13.C regarding installation details as- sociated with the Inside and Overlap Fit methods.
CAUTION! Risk of Glass Damage and Cuts! DO NOT drill or install any type of screw or fastener into the lower cover panel. Sharp screw or fastener tips may penetrate and break the glass or cause cuts.
The
It is acceptable to
Do not drill or install screws which may penetrate the low- er cover panel as this will restrict required access to the glass,
The appliance is designed to accept 1/2 (13 mm) wall sheathing materials such as drywall, plywood, wood com- posites, or
The left/right sides and bottom of the fireplace opening uti- lize finishing flanges that will overlap the 3/8 in. (10 mm) wall sheathing. The 3/8 in. (10 mm) thick wall sheathing can be installed tight to the left, right, and bottom finish- ing flanges such that the rough edges of the sheathing are tucked behind the flanges when using the Overlap Method of finishing.
Note: Finishing materials are designed to overlap the outer edges of the finishing flanges up to the fireplace opening.
Heat & Glo • | 47 |