Honeywell
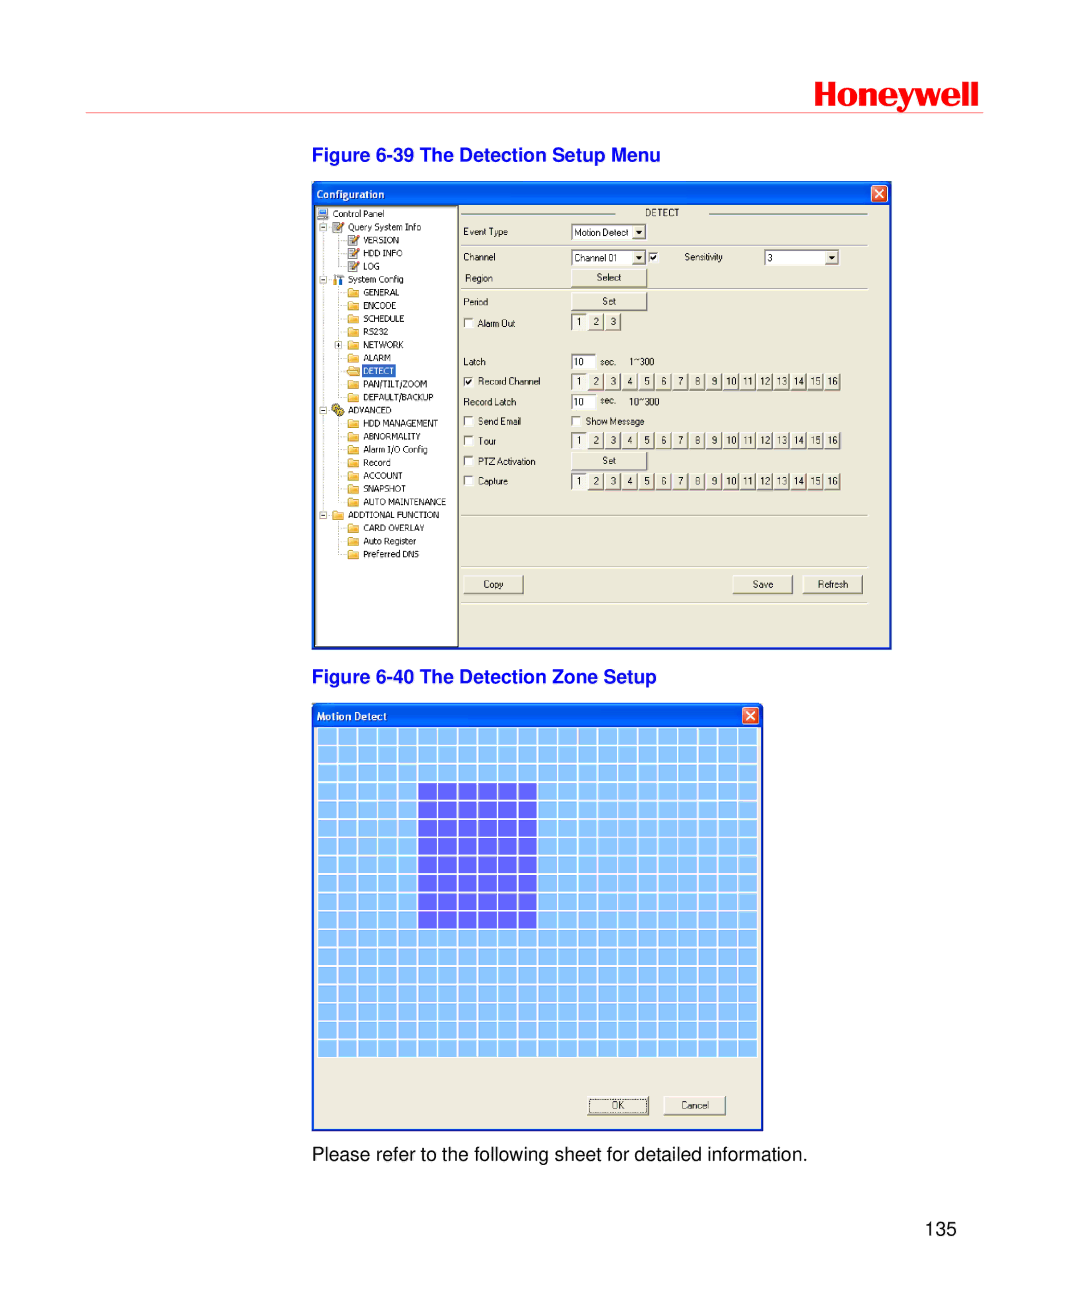
Figure 6-39 The Detection Setup Menu
Figure 6-40 The Detection Zone Setup
Please refer to the following sheet for detailed information.
135
Please refer to the following sheet for detailed information.
135