STEP 1: SIM INSERTION
1. | Unpack the modem and |
|
| accessories. Your service provider |
|
| will have provided you with a SIM |
|
| card. |
|
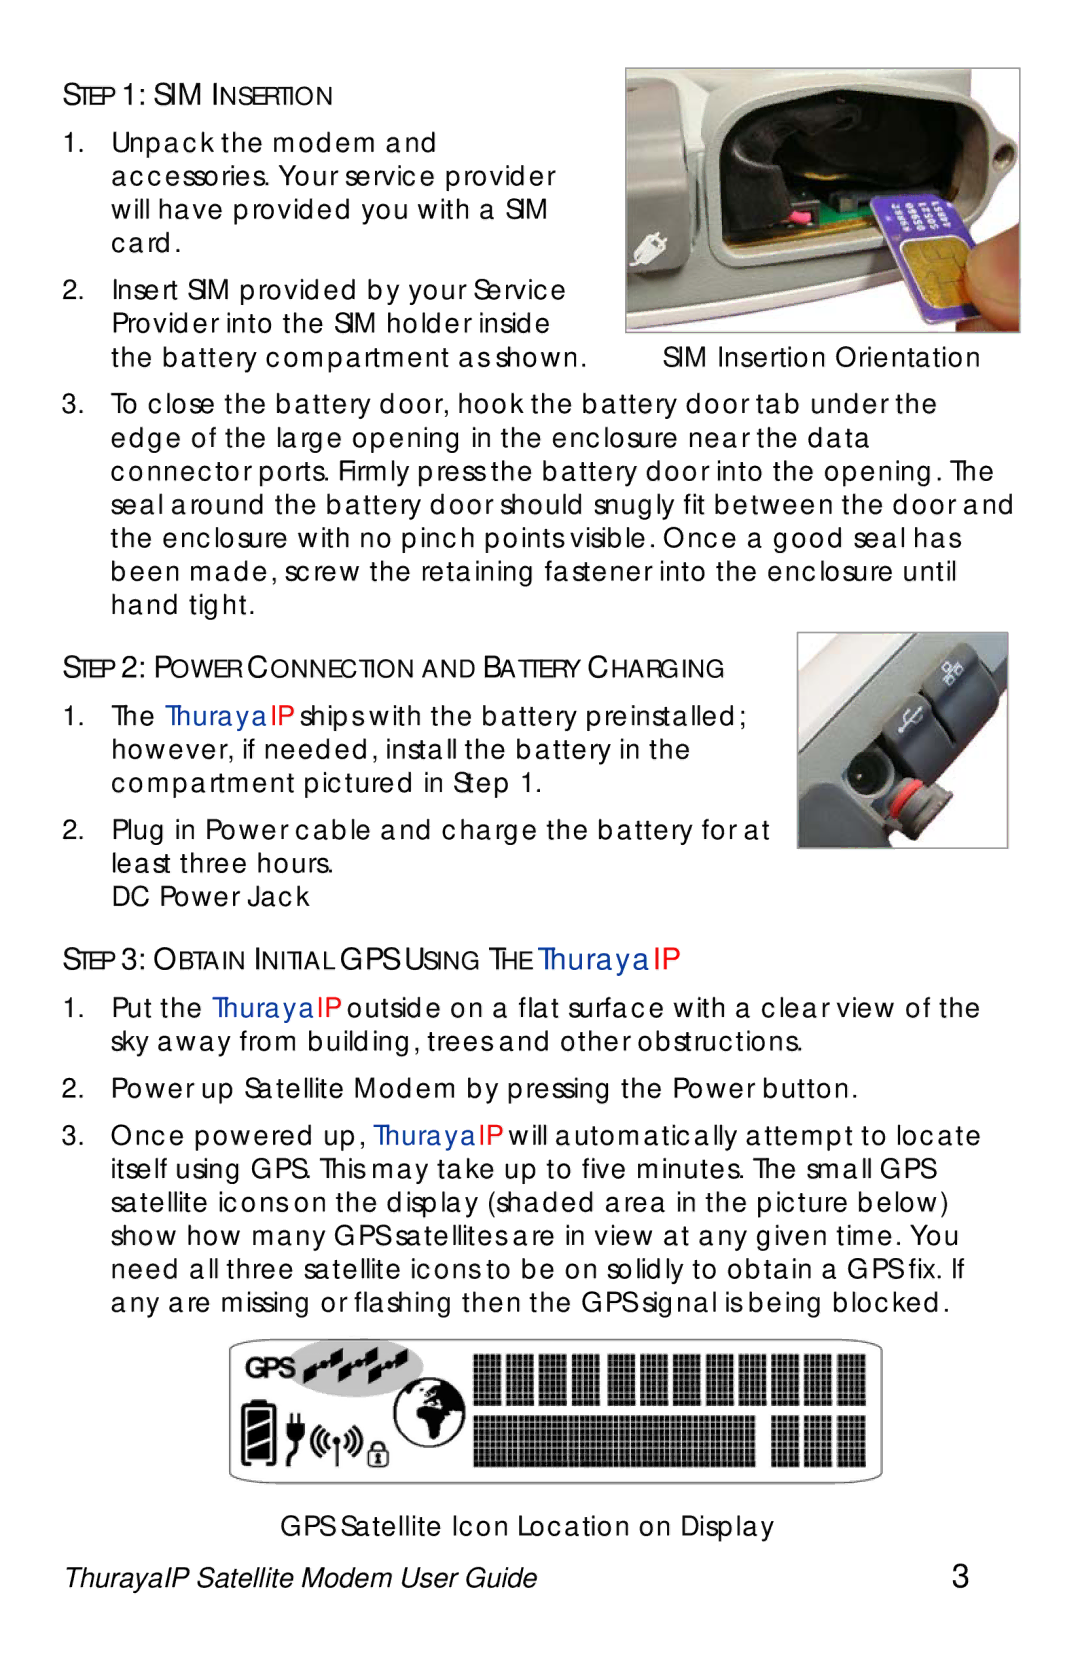
2. | Insert SIM provided by your Service |
|
| Provider into the SIM holder inside |
|
| the battery compartment as shown. | SIM Insertion Orientation |
3.To close the battery door, hook the battery door tab under the edge of the large opening in the enclosure near the data connector ports. Firmly press the battery door into the opening. The seal around the battery door should snugly fit between the door and the enclosure with no pinch points visible. Once a good seal has been made, screw the retaining fastener into the enclosure until hand tight.
STEP 2: POWER CONNECTION AND BATTERY CHARGING
1.The ThurayaIP ships with the battery preinstalled; however, if needed, install the battery in the compartment pictured in Step 1.
2.Plug in Power cable and charge the battery for at least three hours.
DC Power Jack
STEP 3: OBTAIN INITIAL GPS USING THE ThurayaIP
1.Put the ThurayaIP outside on a flat surface with a clear view of the sky away from building, trees and other obstructions.
2.Power up Satellite Modem by pressing the Power button.
3.Once powered up, ThurayaIP will automatically attempt to locate itself using GPS. This may take up to five minutes. The small GPS satellite icons on the display (shaded area in the picture below) show how many GPS satellites are in view at any given time. You need all three satellite icons to be on solidly to obtain a GPS fix. If any are missing or flashing then the GPS signal is being blocked.
GPS Satellite Icon Location on Display |
|
ThurayaIP Satellite Modem User Guide | 3 |