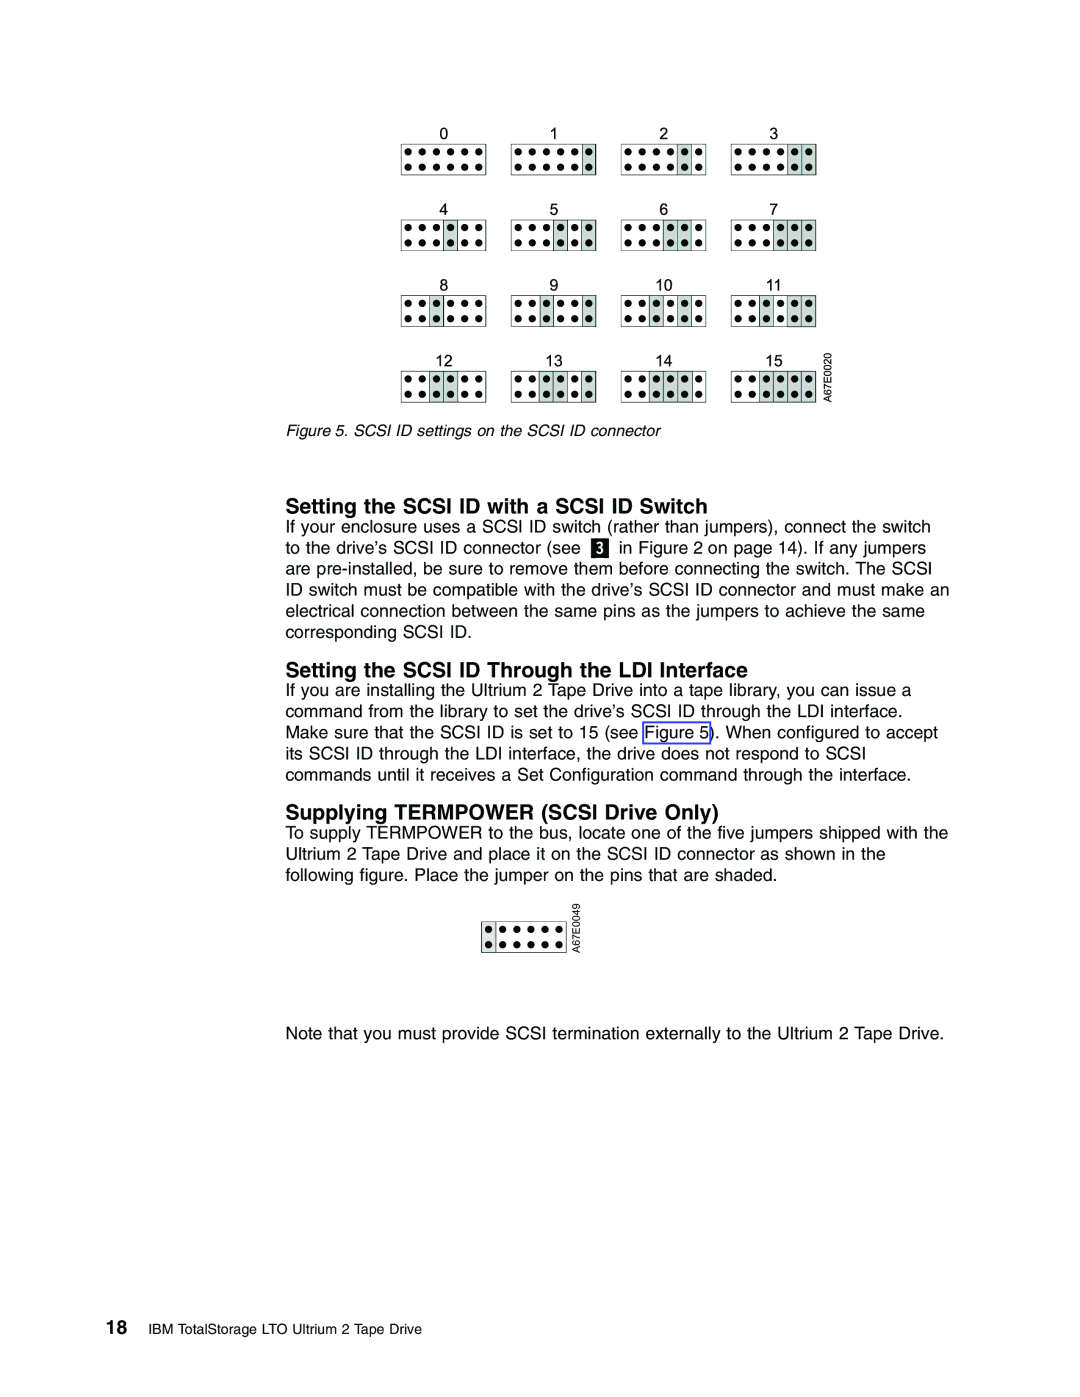
Figure 5. SCSI ID settings on the SCSI ID connector
Setting the SCSI ID with a SCSI ID Switch
If your enclosure uses a SCSI ID switch (rather than jumpers), connect the switch
to the drive’s SCSI ID connector (see in Figure 2 on page 14). If any jumpers are
Setting the SCSI ID Through the LDI Interface
If you are installing the Ultrium 2 Tape Drive into a tape library, you can issue a command from the library to set the drive’s SCSI ID through the LDI interface. Make sure that the SCSI ID is set to 15 (see Figure 5). When configured to accept its SCSI ID through the LDI interface, the drive does not respond to SCSI commands until it receives a Set Configuration command through the interface.
Supplying TERMPOWER (SCSI Drive Only)
To supply TERMPOWER to the bus, locate one of the five jumpers shipped with the Ultrium 2 Tape Drive and place it on the SCSI ID connector as shown in the following figure. Place the jumper on the pins that are shaded.
A67E0049
Note that you must provide SCSI termination externally to the Ultrium 2 Tape Drive.
