C H A P T E R 4 Using the Web Device Manager
NOTE
If you change the flow control or IP settings, you must reboot the switch before the new settings can take effect.
Configuring the Switch’s IP Settings
Note: You must select Manual in the IP Assignment Method box before you can change the IP settings.
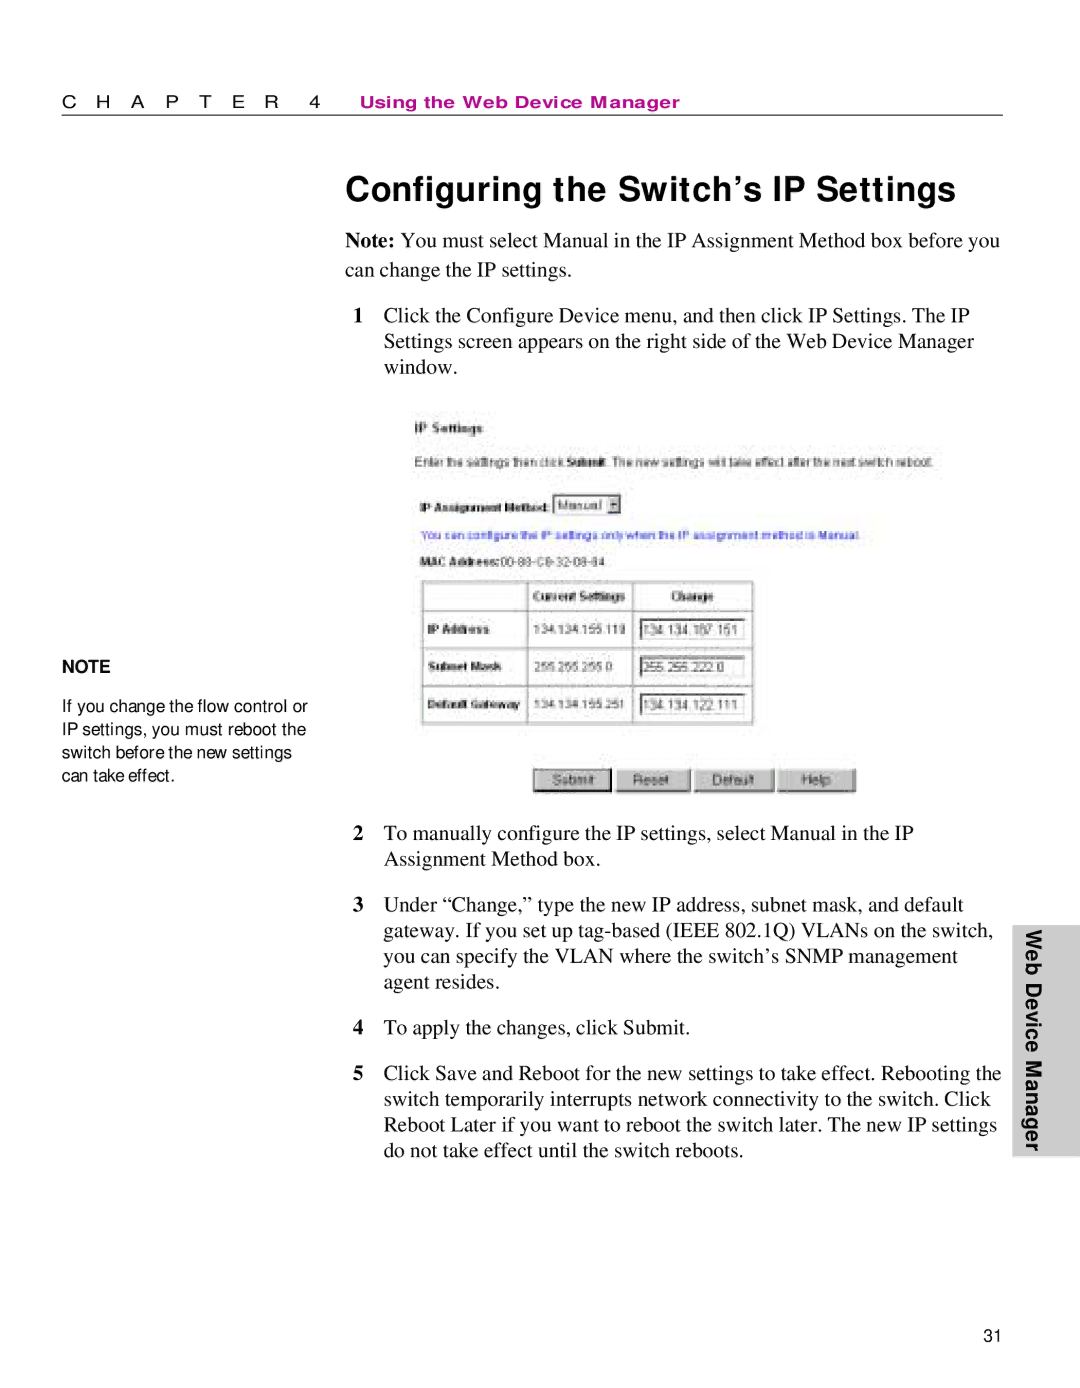
1Click the Configure Device menu, and then click IP Settings. The IP Settings screen appears on the right side of the Web Device Manager window.
2To manually configure the IP settings, select Manual in the IP Assignment Method box.
3Under “Change,” type the new IP address, subnet mask, and default gateway. If you set up
4To apply the changes, click Submit.
5Click Save and Reboot for the new settings to take effect. Rebooting the switch temporarily interrupts network connectivity to the switch. Click Reboot Later if you want to reboot the switch later. The new IP settings do not take effect until the switch reboots.
Web Device Manager
31