|
|
|
|
|
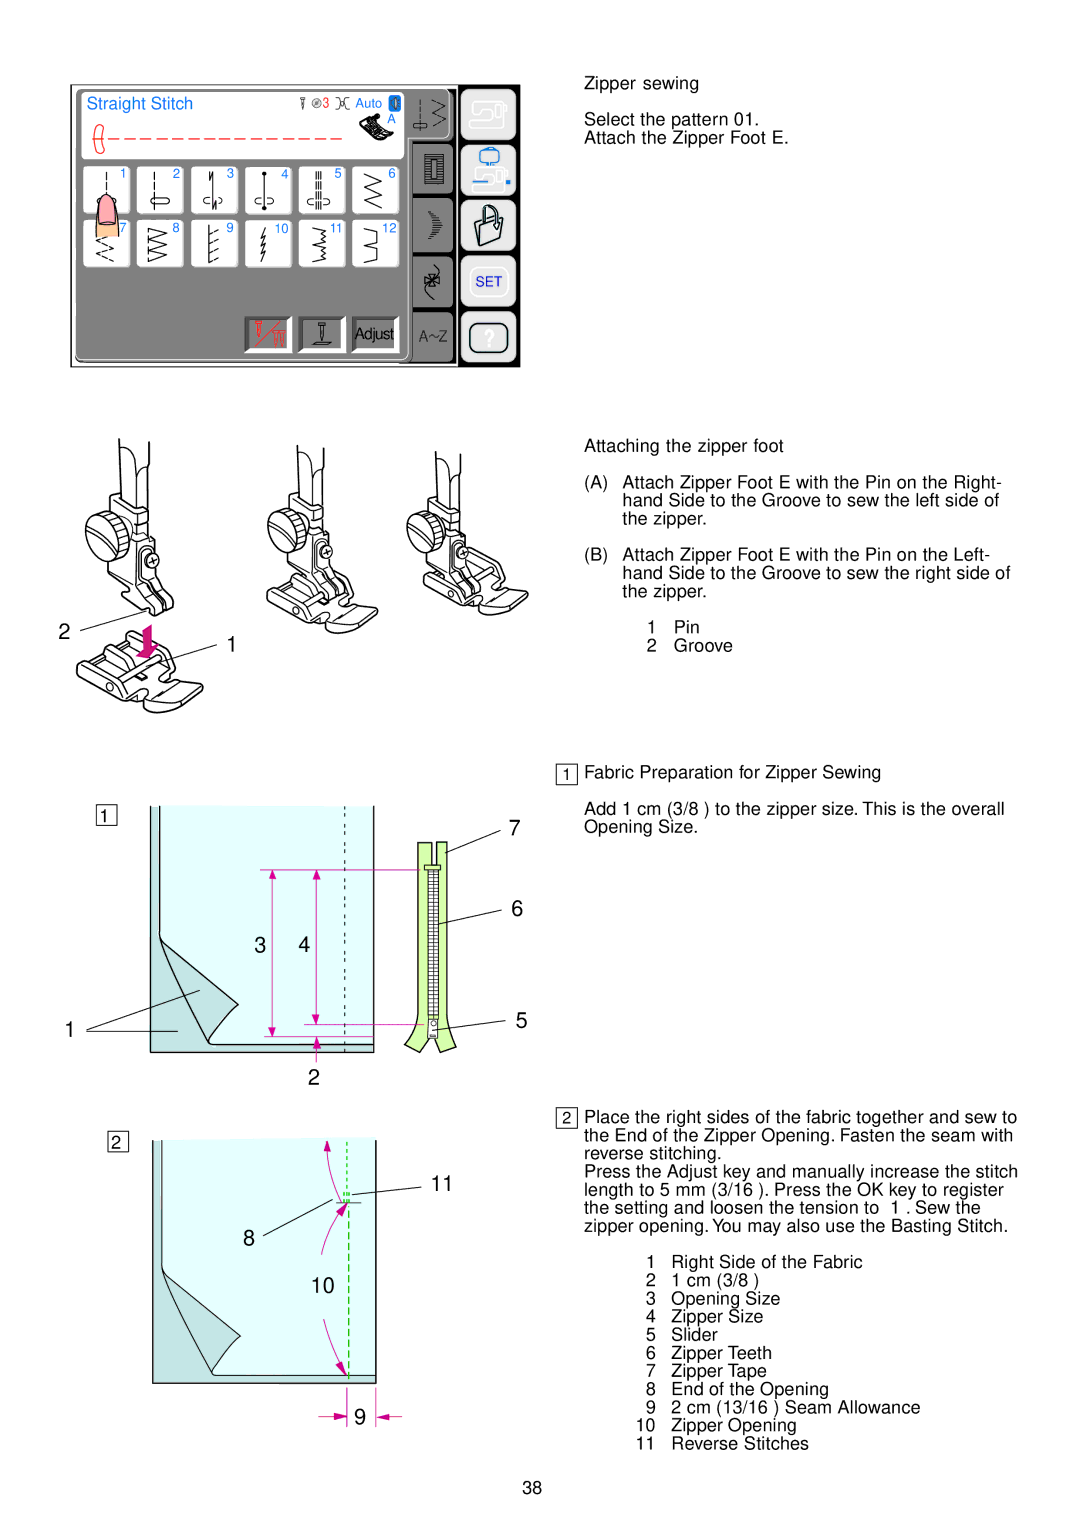
| Zipper sewing |
Straight Stitch |
|
| 3 | Auto | Select the pattern 01. | |
|
|
|
|
| A | |
|
|
|
|
|
| Attach the Zipper Foot E. |
1 | 2 | 3 | 4 | 5 | 6 |
|
7 | 8 | 9 | 10 | 11 | 12 |
|
|
|
|
|
|
| SET |
|
|
|
|
| Adjust | A Z |
2
1
1
1
7
Attaching the zipper foot
(A)Attach Zipper Foot E with the Pin on the Right- hand Side to the Groove to sew the left side of the zipper.
(B)Attach Zipper Foot E with the Pin on the Left- hand Side to the Groove to sew the right side of the zipper.
1Pin
2Groove
Fabric Preparation for Zipper Sewing
Add 1 cm (3/8”) to the zipper size. This is the overall Opening Size.
1
2
| 6 |
3 | 4 |
| 5 |
| 2 |
| 2 |
| 11 |
8 |
|
| 10 |
| 9 |
Place the right sides of the fabric together and sew to the End of the Zipper Opening. Fasten the seam with reverse stitching.
Press the Adjust key and manually increase the stitch length to 5 mm (3/16”). Press the OK key to register the setting and loosen the tension to “1”. Sew the zipper opening. You may also use the Basting Stitch.
1Right Side of the Fabric
21 cm (3/8”)
3Opening Size
4Zipper Size
5Slider
6Zipper Teeth
7Zipper Tape
8End of the Opening
92 cm (13/16”) Seam Allowance
10Zipper Opening
11Reverse Stitches
38
