Auto BH |
|
| 3 | Auto |
| |
Pull Button Holder firmly. |
| R |
| |||
|
|
| ||||
13 | 14 | 15 | 16 | 17 | 18 |
|
Sensor | Auto |
|
|
|
|
|
19 | 20 | 21 | 22 | 23 | 24 |
|
|
|
|
|
|
| SET |
|
|
|
|
| Adjust | A Z |
Automatic buttonhole
Select the pattern 14.
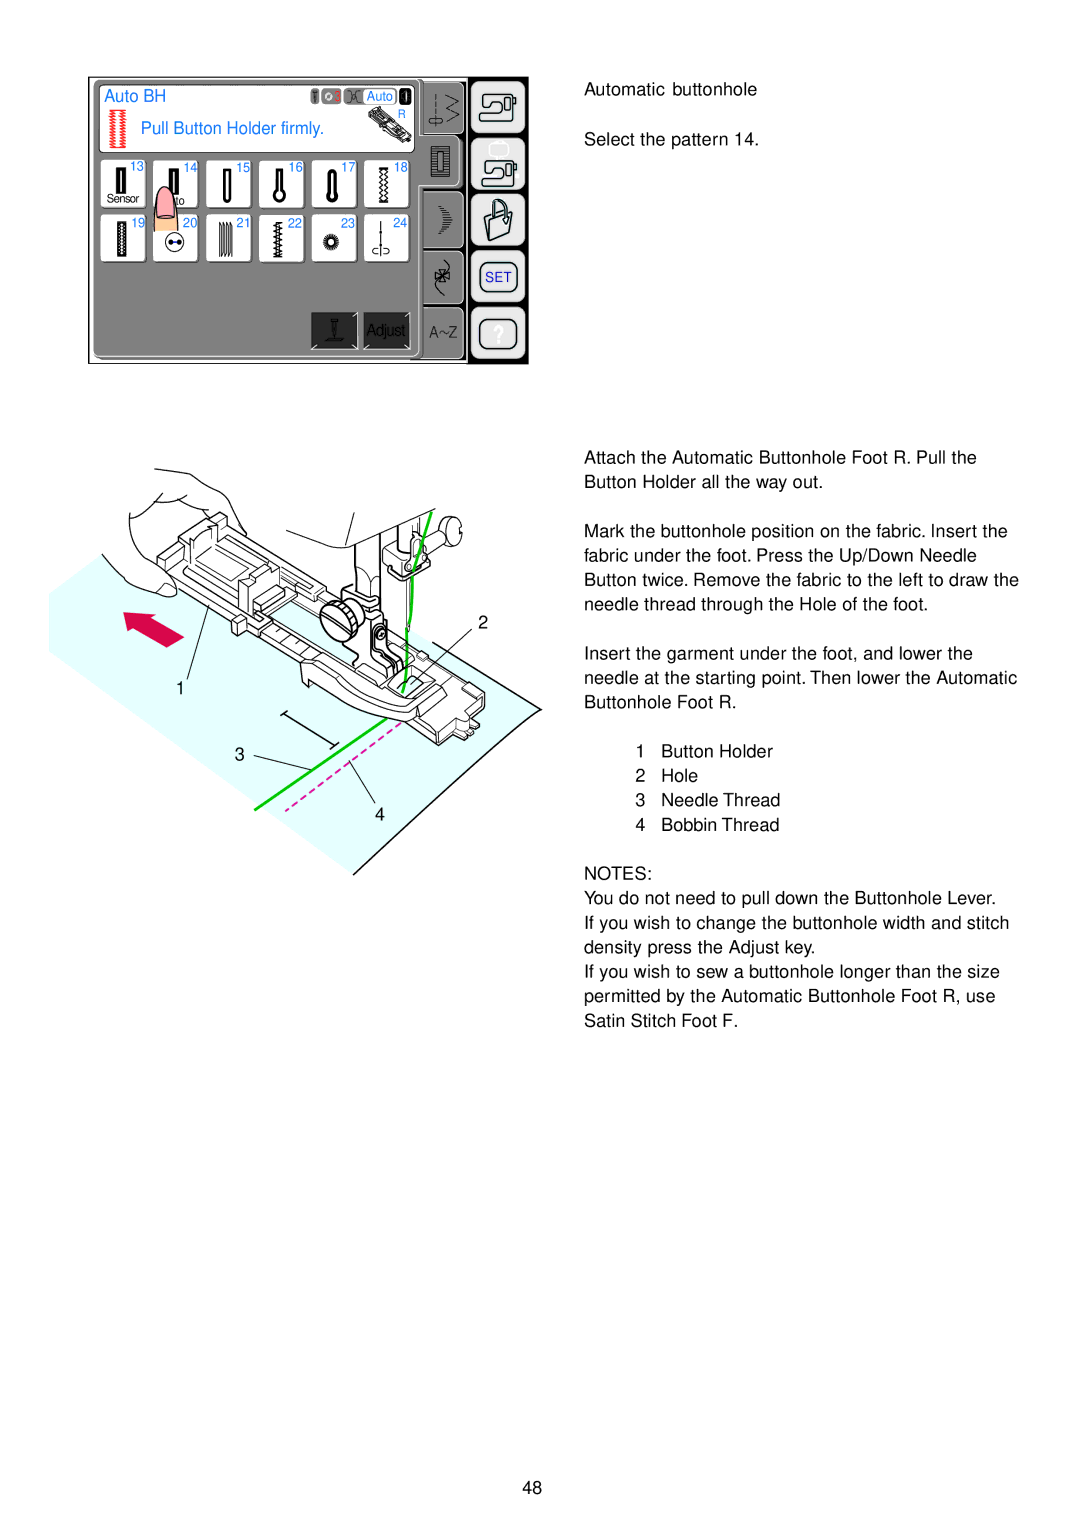
Attach the Automatic Buttonhole Foot R. Pull the Button Holder all the way out.
Mark the buttonhole position on the fabric. Insert the fabric under the foot. Press the Up/Down Needle Button twice. Remove the fabric to the left to draw the needle thread through the Hole of the foot.
2
1
3
4
Insert the garment under the foot, and lower the needle at the starting point. Then lower the Automatic Buttonhole Foot R.
1Button Holder
2Hole
3Needle Thread
4Bobbin Thread
NOTES:
You do not need to pull down the Buttonhole Lever. If you wish to change the buttonhole width and stitch density press the Adjust key.
If you wish to sew a buttonhole longer than the size permitted by the Automatic Buttonhole Foot R, use Satin Stitch Foot F.
48