Edit |
|
|
Size |
|
|
|
| A Z |
|
| SET |
OK | Cancel | Edit |
B: 140x200mm |
|
|
1 |
|
|
2 |
|
|
Edit |
|
|
Size |
|
|
|
| A Z |
|
| SET |
OK | Cancel | Edit |
B: 140x200mm |
|
|
B: 140x200mm
A(F) | B | C |
|
|
| OK | Cancel |
| 4 |
| 3 |
|
|
|
5 |
|
|
|
|
Edit |
|
|
|
|
| Size |
|
| A Z |
|
|
|
| |
|
|
|
| SET |
A(F): 126x110mm |
| OK | Cancel | Edit |
|
|
|
| |
|
|
|
| 93 |
Moving a pattern
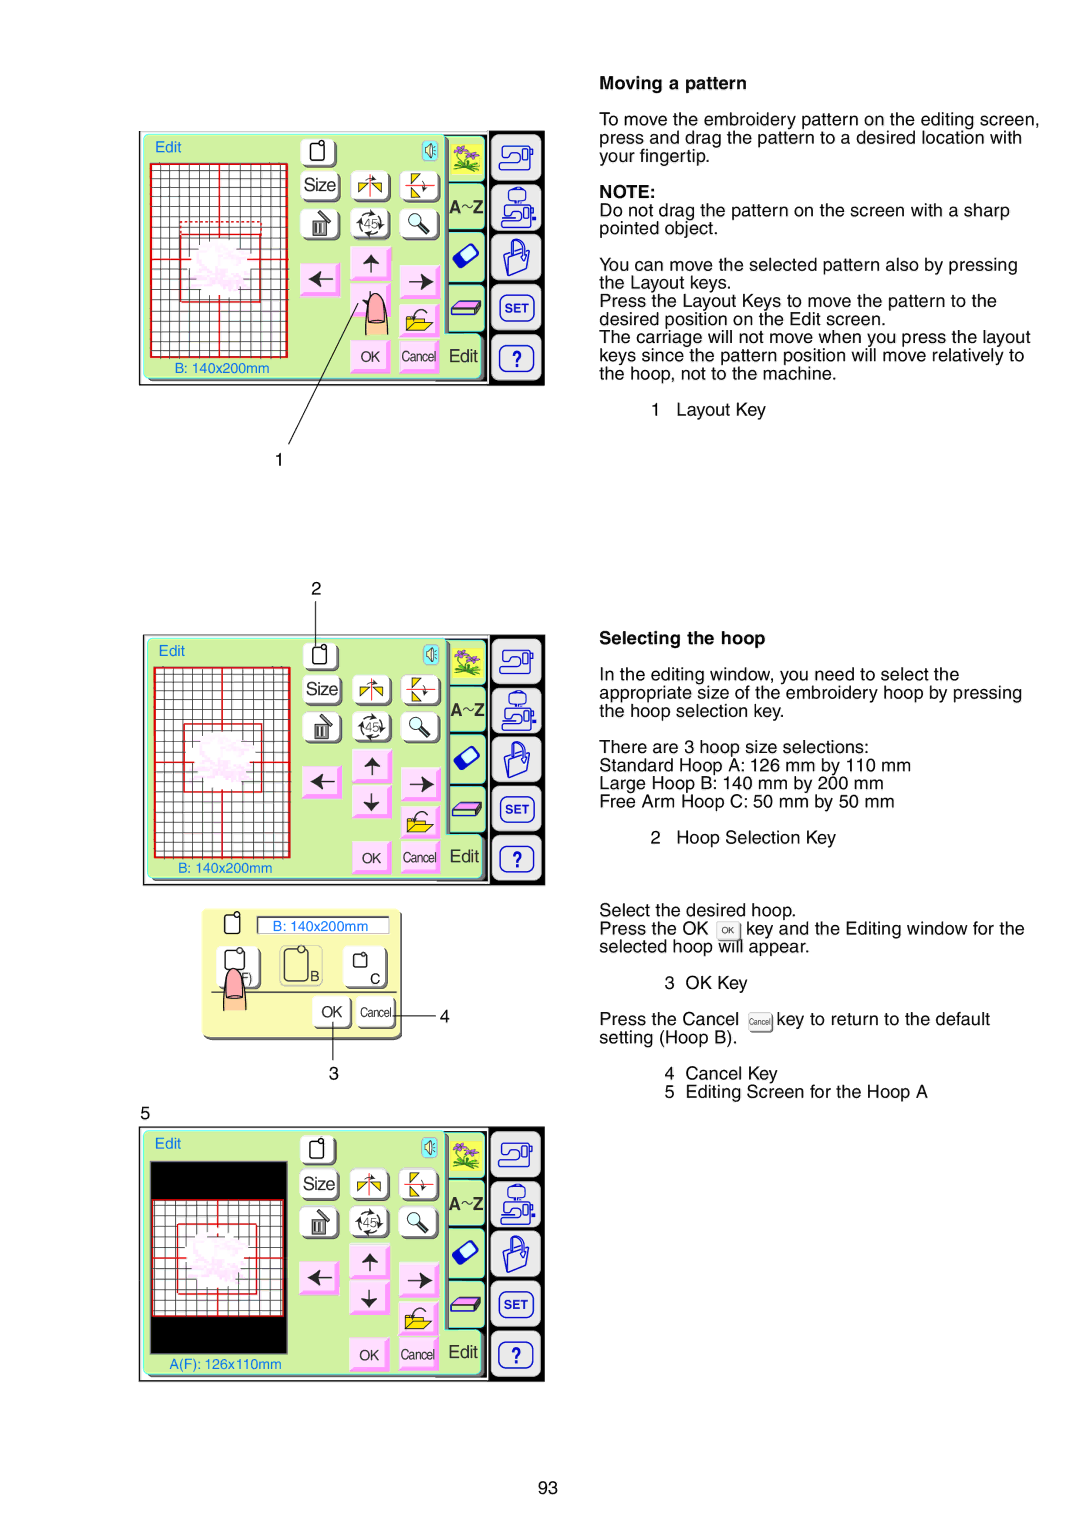
To move the embroidery pattern on the editing screen, press and drag the pattern to a desired location with your fingertip.
NOTE:
Do not drag the pattern on the screen with a sharp pointed object.
You can move the selected pattern also by pressing the Layout keys.
Press the Layout Keys to move the pattern to the desired position on the Edit screen.
The carriage will not move when you press the layout keys since the pattern position will move relatively to the hoop, not to the machine.
1 Layout Key
Selecting the hoop
In the editing window, you need to select the appropriate size of the embroidery hoop by pressing the hoop selection key.
There are 3 hoop size selections:
Standard Hoop A: 126 mm by 110 mm
Large Hoop B: 140 mm by 200 mm
Free Arm Hoop C: 50 mm by 50 mm
2 Hoop Selection Key
Select the desired hoop.
Press the OK OK key and the Editing window for the selected hoop will appear.
3 OK Key
Press the Cancel Cancel key to return to the default setting (Hoop B).
4Cancel Key
5Editing Screen for the Hoop A
