EN5
EN5
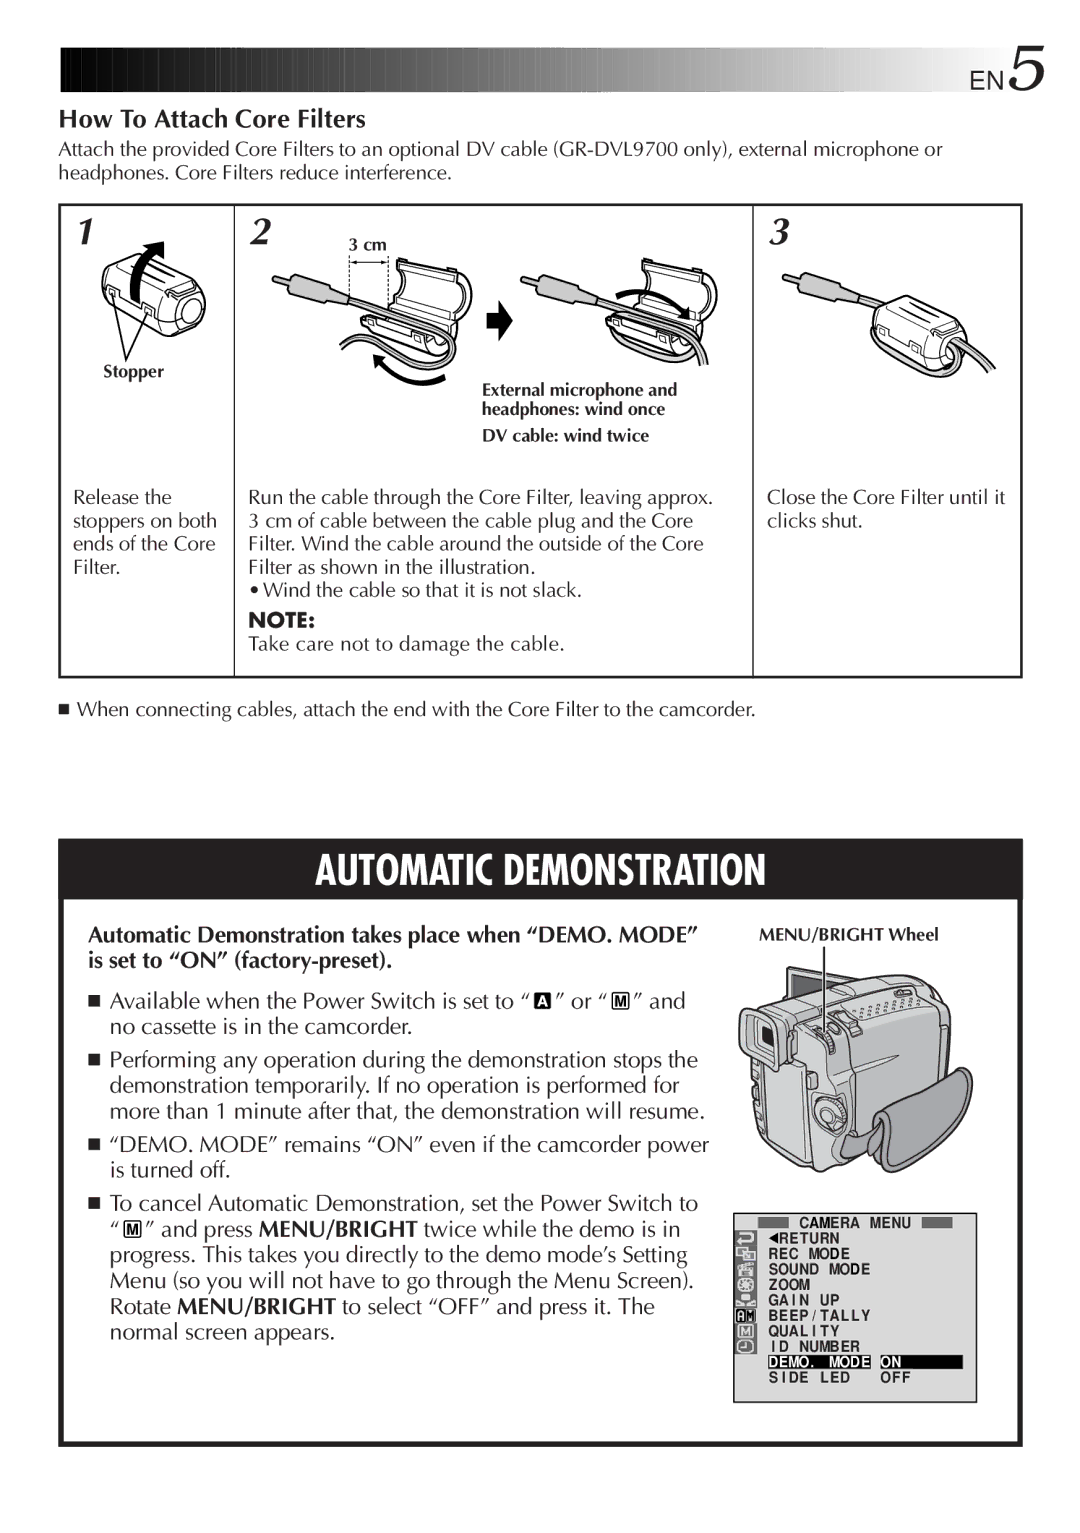
How To Attach Core Filters
Attach the provided Core Filters to an optional DV cable
1
Stopper
Release the stoppers on both ends of the Core Filter.
2 | 3 cm | ||
|
|
|
|
External microphone and headphones: wind once
DV cable: wind twice
Run the cable through the Core Filter, leaving approx. 3 cm of cable between the cable plug and the Core Filter. Wind the cable around the outside of the Core Filter as shown in the illustration.
•Wind the cable so that it is not slack.
NOTE:
Take care not to damage the cable.
3
Close the Core Filter until it clicks shut.
■When connecting cables, attach the end with the Core Filter to the camcorder.
AUTOMATIC DEMONSTRATION
Automatic Demonstration takes place when “DEMO. MODE” is set to “ON”
■ Available when the Power Switch is set to “ ” or “ ![]() ” and no cassette is in the camcorder.
” and no cassette is in the camcorder.
■Performing any operation during the demonstration stops the demonstration temporarily. If no operation is performed for more than 1 minute after that, the demonstration will resume.
■“DEMO. MODE” remains “ON” even if the camcorder power is turned off.
■To cancel Automatic Demonstration, set the Power Switch to “ ![]() ” and press MENU/BRIGHT twice while the demo is in progress. This takes you directly to the demo mode’s Setting Menu (so you will not have to go through the Menu Screen). Rotate MENU/BRIGHT to select “OFF” and press it. The normal screen appears.
” and press MENU/BRIGHT twice while the demo is in progress. This takes you directly to the demo mode’s Setting Menu (so you will not have to go through the Menu Screen). Rotate MENU/BRIGHT to select “OFF” and press it. The normal screen appears.
MENU/BRIGHT Wheel
CAMERA MENU
1RE TURN |
|
REC MODE |
|
SOUND MODE |
|
ZOOM |
|
GA I N UP |
|
BEEP / TAL L Y |
|
QUAL I T Y |
|
I D NUMBER |
|
DEMO. MODE | ON |
S I DE LED | OF F |