34
 EN
EN


 RECORDING

Advanced
 Features
 For
For
 Video
Video
 And
And
 D.S.C.
 (cont.)

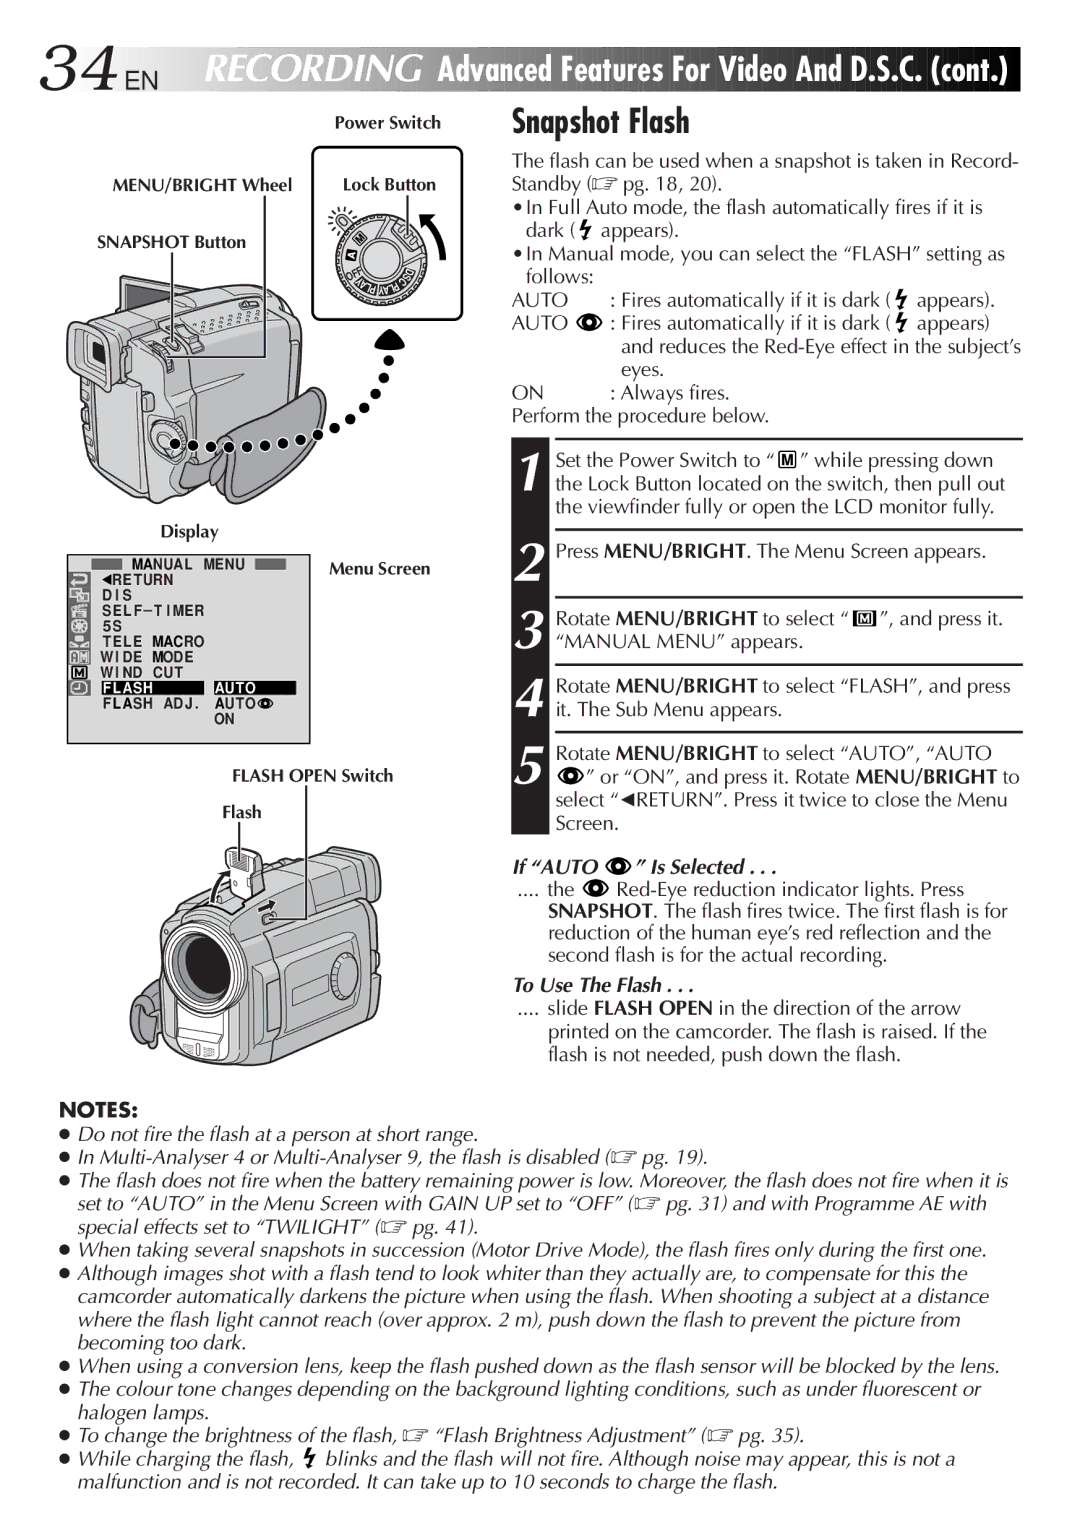
Power Switch | Snapshot Flash |
MENU/BRIGHT Wheel | Lock Button |
SNAPSHOT Button
OFF |
|
| C | S | D |
Y |
|
|
|
| |
A |
| P |
|
| |
|
| L |
|
| |
| LP YA |
|
|
| |
Display
MANUAL MENU | Menu Screen | |
1RE TURN |
|
|
D I S |
|
|
SEL F – T I MER |
|
|
5S |
|
|
T EL E MACRO |
|
|
W I DE MODE |
|
|
W I ND CUT |
|
|
F LASH | AUTO |
|
F LASH AD J . AUTO![]()
ON
FLASH OPEN Switch |
Flash |
The flash can be used when a snapshot is taken in Record- Standby (☞ pg. 18, 20).
•In Full Auto mode, the flash automatically fires if it is dark ( ![]() appears).
appears).
•In Manual mode, you can select the “FLASH” setting as
follows: |
|
|
AUTO | : Fires automatically if it is dark ( | appears). |
AUTO | : Fires automatically if it is dark ( | appears) |
| and reduces the | |
| eyes. |
|
ON | : Always fires. |
|
Perform the procedure below.
1 Set the Power Switch to “ ![]() ” while pressing down the Lock Button located on the switch, then pull out the viewfinder fully or open the LCD monitor fully.
” while pressing down the Lock Button located on the switch, then pull out the viewfinder fully or open the LCD monitor fully.
2
3 Rotate MENU/BRIGHT to select “ ![]() ”, and press it. “MANUAL MENU” appears.
”, and press it. “MANUAL MENU” appears.
4
5 Rotate MENU/BRIGHT to select “AUTO”, “AUTO
” or “ON”, and press it. Rotate MENU/BRIGHT to select “1RETURN”. Press it twice to close the Menu Screen.
If “AUTO | ” Is Selected . . . |
.... the |
SNAPSHOT. The flash fires twice. The first flash is for reduction of the human eye’s red reflection and the second flash is for the actual recording.
To Use The Flash . . .
.... slide FLASH OPEN in the direction of the arrow
printed on the camcorder. The flash is raised. If the flash is not needed, push down the flash.
NOTES:
●Do not fire the flash at a person at short range.
●In
●The flash does not fire when the battery remaining power is low. Moreover, the flash does not fire when it is set to “AUTO” in the Menu Screen with GAIN UP set to “OFF” (☞ pg. 31) and with Programme AE with special effects set to “TWILIGHT” (☞ pg. 41).
●When taking several snapshots in succession (Motor Drive Mode), the flash fires only during the first one.
●Although images shot with a flash tend to look whiter than they actually are, to compensate for this the camcorder automatically darkens the picture when using the flash. When shooting a subject at a distance where the flash light cannot reach (over approx. 2 m), push down the flash to prevent the picture from becoming too dark.
●When using a conversion lens, keep the flash pushed down as the flash sensor will be blocked by the lens.
●The colour tone changes depending on the background lighting conditions, such as under fluorescent or halogen lamps.
●To change the brightness of the flash, ☞ “Flash Brightness Adjustment” (☞ pg. 35).
●While charging the flash, ![]() blinks and the flash will not fire. Although noise may appear, this is not a malfunction and is not recorded. It can take up to 10 seconds to charge the flash.
blinks and the flash will not fire. Although noise may appear, this is not a malfunction and is not recorded. It can take up to 10 seconds to charge the flash.