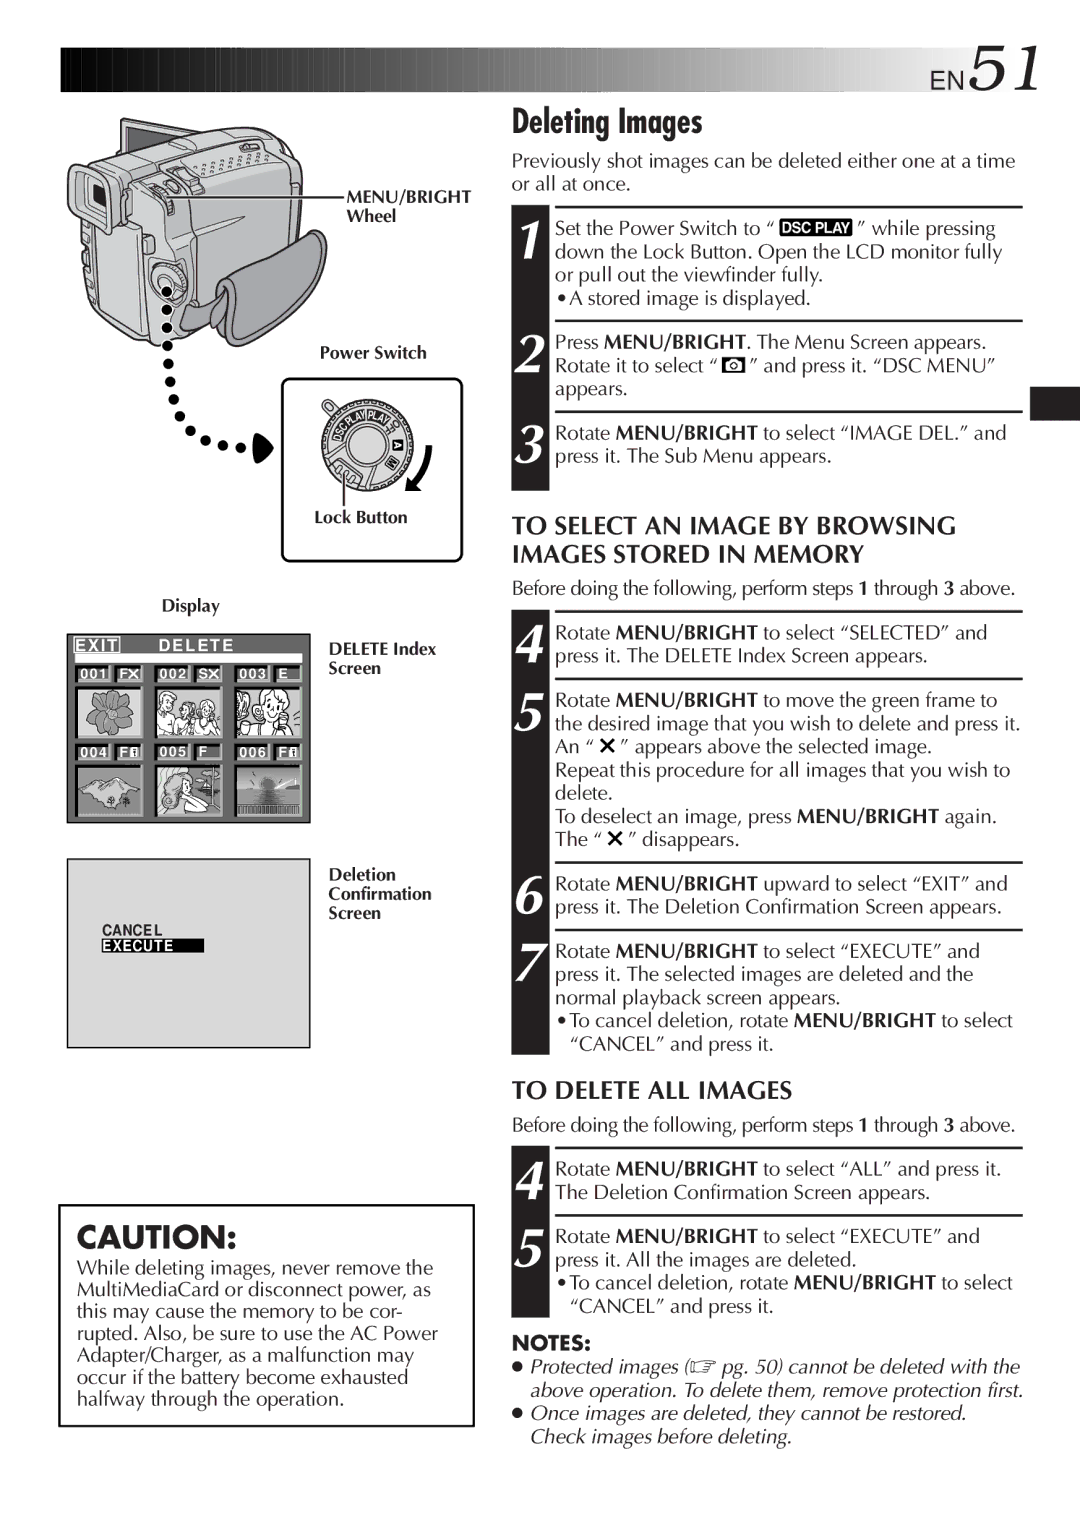
MENU/BRIGHT Wheel
Power Switch
|
|
| AY PL | A |
|
|
| L |
| ||
|
| P |
| Y | |
S | C |
|
|
| OFF |
|
|
|
|
| |
D |
|
|
|
|
|


 EN51
EN51
Deleting Images
Previously shot images can be deleted either one at a time or all at once.
1 Set the Power Switch to “ ![]() ” while pressing down the Lock Button. Open the LCD monitor fully or pull out the viewfinder fully.
” while pressing down the Lock Button. Open the LCD monitor fully or pull out the viewfinder fully.
•A stored image is displayed.
2 Press MENU/BRIGHT. The Menu Screen appears. Rotate it to select “ ![]() ” and press it. “DSC MENU” appears.
” and press it. “DSC MENU” appears.
3 Rotate MENU/BRIGHT to select “IMAGE DEL.” and press it. The Sub Menu appears.
|
|
| Lock Button |
| Display |
|
|
EXIT | D E L E T E |
| DELETE Index |
0 0 1 F | 0 0 2 S | 0 0 3 E | Screen |
0 0 4 F | 0 0 5 F | 0 0 6 F |
|
|
|
| Deletion |
|
|
| Confirmation |
CANCE L |
| Screen | |
|
| ||
EXECUTE |
|
| |
TO SELECT AN IMAGE BY BROWSING IMAGES STORED IN MEMORY
Before doing the following, perform steps 1 through 3 above.
4 Rotate MENU/BRIGHT to select “SELECTED” and press it. The DELETE Index Screen appears.
5 Rotate MENU/BRIGHT to move the green frame to the desired image that you wish to delete and press it. An “ ![]() ” appears above the selected image.
” appears above the selected image.
Repeat this procedure for all images that you wish to delete.
To deselect an image, press MENU/BRIGHT again. The “ ![]() ” disappears.
” disappears.
6
7 Rotate MENU/BRIGHT to select “EXECUTE” and press it. The selected images are deleted and the normal playback screen appears.
•To cancel deletion, rotate MENU/BRIGHT to select “CANCEL” and press it.
CAUTION:
While deleting images, never remove the MultiMediaCard or disconnect power, as this may cause the memory to be cor- rupted. Also, be sure to use the AC Power Adapter/Charger, as a malfunction may occur if the battery become exhausted halfway through the operation.
TO DELETE ALL IMAGES
Before doing the following, perform steps 1 through 3 above.
4 Rotate MENU/BRIGHT to select “ALL” and press it. The Deletion Confirmation Screen appears.
5 Rotate MENU/BRIGHT to select “EXECUTE” and press it. All the images are deleted.
•To cancel deletion, rotate MENU/BRIGHT to select “CANCEL” and press it.
NOTES:
●Protected images (☞ pg. 50) cannot be deleted with the above operation. To delete them, remove protection first.
●Once images are deleted, they cannot be restored. Check images before deleting.