Names of Parts
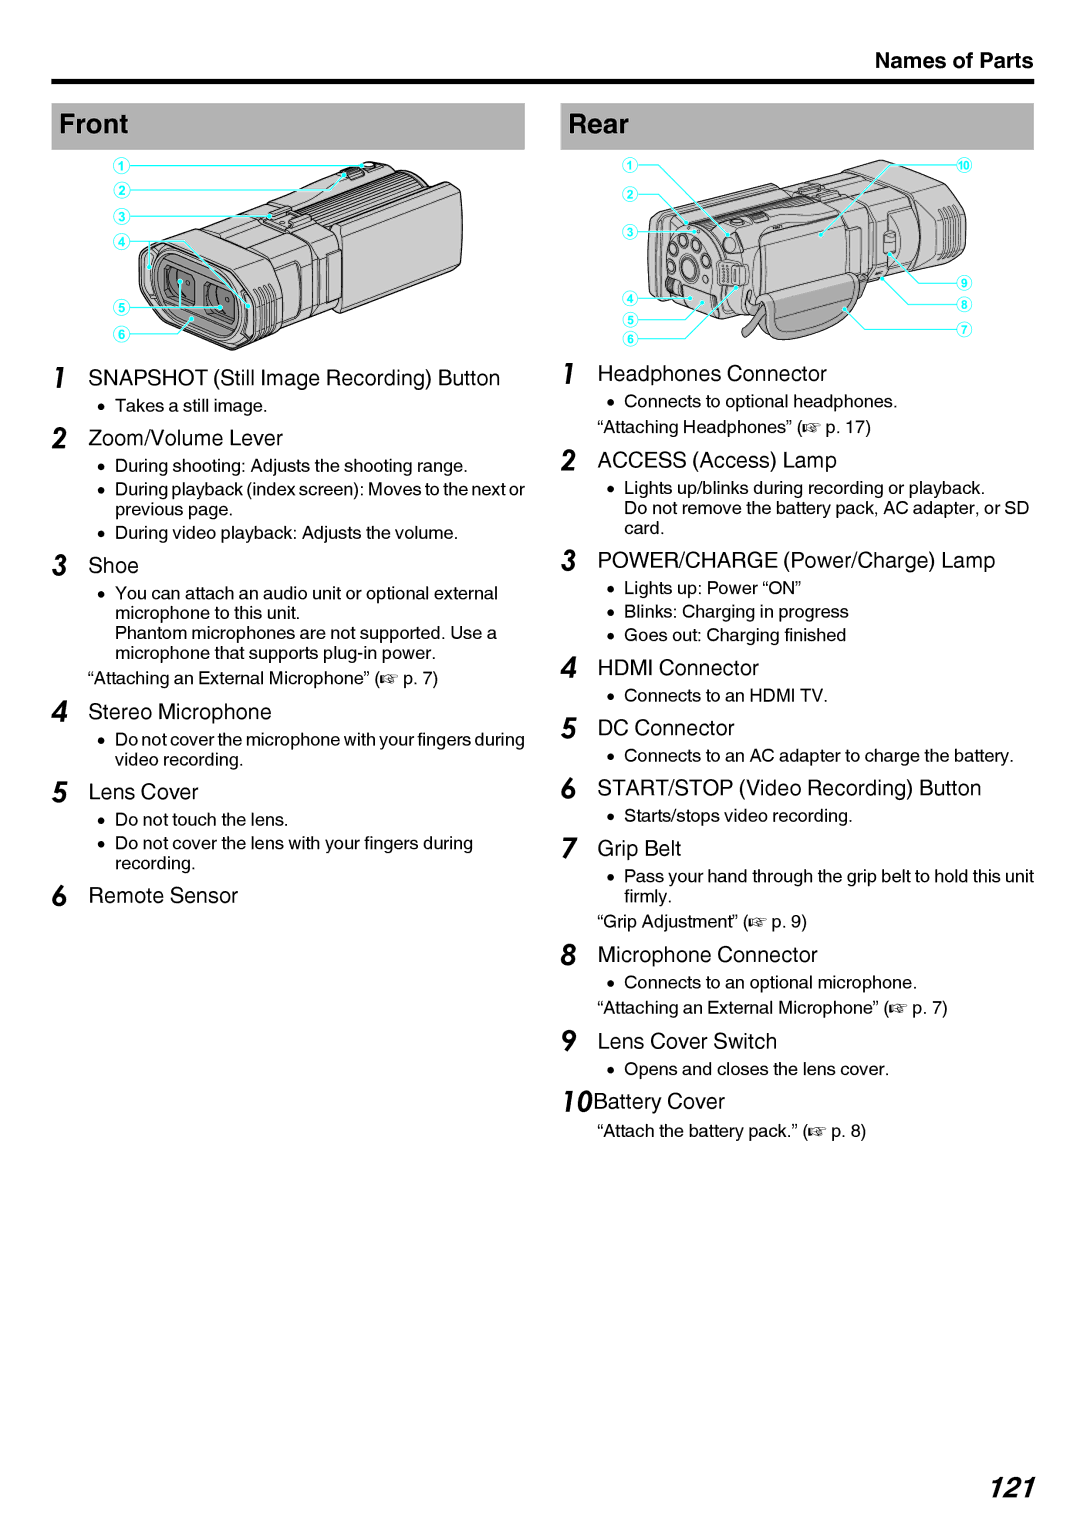
Front |
| Rear |
1
2
3
4
5
6
SNAPSHOT (Still Image Recording) Button
0Takes a still image.
Zoom/Volume Lever
0During shooting: Adjusts the shooting range.
0During playback (index screen): Moves to the next or previous page.
0During video playback: Adjusts the volume.
Shoe
0You can attach an audio unit or optional external microphone to this unit.
Phantom microphones are not supported. Use a microphone that supports
“Attaching an External Microphone” (A p. 7)
Stereo Microphone
0Do not cover the microphone with your fingers during video recording.
Lens Cover
0Do not touch the lens.
0Do not cover the lens with your fingers during recording.
Remote Sensor
1Headphones Connector
0Connects to optional headphones. “Attaching Headphones” (A p. 17)
2ACCESS (Access) Lamp
0Lights up/blinks during recording or playback.
Do not remove the battery pack, AC adapter, or SD card.
3POWER/CHARGE (Power/Charge) Lamp
0Lights up: Power “ON”
0Blinks: Charging in progress
0Goes out: Charging finished
4HDMI Connector
0Connects to an HDMI TV.
5DC Connector
0Connects to an AC adapter to charge the battery.
6START/STOP (Video Recording) Button
0Starts/stops video recording.
7Grip Belt
0Pass your hand through the grip belt to hold this unit firmly.
“Grip Adjustment” (A p. 9)
8Microphone Connector
0Connects to an optional microphone. “Attaching an External Microphone” (A p. 7)
9Lens Cover Switch
0Opens and closes the lens cover.
10Battery Cover
“Attach the battery pack.” (A p. 8)