Recording
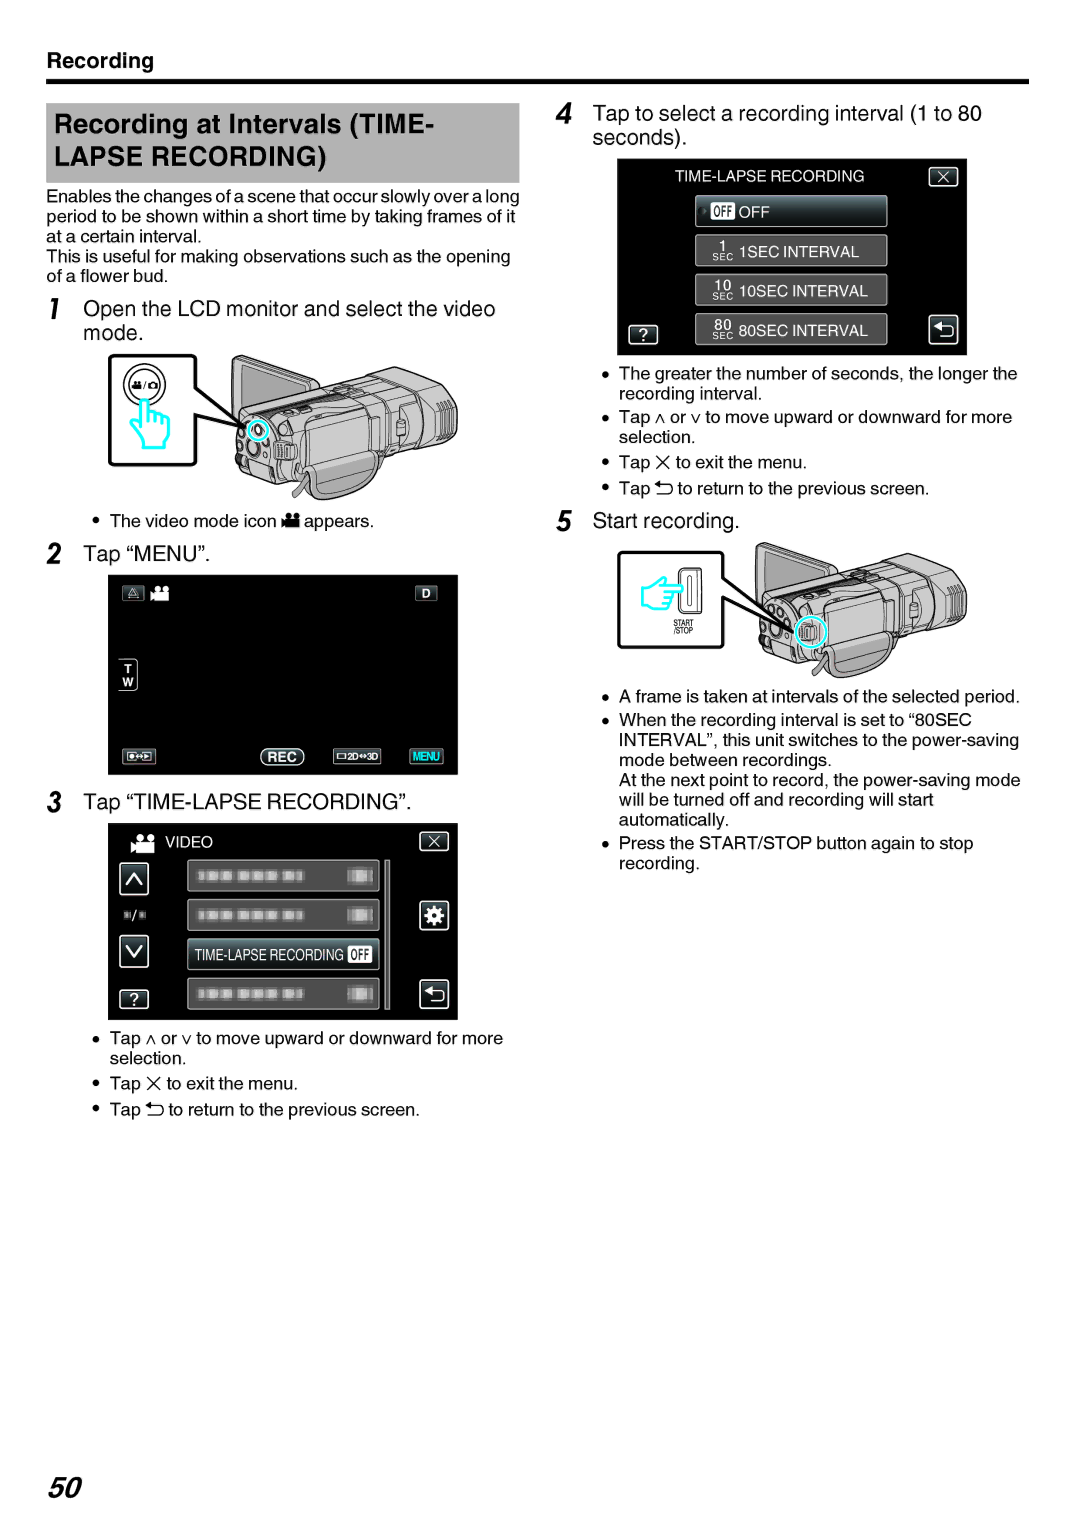
Recording at Intervals (TIME- | 4 | Tap to select a recording interval (1 to 80 | |||
| seconds). | ||||
LAPSE RECORDING) |
|
| |||
Enables the changes of a scene that occur slowly over a long |
|
|
| ||
period to be shown within a short time by taking frames of it |
|
| OFF | ||
at a certain interval. |
|
|
| ||
This is useful for making observations such as the opening |
|
| 1SEC INTERVAL | ||
of a flower bud. |
|
| 10SEC INTERVAL | ||
1 | Open the LCD monitor and select the video |
|
| ||
|
|
| |||
| mode. |
|
| 80SEC INTERVAL | |
|
|
|
|
| |
|
|
|
| 0 | The greater the number of seconds, the longer the |
|
|
|
|
| recording interval. |
|
|
|
| 0 | Tap ∧ or ∨ to move upward or downward for more |
|
|
|
|
| selection. |
|
|
|
| 0 Tap L to exit the menu. | |
|
| The video mode icon A appears. | 5 | 0 Tap J to return to the previous screen. | |
| 0 | Start recording. | |||
|
|
|
|
| |
2 Tap “MENU”.
|
|
|
|
|
|
|
|
|
|
|
|
|
|
|
|
|
|
|
|
|
|
|
|
|
|
|
|
|
|
|
|
|
|
|
|
|
| 0 | A frame is taken at intervals of the selected period. | ||||||||
|
| 0 | When the recording interval is set to “80SEC | ||||||||
|
|
| INTERVAL”, this unit switches to the | ||||||||
|
|
| mode between recordings. | ||||||||
3 Tap |
| At the next point to record, the | |||||||||
| will be turned off and recording will start | ||||||||||
|
|
| automatically. | ||||||||
| VIDEO | 0 | Press the START/STOP button again to stop | ||||||||
|
|
| recording. | ||||||||
![]()
0Tap ∧ or ∨ to move upward or downward for more selection.
0Tap L to exit the menu.
0Tap J to return to the previous screen.
50