Setting the white and black-point values
The white and
Enter the new
OK.
With the
Calibrate the image as described in the white, black, and gray point corrections section.
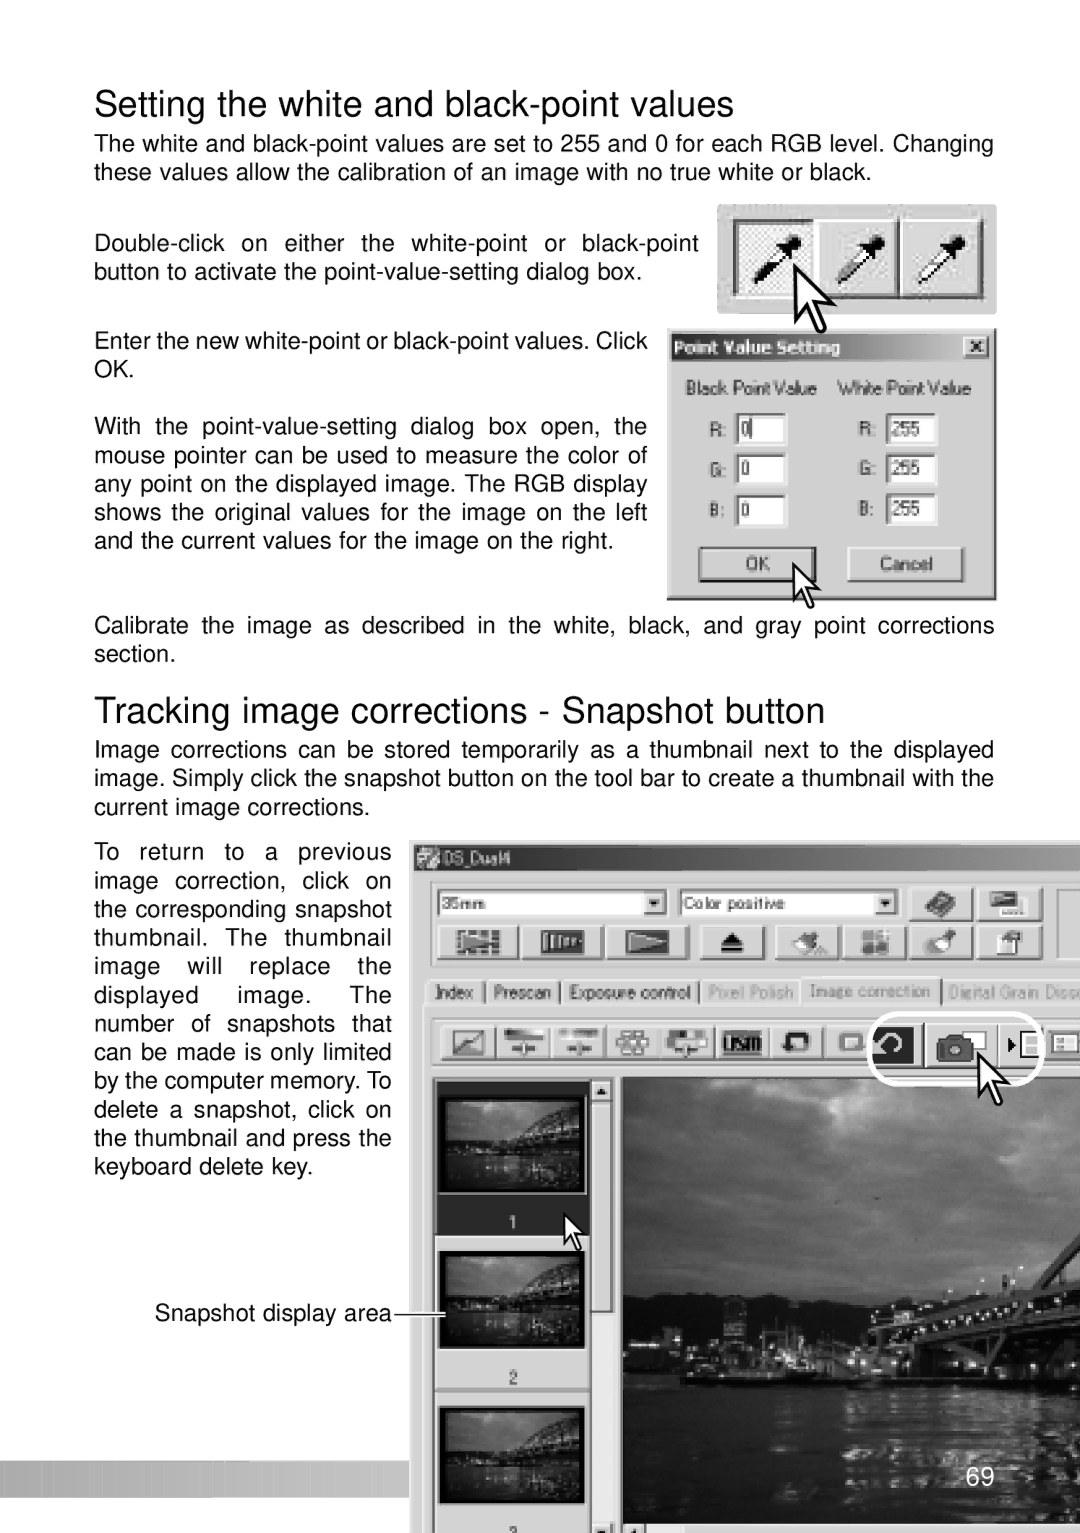
Tracking image corrections - Snapshot button
Image corrections can be stored temporarily as a thumbnail next to the displayed image. Simply click the snapshot button on the tool bar to create a thumbnail with the current image corrections.
To return to a previous image correction, click on the corresponding snapshot thumbnail. The thumbnail image will replace the displayed image. The number of snapshots that can be made is only limited by the computer memory. To delete a snapshot, click on the thumbnail and press the keyboard delete key.
Snapshot display area ![]()
![]()
![]()
![]()
![]()
![]()
![]()
![]()
![]()
![]()
![]()
![]()
![]()
![]()
![]()
![]()
![]()
![]()
![]()
![]()
![]()
![]()
![]()
![]()
![]()
![]()
![]()
![]()
![]()
![]()
![]()
![]()
![]()
![]()
![]()
![]()
![]()
![]()
![]()
![]()
![]()
![]() 69
69![]()
![]()