Section 6 COPY DEFAULT SETTINGS
8 Press the Recall%/Enter key. The operation panel will return to the display in step 2. Once you are finished accessing default items, proceed to step 19.
9 Press the Number of Copies / Zoom(+) or the Number of Copies /
(F16)
10 Press the Recall%/Enter key. The operation panel will return to the display in step 2. Once you are finished accessing default items, proceed to step 19.
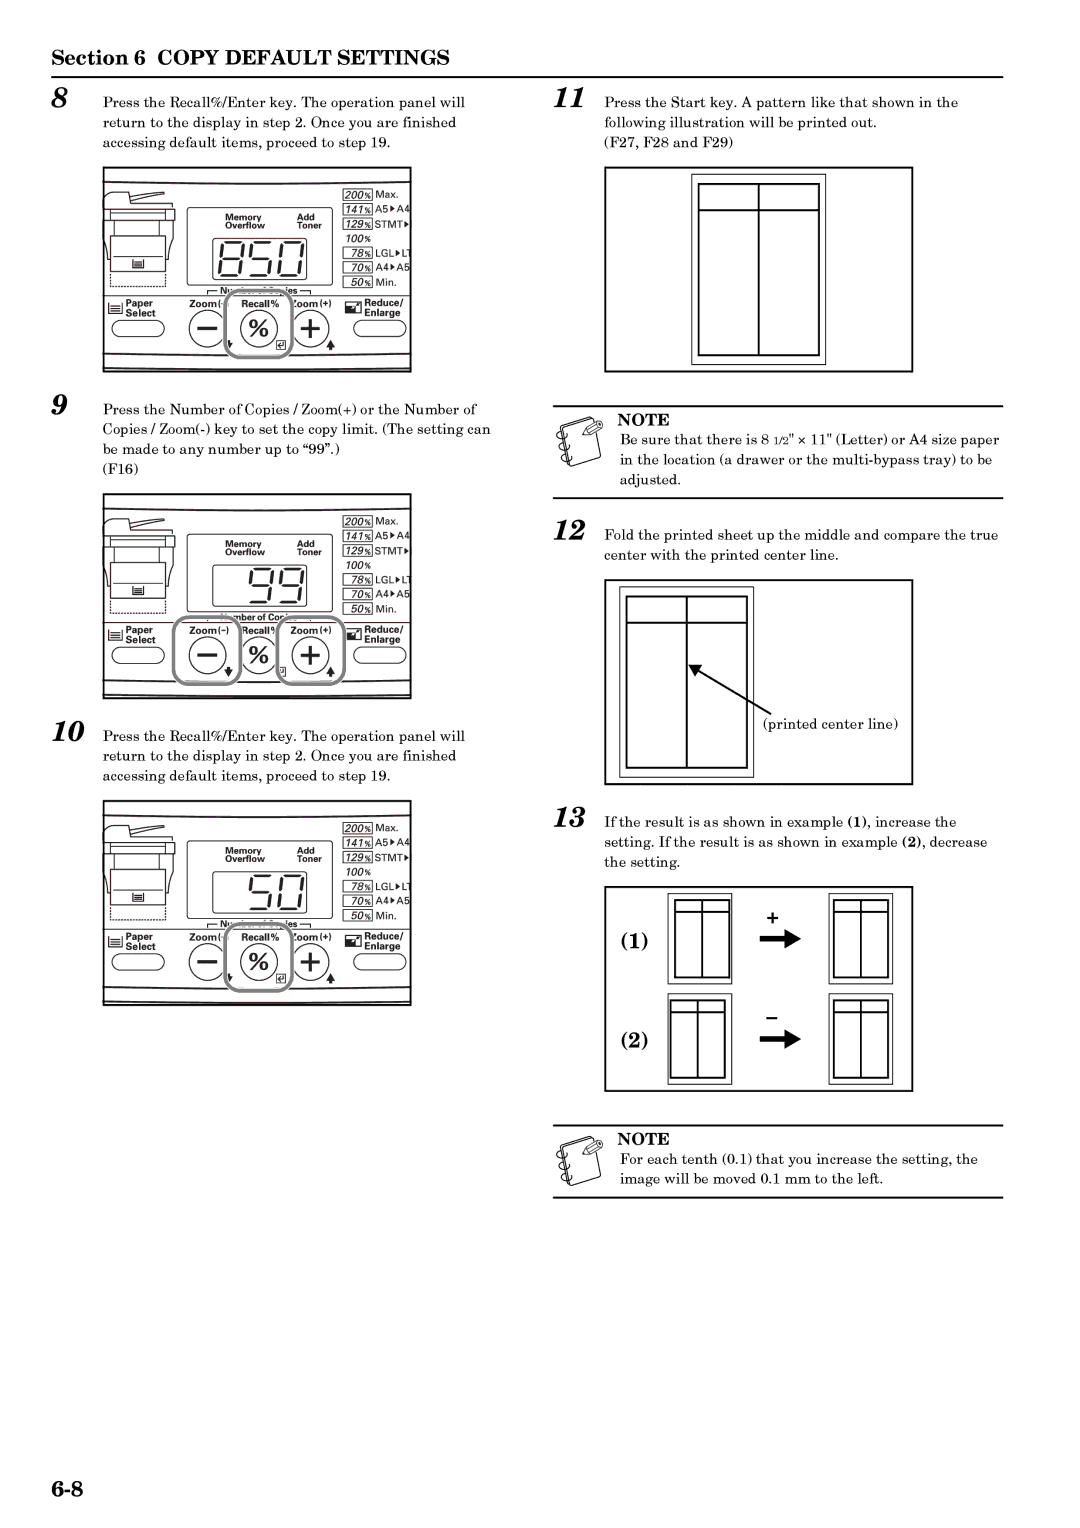
11 Press the Start key. A pattern like that shown in the following illustration will be printed out.
(F27, F28 and F29)
NOTE
Be sure that there is 8 1/2" × 11" (Letter) or A4 size paper in the location (a drawer or the
12 Fold the printed sheet up the middle and compare the true center with the printed center line.
(printed center line)
13 If the result is as shown in example (1), increase the setting. If the result is as shown in example (2), decrease the setting.
+
(1)
–
(2)
NOTE
For each tenth (0.1) that you increase the setting, the image will be moved 0.1 mm to the left.