Section 3 PREPARATIONS
Selecting the paper size
Perform the following procedure to use the operation panel and select the size of paper that is set on the
Selecting the paper size (standard setting)
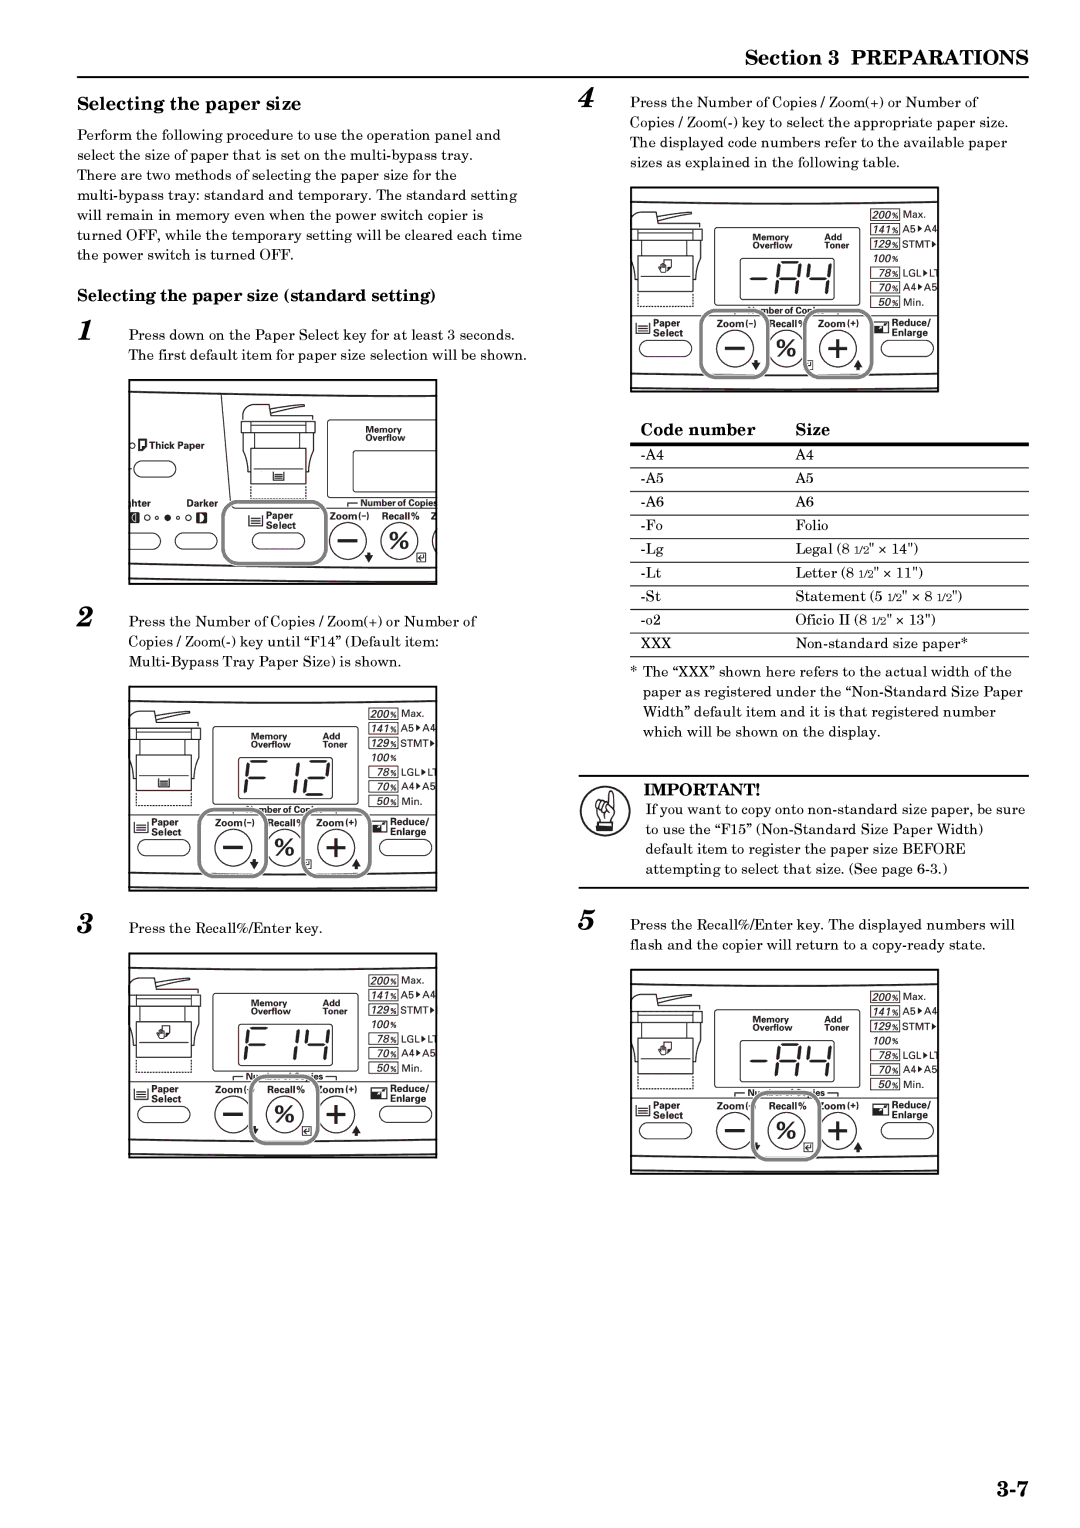
1 Press down on the Paper Select key for at least 3 seconds. The first default item for paper size selection will be shown.
2 Press the Number of Copies / Zoom(+) or Number of Copies /
3 Press the Recall%/Enter key.
4 Press the Number of Copies / Zoom(+) or Number of Copies /
Code number | Size |
A4 | |
|
|
A5 | |
|
|
A6 | |
|
|
Folio | |
|
|
Legal (8 1/2" × 14") | |
|
|
Letter (8 1/2" × 11") | |
|
|
Statement (5 1/2" × 8 1/2") | |
|
|
Oficio II (8 1/2" × 13") | |
|
|
XXX |
*The “XXX” shown here refers to the actual width of the paper as registered under the
IMPORTANT!
If you want to copy onto
5 Press the Recall%/Enter key. The displayed numbers will flash and the copier will return to a