1.4. Setting Up and Interfacing
5—Adjusting the paper guides in the cassette and adding paper
The paper cassette provided with the printer can accommodate paper sizes from A5 to legal, by adjusting the position of the paper guides and the paper stopper. Paper sizes that are not standard sizes (custom sizes) but within the size limitations can also be loaded into the cassette. When loading custom sizes into the cassette, the size must be input into the printer on the control panel. (Refer to 2.7. Setting Custom Sizes) Standard size paper settings are indicated as fixed positions in the cassette.
☛‹ Before adding paper, remove the paper cassette all the way from the printer.
‹ Read the paper manufacturer's instructions concerning handling of the paper.
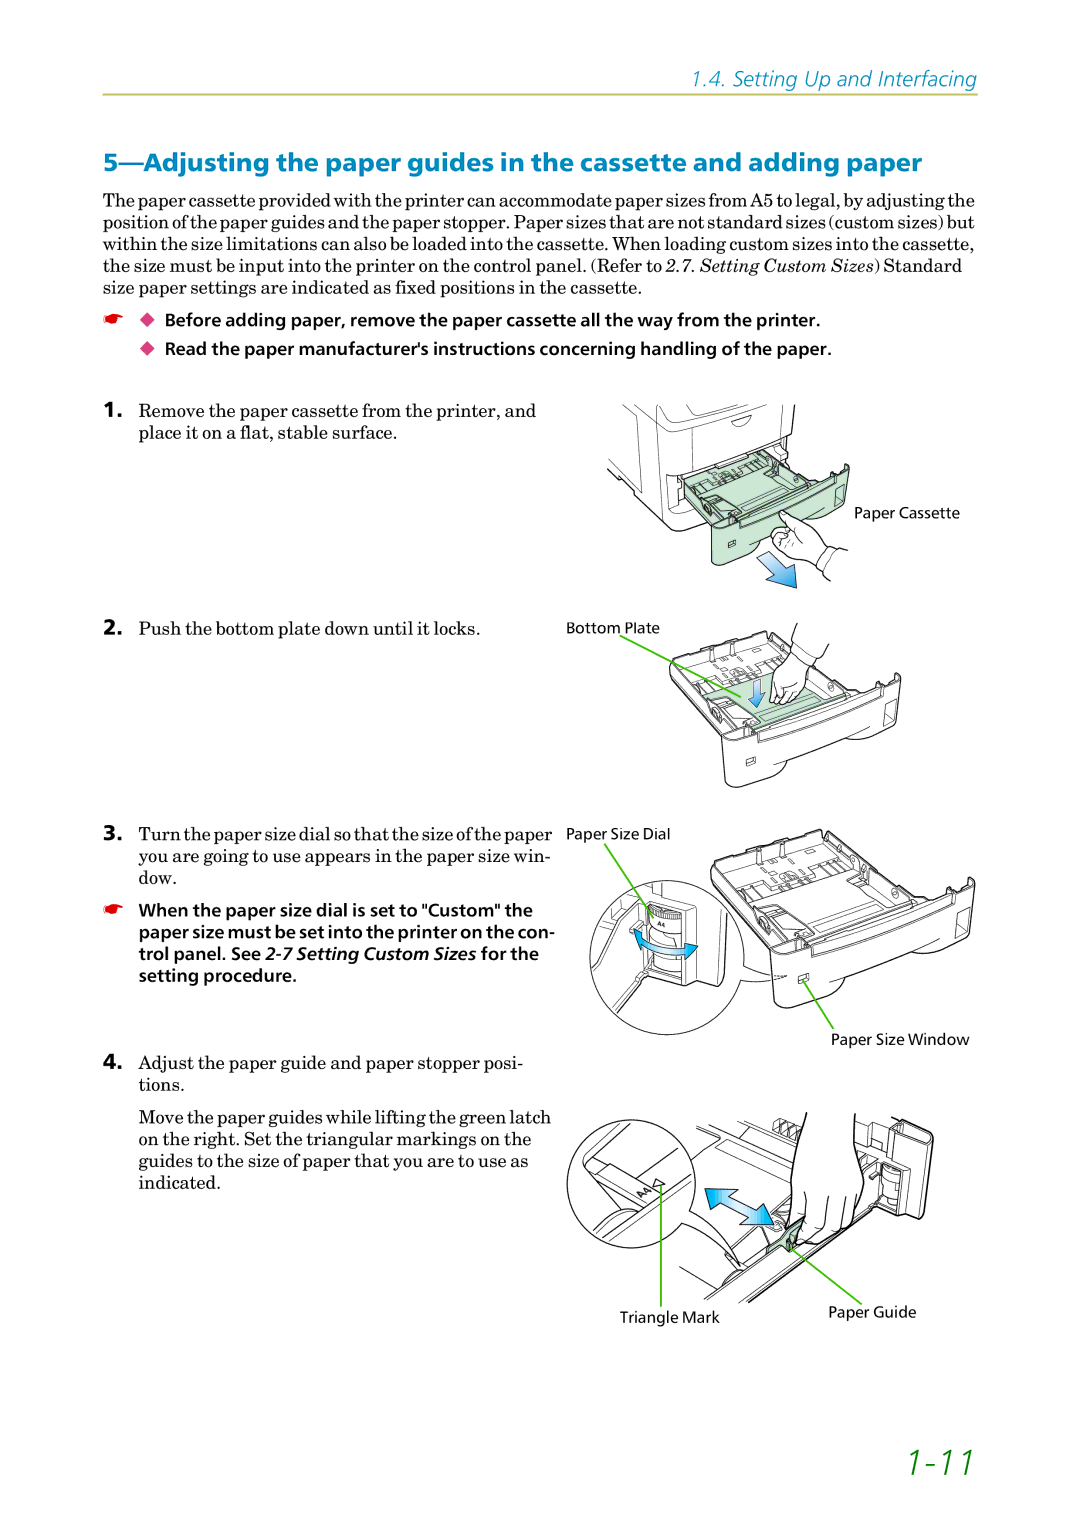
1.Remove the paper cassette from the printer, and place it on a flat, stable surface.
Paper Cassette
2. Push the bottom plate down until it locks. | Bottom Plate |
3. Turn the paper size dial so that the size of the paper Paper Size Dial you are going to use appears in the paper size win-
dow.
☛ When the paper size dial is set to "Custom" the paper size must be set into the printer on the con- trol panel. See
Paper Size Window
4.Adjust the paper guide and paper stopper posi- tions.
Move the paper guides while lifting the green latch on the right. Set the triangular markings on the guides to the size of paper that you are to use as indicated.
Triangle Mark | Paper Guide |
|