1.4. Setting Up and Interfacing
8—Connect the printer to the computer
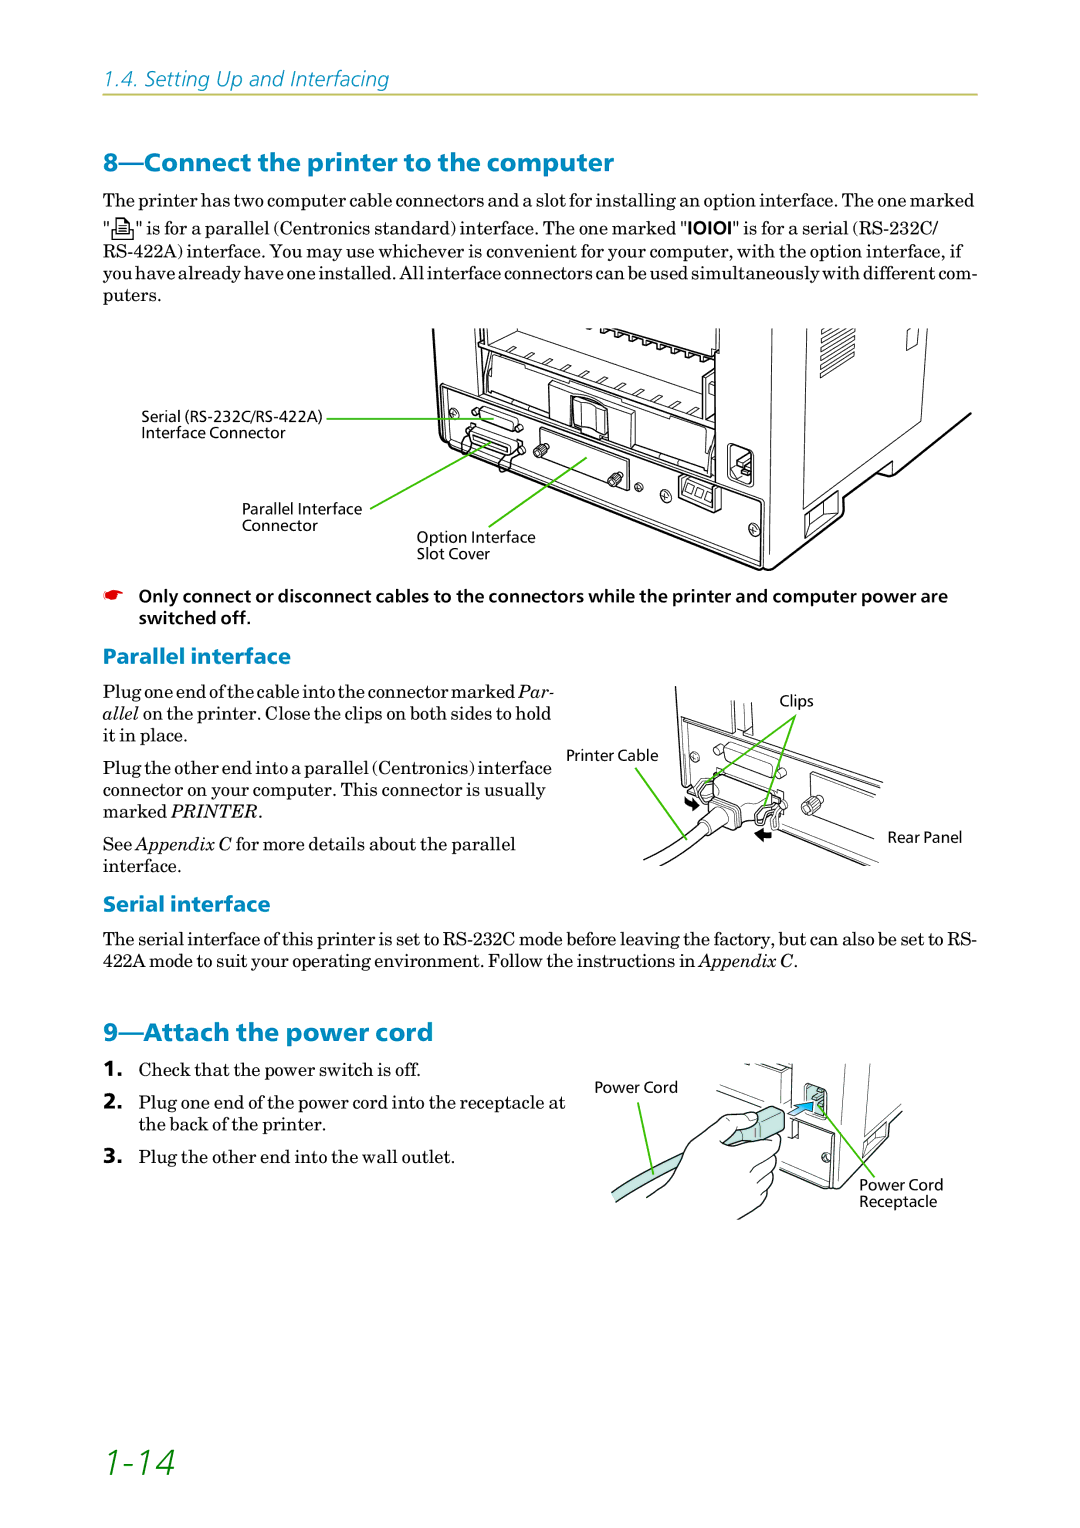
The printer has two computer cable connectors and a slot for installing an option interface. The one marked
"![]() " is for a parallel (Centronics standard) interface. The one marked "IOIOI" is for a serial
" is for a parallel (Centronics standard) interface. The one marked "IOIOI" is for a serial
Serial
Interface Connector
Parallel Interface
Connector
Option Interface
Slot Cover
☛Only connect or disconnect cables to the connectors while the printer and computer power are switched off.
Parallel interface |
| |
Plug one end of the cable into the connector marked Par- | Clips | |
allel on the printer. Close the clips on both sides to hold | ||
| ||
it in place. |
| |
Plug the other end into a parallel (Centronics) interface Printer Cable |
| |
connector on your computer. This connector is usually |
| |
marked PRINTER. |
| |
See Appendix C for more details about the parallel | Rear Panel | |
| ||
interface. |
|
Serial interface
The serial interface of this printer is set to
9—Attach the power cord
1. Check that the power switch is off.
2. Plug one end of the power cord into the receptacle at the back of the printer.
3. Plug the other end into the wall outlet.
Power Cord
Power Cord
Receptacle