3From the Style tab, click to select a style for your greeting card.
4From the Photo tab, select and drag a photo into the preview pane on the right side of the screen.
5Click the text area to be able to add text to your photo greeting card.
6When you have finished editing your text, click OK.
7If you want to create another photo greeting card using a different style and/or photo, click Add New Card, and repeat step 3 on page 55 through step 6 on page 55.
8If you want to print your photo greeting card, select Print your Photo Greeting Card from the Share tab.
9Select the number of copies from the Copies
10Select the copy quality from the Quality
11Select the paper size from the Paper Size in Printer
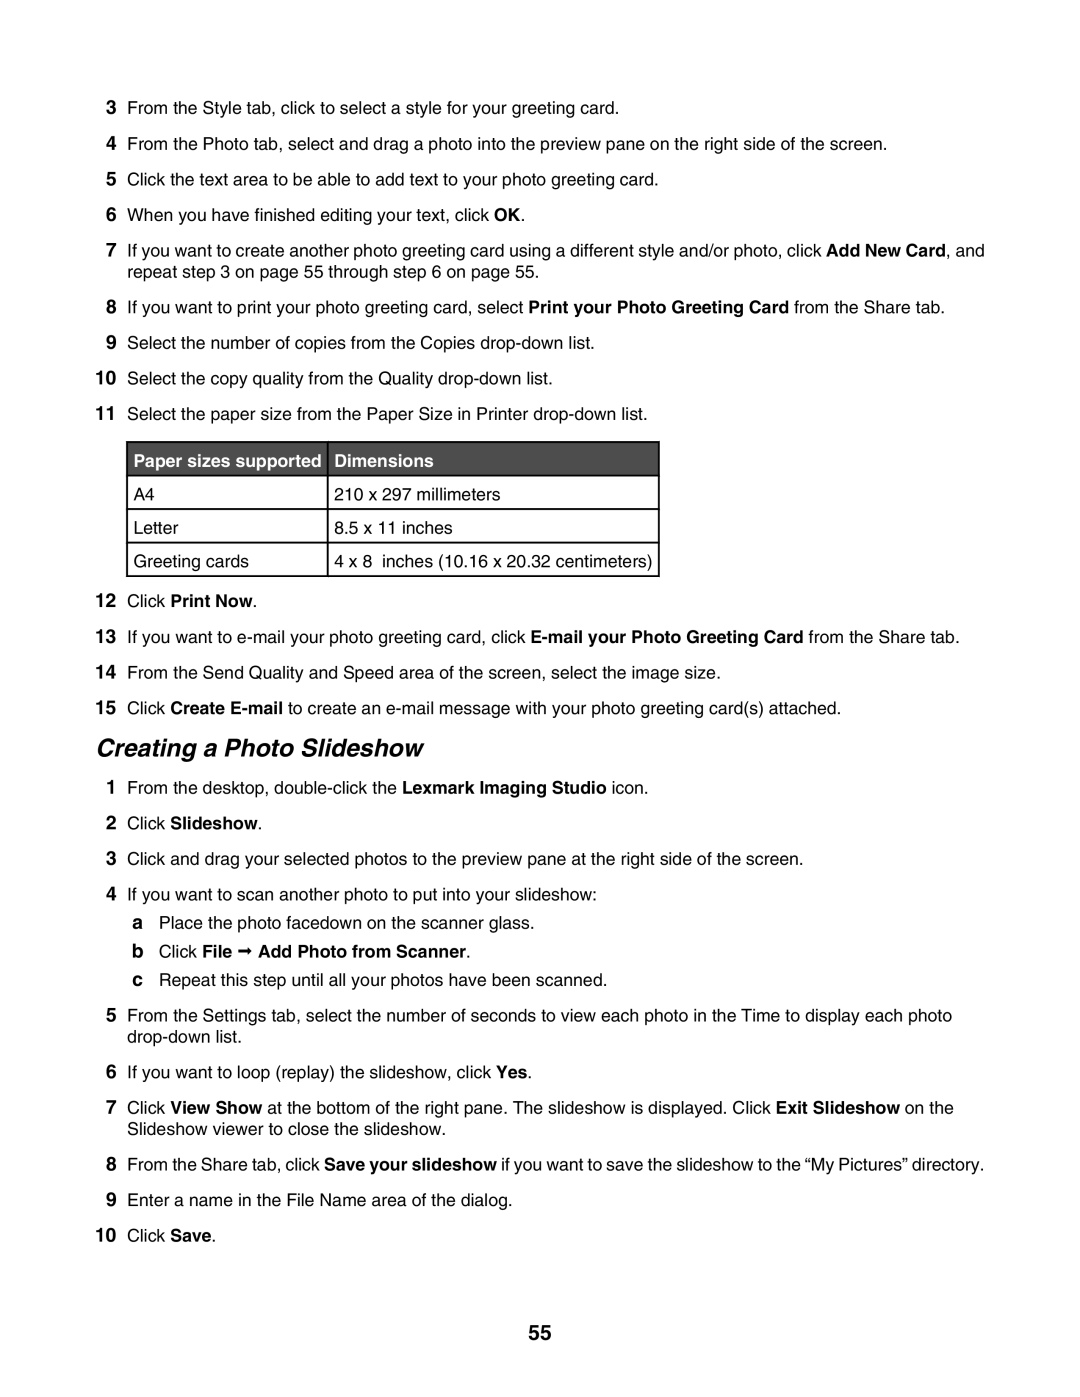
Paper sizes supported | Dimensions | |
A4 | 210 x 297 millimeters |
|
|
|
|
Letter | 8.5 x 11 inches | |
|
|
|
Greeting cards | 4 x 8 inches (10.16 x 20.32 centimeters) | |
|
|
|
12Click Print Now.
13If you want to
14From the Send Quality and Speed area of the screen, select the image size.
15Click Create
Creating a Photo Slideshow
1From the desktop,
2Click Slideshow.
3Click and drag your selected photos to the preview pane at the right side of the screen.
4If you want to scan another photo to put into your slideshow:
aPlace the photo facedown on the scanner glass.
bClick File Add Photo from Scanner.
cRepeat this step until all your photos have been scanned.
5From the Settings tab, select the number of seconds to view each photo in the Time to display each photo
6If you want to loop (replay) the slideshow, click Yes.
7Click View Show at the bottom of the right pane. The slideshow is displayed. Click Exit Slideshow on the Slideshow viewer to close the slideshow.
8From the Share tab, click Save your slideshow if you want to save the slideshow to the “My Pictures” directory.
9Enter a name in the File Name area of the dialog.
10Click Save.
55