Replacing the system board access cover
Applying the Option Added label
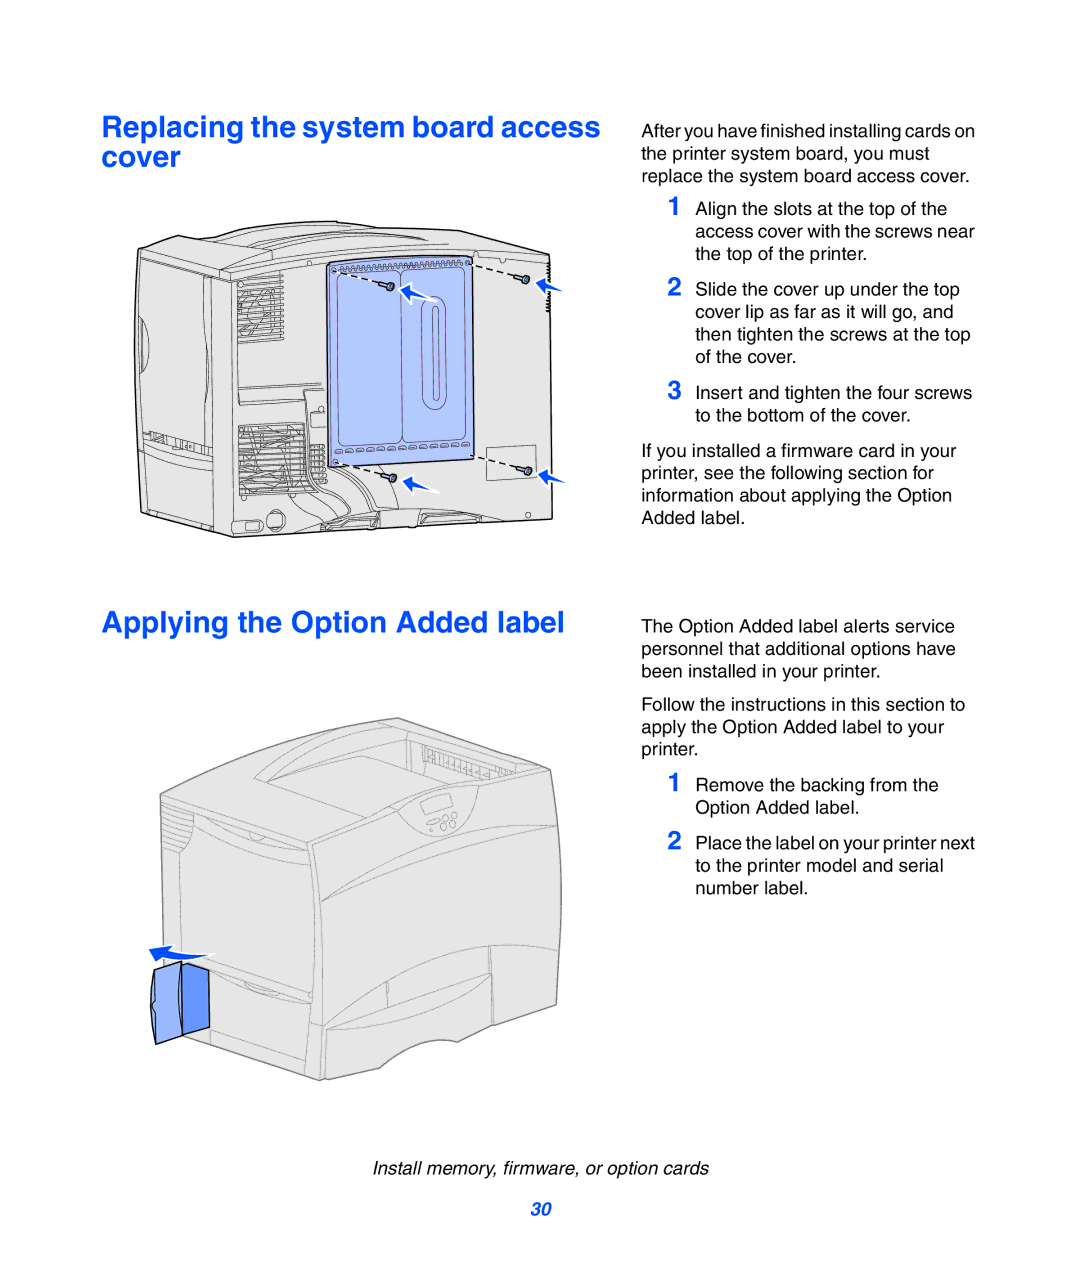
After you have finished installing cards on the printer system board, you must replace the system board access cover.
1 Align the slots at the top of the access cover with the screws near the top of the printer.
2 Slide the cover up under the top cover lip as far as it will go, and then tighten the screws at the top of the cover.
3 Insert and tighten the four screws to the bottom of the cover.
If you installed a firmware card in your printer, see the following section for information about applying the Option Added label.
The Option Added label alerts service personnel that additional options have been installed in your printer.
Follow the instructions in this section to apply the Option Added label to your printer.
1 Remove the backing from the Option Added label.
2 Place the label on your printer next to the printer model and serial number label.
Install memory, firmware, or option cards
30