7
3.
CHAPTER 1
5
6
7
8
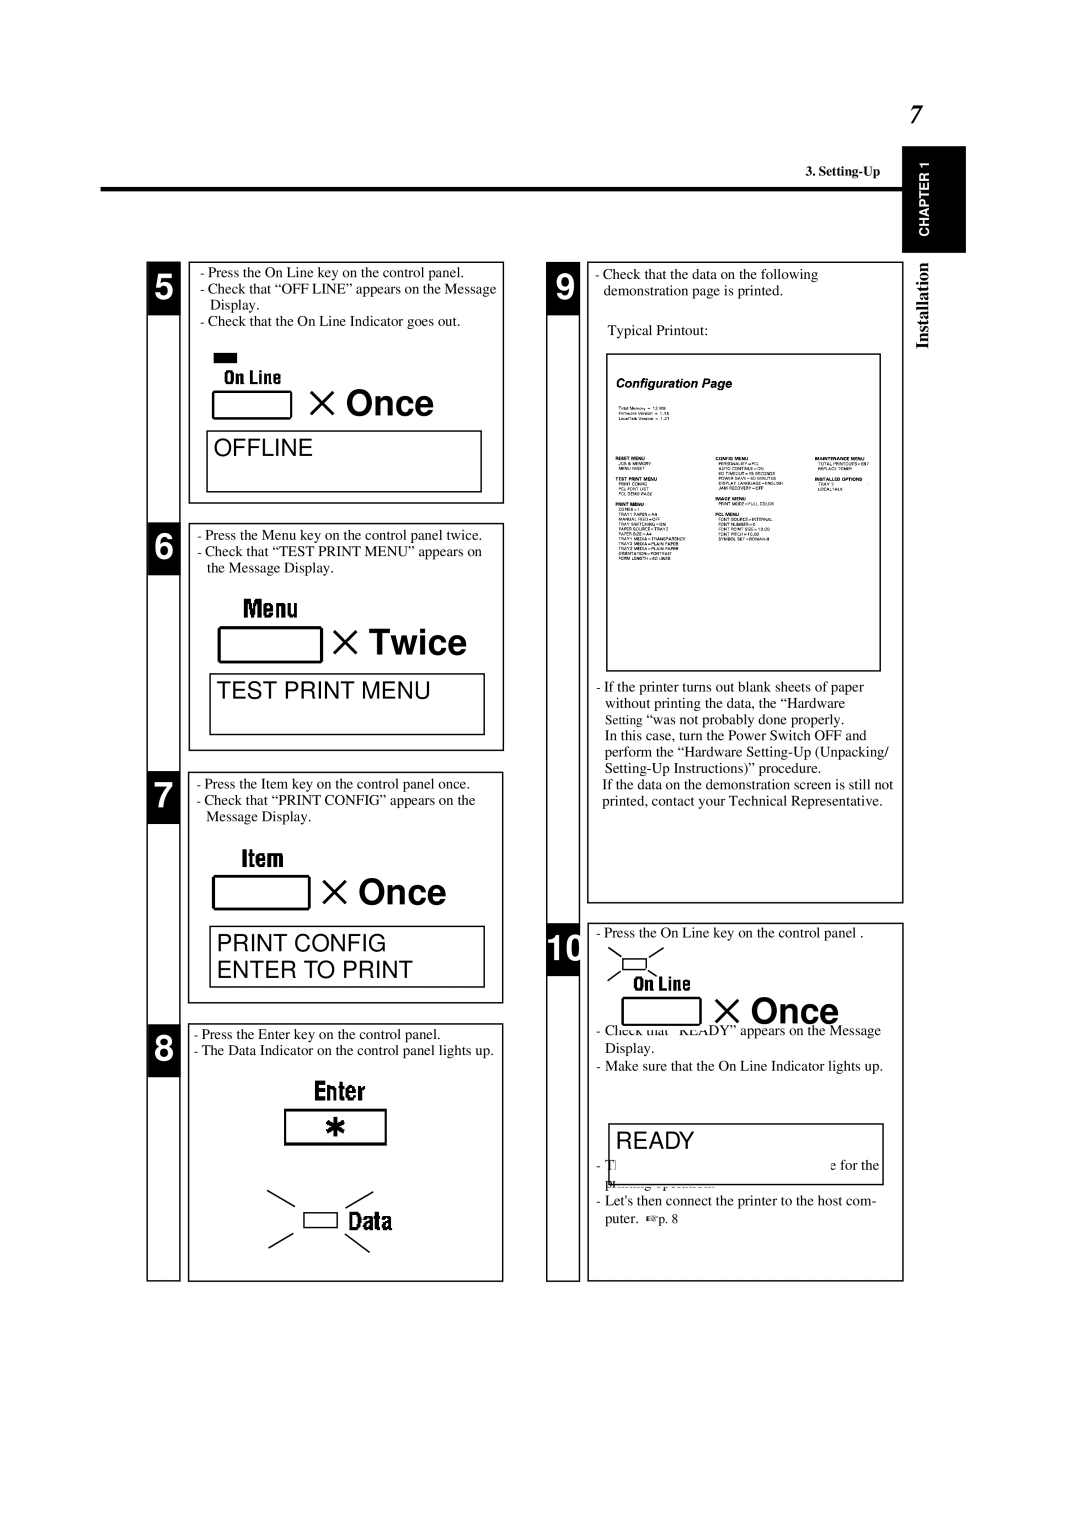
-Press the On Line key on the control panel.
-Check that “OFF LINE” appears on the Message Display.
-Check that the On Line Indicator goes out.
 ✕ Once
OFFLINE
-Press the Menu key on the control panel twice.
-Check that “TEST PRINT MENU” appears on the Message Display.
 ✕ Twice
TEST PRINT MENU
-Press the Item key on the control panel once.
-Check that “PRINT CONFIG” appears on the Message Display.
 ✕ Once
PRINT CONFIG
ENTER TO PRINT
-Press the Enter key on the control panel.
-The Data Indicator on the control panel lights up.
9
10
-Check that the data on the following demonstration page is printed.
Typical Printout:
-If the printer turns out blank sheets of paper without printing the data, the “Hardware Setting “was not probably done properly.
In this case, turn the Power Switch OFF and perform the “Hardware
If the data on the demonstration screen is still not printed, contact your Technical Representative.
-Press the On Line key on the control panel .
✕ Once
-Check that “READY” appears on the Message Display.
-Make sure that the On Line Indicator lights up.
READY
-This completes the checking procedure for the printing operation.
-Let's then connect the printer to the host com- puter. ☞p. 8
