38
2. Setting the MENU Utilities
Changing the Printer Settings CHAPTER 3
1
2
3
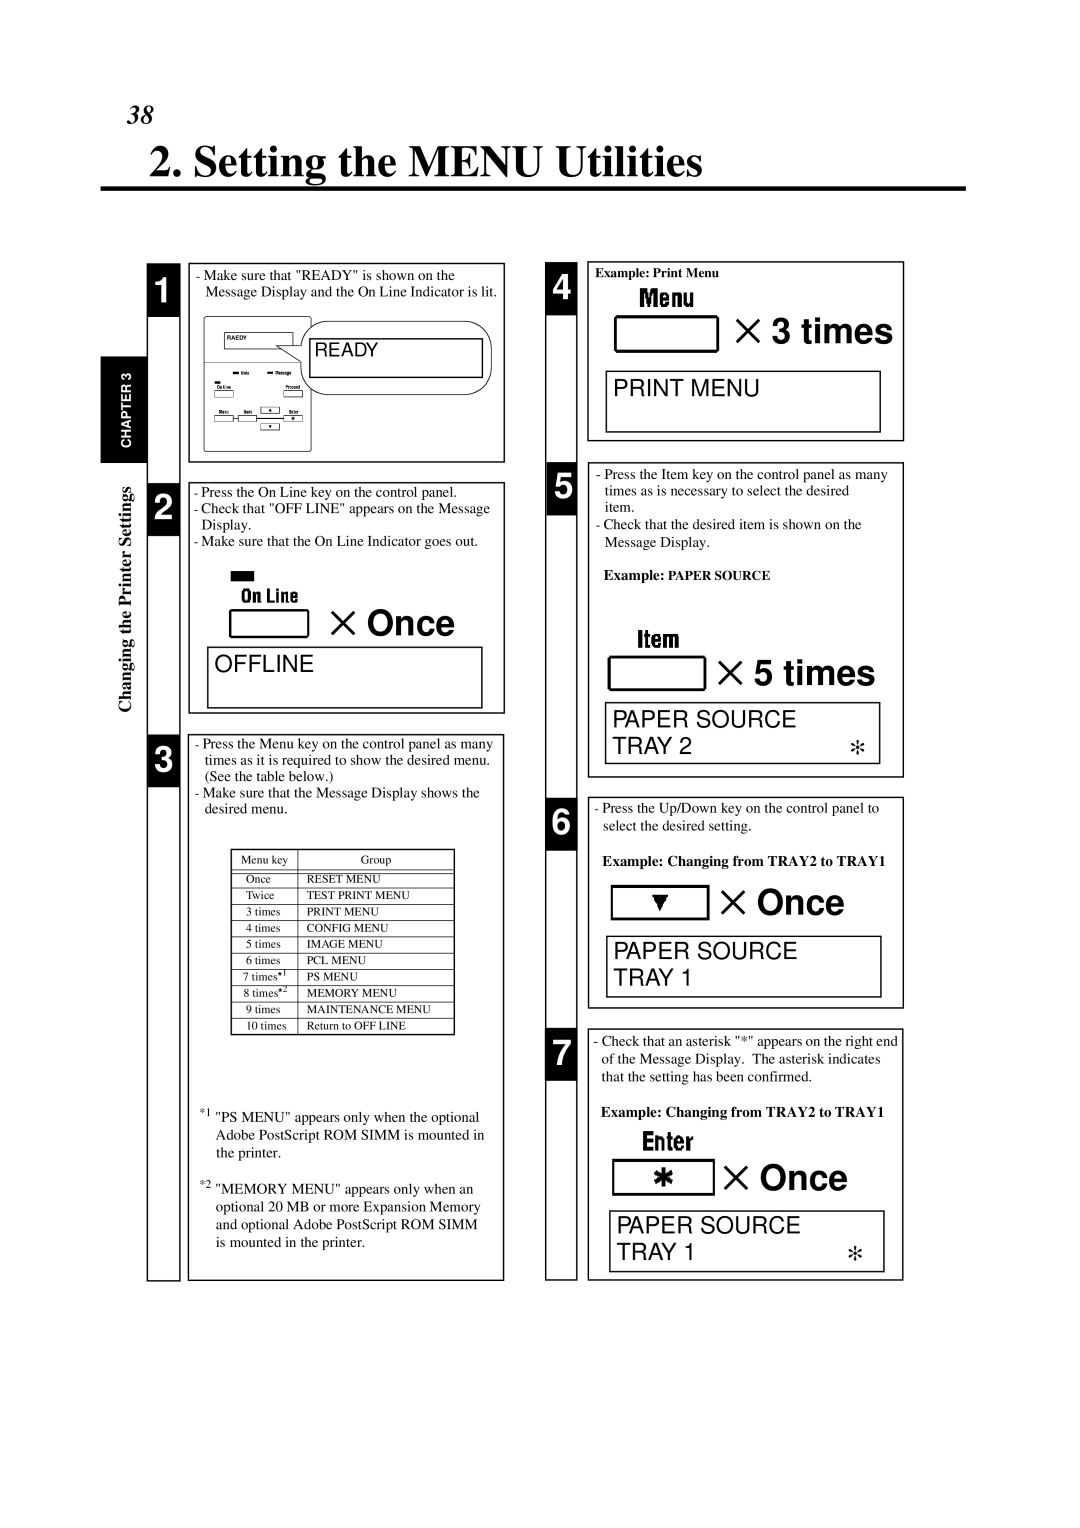
-Make sure that "READY" is shown on the Message Display and the On Line Indicator is lit.
RAEDY

 READY
READY
-Press the On Line key on the control panel.
-Check that "OFF LINE" appears on the Message Display.
-Make sure that the On Line Indicator goes out.
✕ Once
OFFLINE
-Press the Menu key on the control panel as many times as it is required to show the desired menu. (See the table below.)
-Make sure that the Message Display shows the desired menu.
Menu key | Group | |
|
| |
|
|
|
Once | RESET MENU | |
Twice | TEST PRINT MENU | |
|
| |
3 times | PRINT MENU | |
|
| |
4 times | CONFIG MENU | |
|
| |
5 times | IMAGE MENU | |
|
| |
6 times | PCL MENU | |
|
| |
7 times*1 | PS MENU | |
8 times*2 | MEMORY MENU | |
9 times | MAINTENANCE MENU | |
|
| |
10 times | Return to OFF LINE | |
|
|
|
*1 "PS MENU" appears only when the optional Adobe PostScript ROM SIMM is mounted in the printer.
*2 "MEMORY MENU" appears only when an optional 20 MB or more Expansion Memory and optional Adobe PostScript ROM SIMM is mounted in the printer.
4 Example: Print Menu
✕ 3 times
PRINT MENU
5 | - Press the Item key on the control panel as many |
times as is necessary to select the desired | |
| item. |
| - Check that the desired item is shown on the |
| Message Display. |
| Example: PAPER SOURCE |
 ✕ 5 times
|
|
| PAPER SOURCE |
|
|
|
|
| TRAY 2 | ✻ |
|
|
|
|
|
| |
|
|
|
|
|
|
|
|
|
|
| |
6 |
| - Press the Up/Down key on the control panel to | |||
| select the desired setting. |
|
| ||
|
|
|
| ||
|
|
|
|
|
|
Example: Changing from TRAY2 to TRAY1
 ✕ Once
PAPER SOURCE
TRAY 1
-Check that an asterisk "*" appears on the right end
7 of the Message Display. The asterisk indicates that the setting has been confirmed.
Example: Changing from TRAY2 to TRAY1
 ✕ Once
PAPER SOURCE |
|
TRAY 1 | ✻ |
