56
1. Changing Cartridges
Printer CHAPTER 4
Changing the Drum Cartridge, Waste Bottle and Oiling Roller
⋅The Drum Cartridge provides
⋅When 20,000 images are calculated in terms of color prints, about 5,000 sheets can be printed. (This value will vary according to the
⋅Change the Drum Cartridge together with the Waste Bottle and Oiling Roller. (These parts are preset to reach the time to change simultaneously.)
⋅When the Waste Bottle is filled with waste toner, “REPLACE WASTE BOTTLE” is displayed to indicate that the Bottle is full of waste toner. In this case, change the Drum Cartridge, Waste Bottle and Oiling Roller by the following procedure.
⋅When the Drum Cartridge is nearing the end of its reliable life, “DRUM ALMOST USED” is displayed to indicate that the Drum Cartridge will soon reach the end of its life soon. Prepare a new Drum Cartridge.
⋅When the Drum Cartridge reaches the end of its life, “REPLACE DRUM UNIT” is displayed to indicate that Drum Cartridge is end worn out.
In this case, change the Drum Cartridge, Waste Bottle and Oiling Roller by the following procedure.
⋅Put the old Drum Cartridge, Waste Bottle and Oiling Roller in polyethylene bags or the like and dispose of them according to your local regulations, or return them to your sales representative.
Maintaining Your
1
2
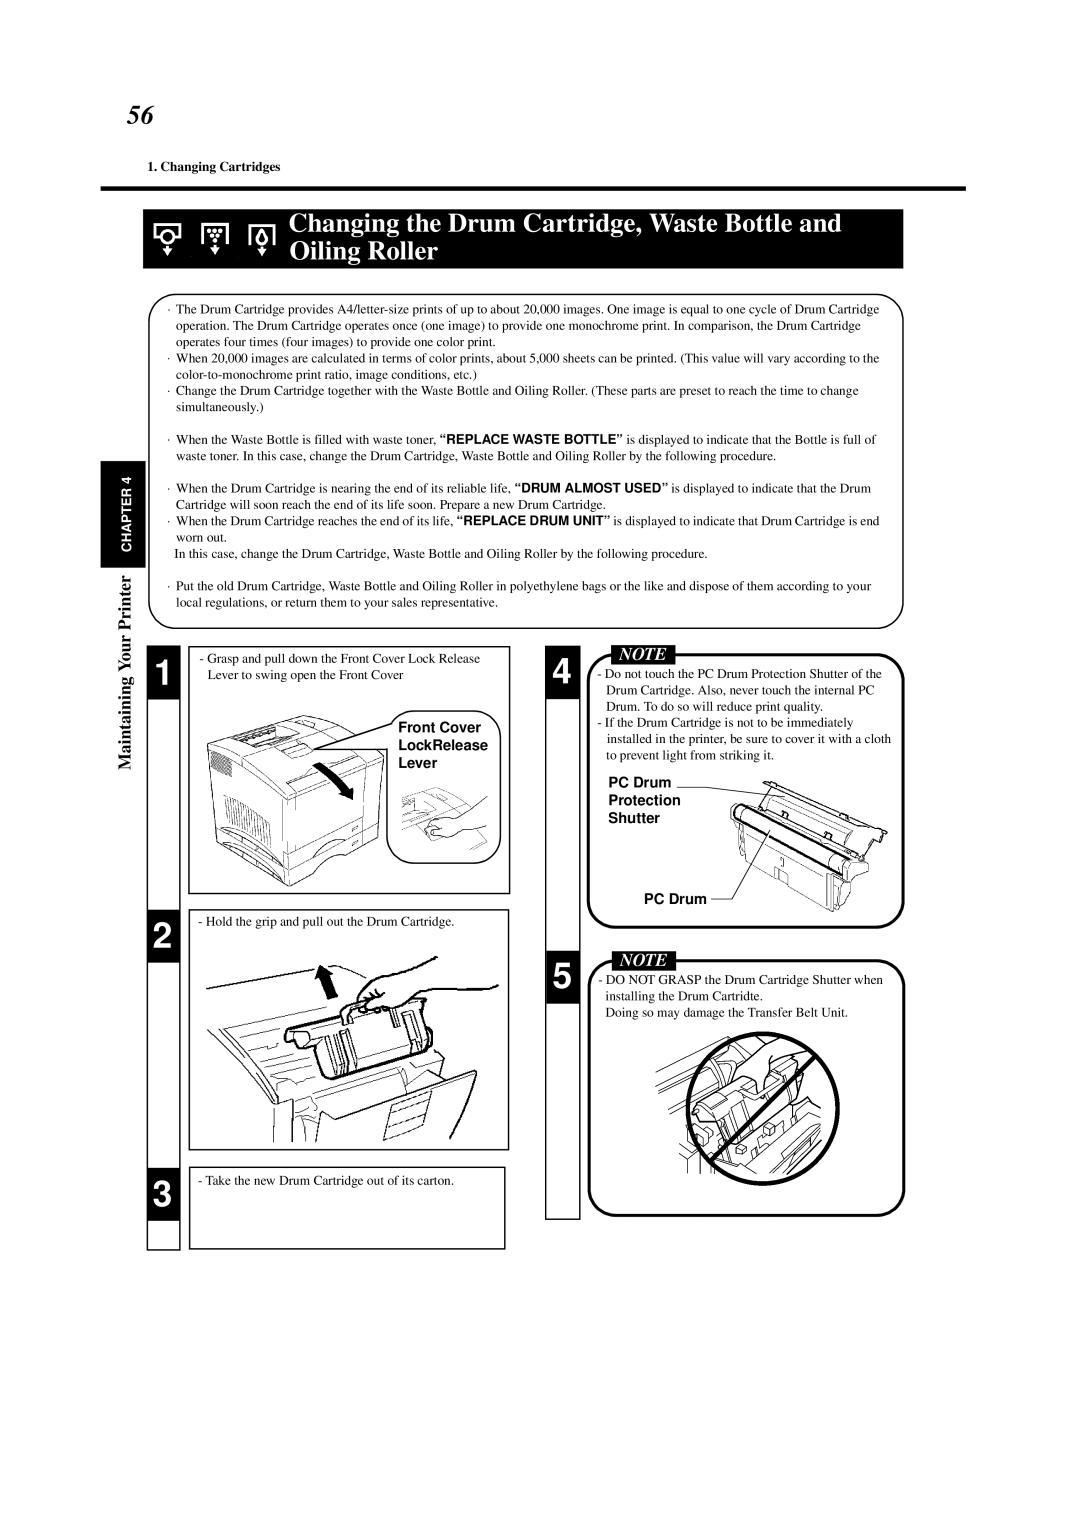
-Grasp and pull down the Front Cover Lock Release Lever to swing open the Front Cover
Front Cover
LockRelease
Lever
- Hold the grip and pull out the Drum Cartridge.
4
5
NOTE
-Do not touch the PC Drum Protection Shutter of the Drum Cartridge. Also, never touch the internal PC Drum. To do so will reduce print quality.
-If the Drum Cartridge is not to be immediately installed in the printer, be sure to cover it with a cloth to prevent light from striking it.
PC Drum
Protection
Shutter
PC Drum ![]()
![]()
NOTE
-DO NOT GRASP the Drum Cartridge Shutter when installing the Drum Cartridte.
Doing so may damage the Transfer Belt Unit.
3
- Take the new Drum Cartridge out of its carton.
