63
1. Changing Cartridges
7
8
9
10
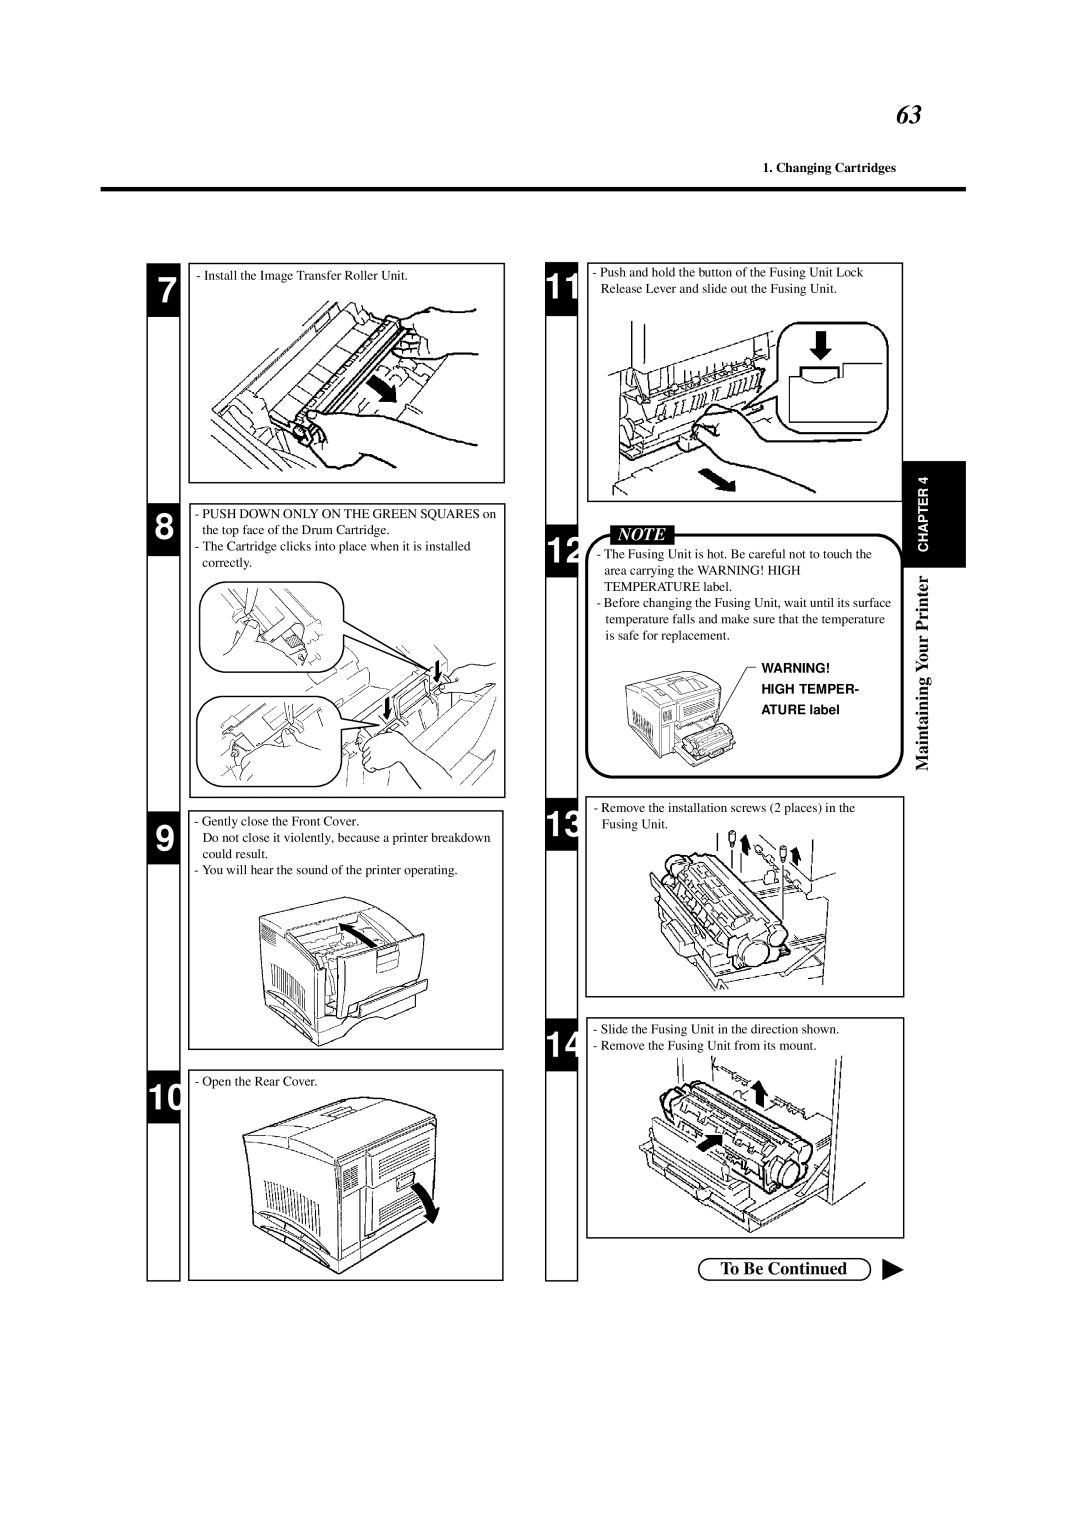
- Install the Image Transfer Roller Unit.
-PUSH DOWN ONLY ON THE GREEN SQUARES on the top face of the Drum Cartridge.
-The Cartridge clicks into place when it is installed correctly.
-Gently close the Front Cover.
Do not close it violently, because a printer breakdown could result.
-You will hear the sound of the printer operating.
- Open the Rear Cover.
11 |
| - Push and hold the button of the Fusing Unit Lock |
| Release Lever and slide out the Fusing Unit. | |
|
|
|
|
|
|
|
|
|
12 |
| NOTE |
|
- The Fusing Unit is hot. Be careful not to touch the | |||
| area carrying the WARNING! HIGH | ||
| TEMPERATURE label. | ||
-Before changing the Fusing Unit, wait until its surface temperature falls and make sure that the temperature is safe for replacement.
WARNING!
HIGH TEMPER-
ATURE label
13 |
| - Remove the installation screws (2 places) in the |
| Fusing Unit. | |
|
|
|
|
|
|
|
|
|
-Slide the Fusing Unit in the direction shown. 14 - Remove the Fusing Unit from its mount.
