3. Setup
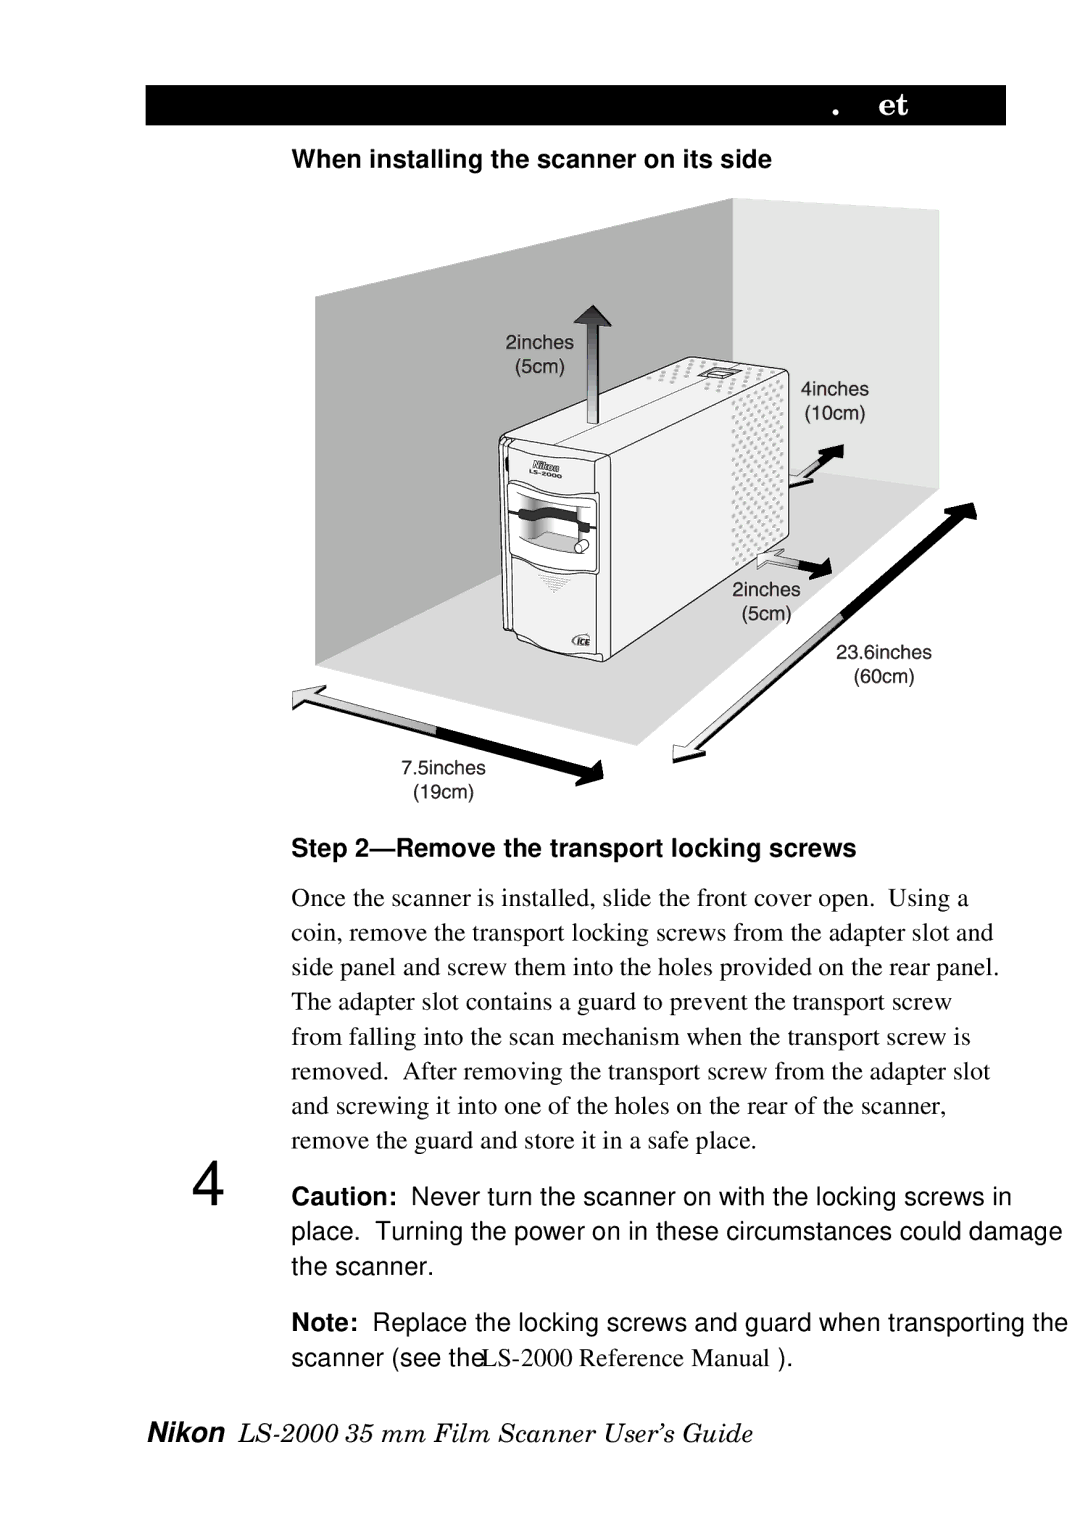
When installing the scanner on its side
Step
Once the scanner is installed, slide the front cover open. Using a coin, remove the transport locking screws from the adapter slot and side panel and screw them into the holes provided on the rear panel. The adapter slot contains a guard to prevent the transport screw from falling into the scan mechanism when the transport screw is removed. After removing the transport screw from the adapter slot and screwing it into one of the holes on the rear of the scanner, remove the guard and store it in a safe place.
✔Caution: Never turn the scanner on with the locking screws in place. Turning the power on in these circumstances could damage the scanner.
Note: Replace the locking screws and guard when transporting the scanner (see the “
Nikon | 7 |