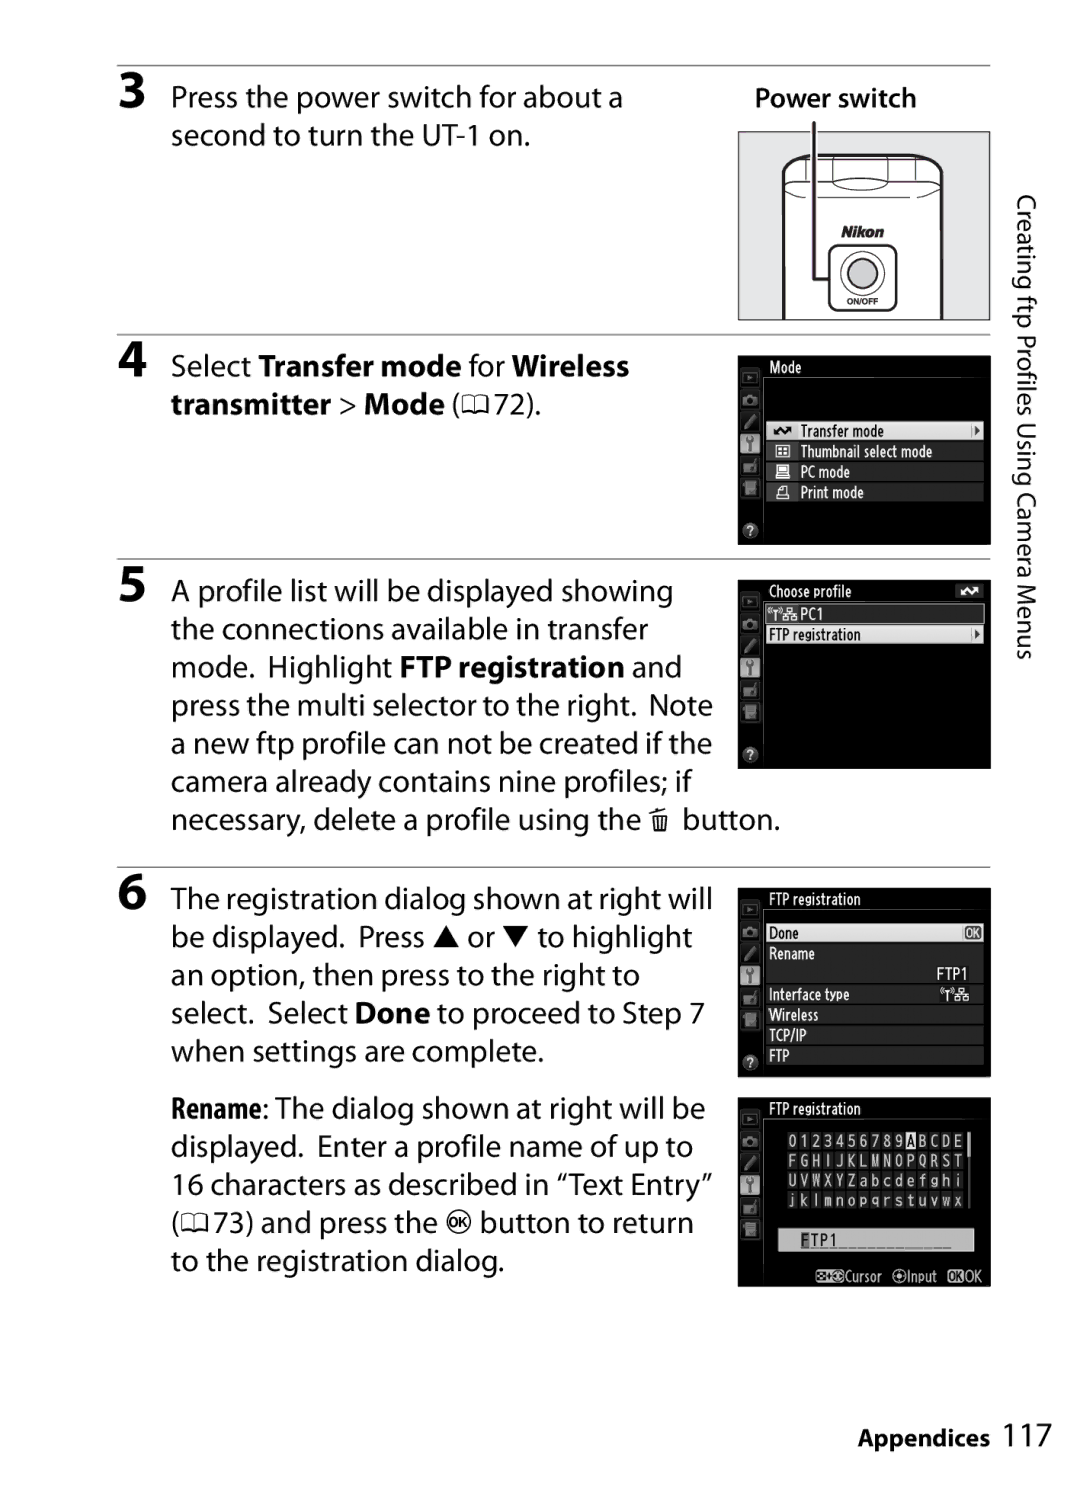
3 Press the power switch for about a | Power switch | ||||
second to turn the |
|
|
|
|
|
|
|
|
|
| |
|
|
|
|
|
|
|
|
|
|
|
|
|
|
|
|
|
|
4Select Transfer mode for Wireless transmitter > Mode (072).
5A profile list will be displayed showing the connections available in transfer mode. Highlight FTP registration and press the multi selector to the right. Note a new ftp profile can not be created if the camera already contains nine profiles; if necessary, delete a profile using the O button.
6The registration dialog shown at right will be displayed. Press 1 or 3 to highlight an option, then press to the right to select. Select Done to proceed to Step 7 when settings are complete.
Rename: The dialog shown at right will be displayed. Enter a profile name of up to 16 characters as described in “Text Entry” (073) and press the Jbutton to return to the registration dialog.
Creating ftp Profiles Using Camera Menus
Appendices 117