E.2 Hardware Inputs
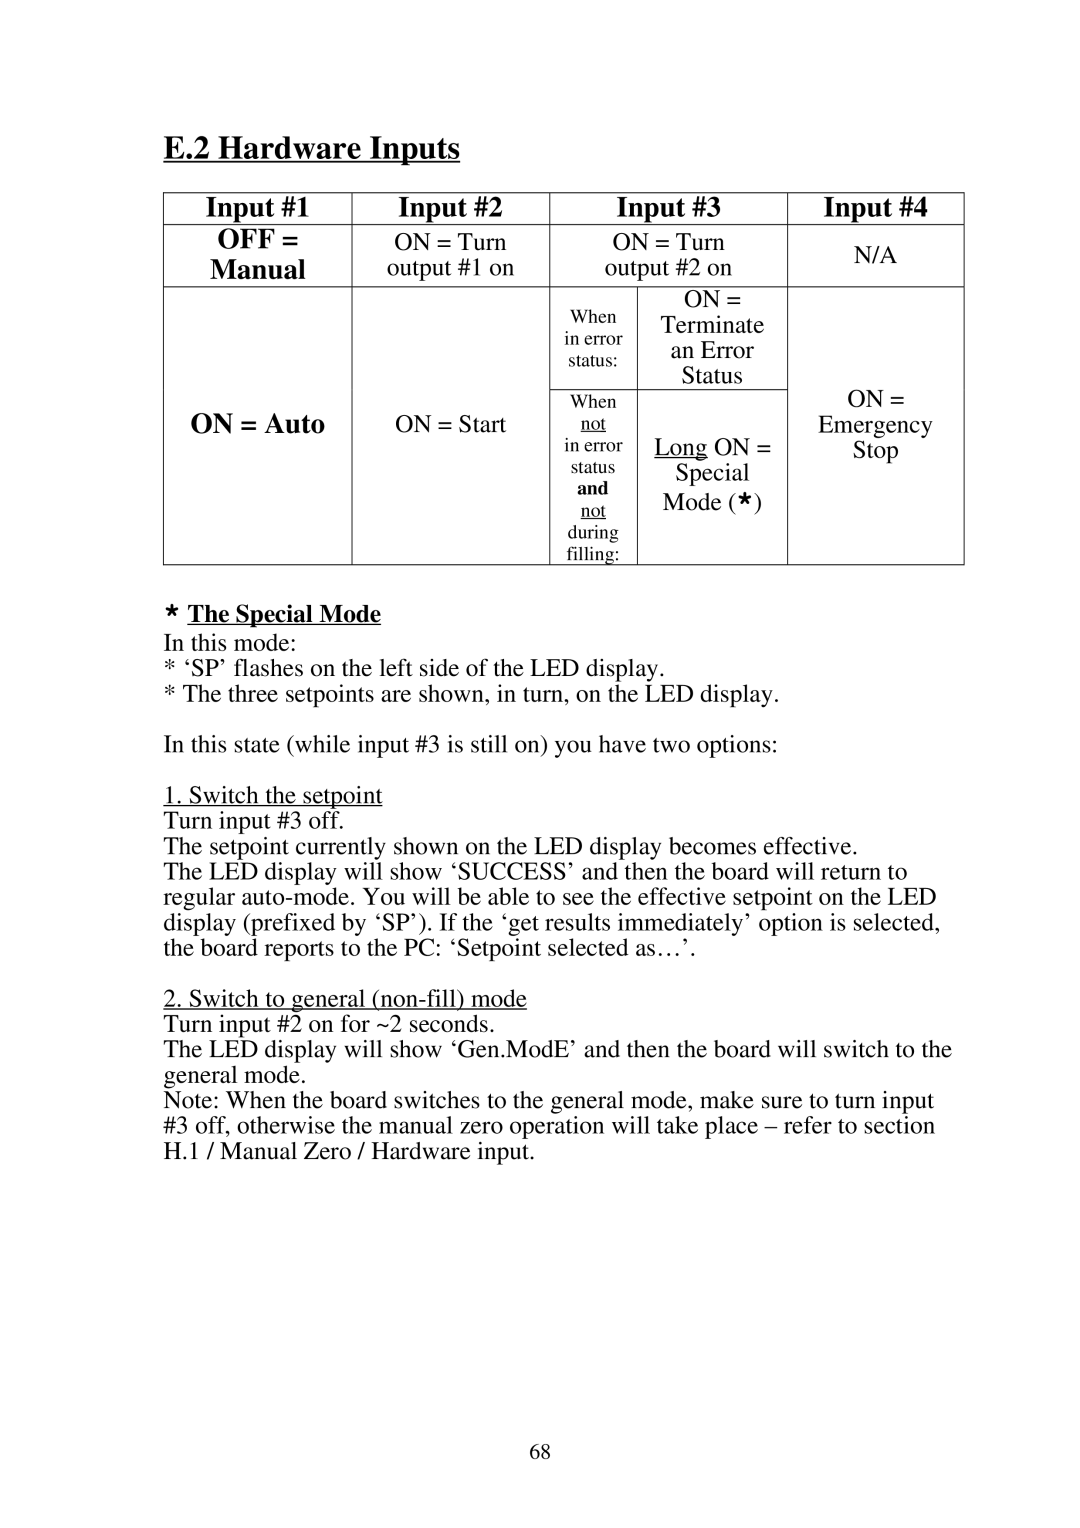
Input #1 | Input #2 | Input #3 | Input #4 | ||
OFF = | ON = Turn | ON = Turn | N/A | ||
Manual | output #1 on | output #2 on | |||
| |||||
|
| When | ON = |
| |
|
| Terminate |
| ||
|
| in error |
| ||
|
| an Error |
| ||
|
| status: |
| ||
|
| Status |
| ||
|
|
| ON = | ||
ON = Auto | ON = Start | When |
| ||
not | Long ON = | Emergency | |||
|
| in error | Stop | ||
|
| status | Special |
| |
|
| and | Mode (*) |
| |
|
| not |
| ||
|
| during |
|
| |
|
| filling: |
|
| |
*The Special Mode
In this mode:
*‘SP’ flashes on the left side of the LED display.
*The three setpoints are shown, in turn, on the LED display.
In this state (while input #3 is still on) you have two options:
1.Switch the setpoint Turn input #3 off.
The setpoint currently shown on the LED display becomes effective. The LED display will show ‘SUCCESS’ and then the board will return to regular
2.Switch to general
Turn input #2 on for ~2 seconds.
The LED display will show ‘Gen.ModE’ and then the board will switch to the general mode.
Note: When the board switches to the general mode, make sure to turn input #3 off, otherwise the manual zero operation will take place – refer to section H.1 / Manual Zero / Hardware input.
68