Setup (Handset)
Location)
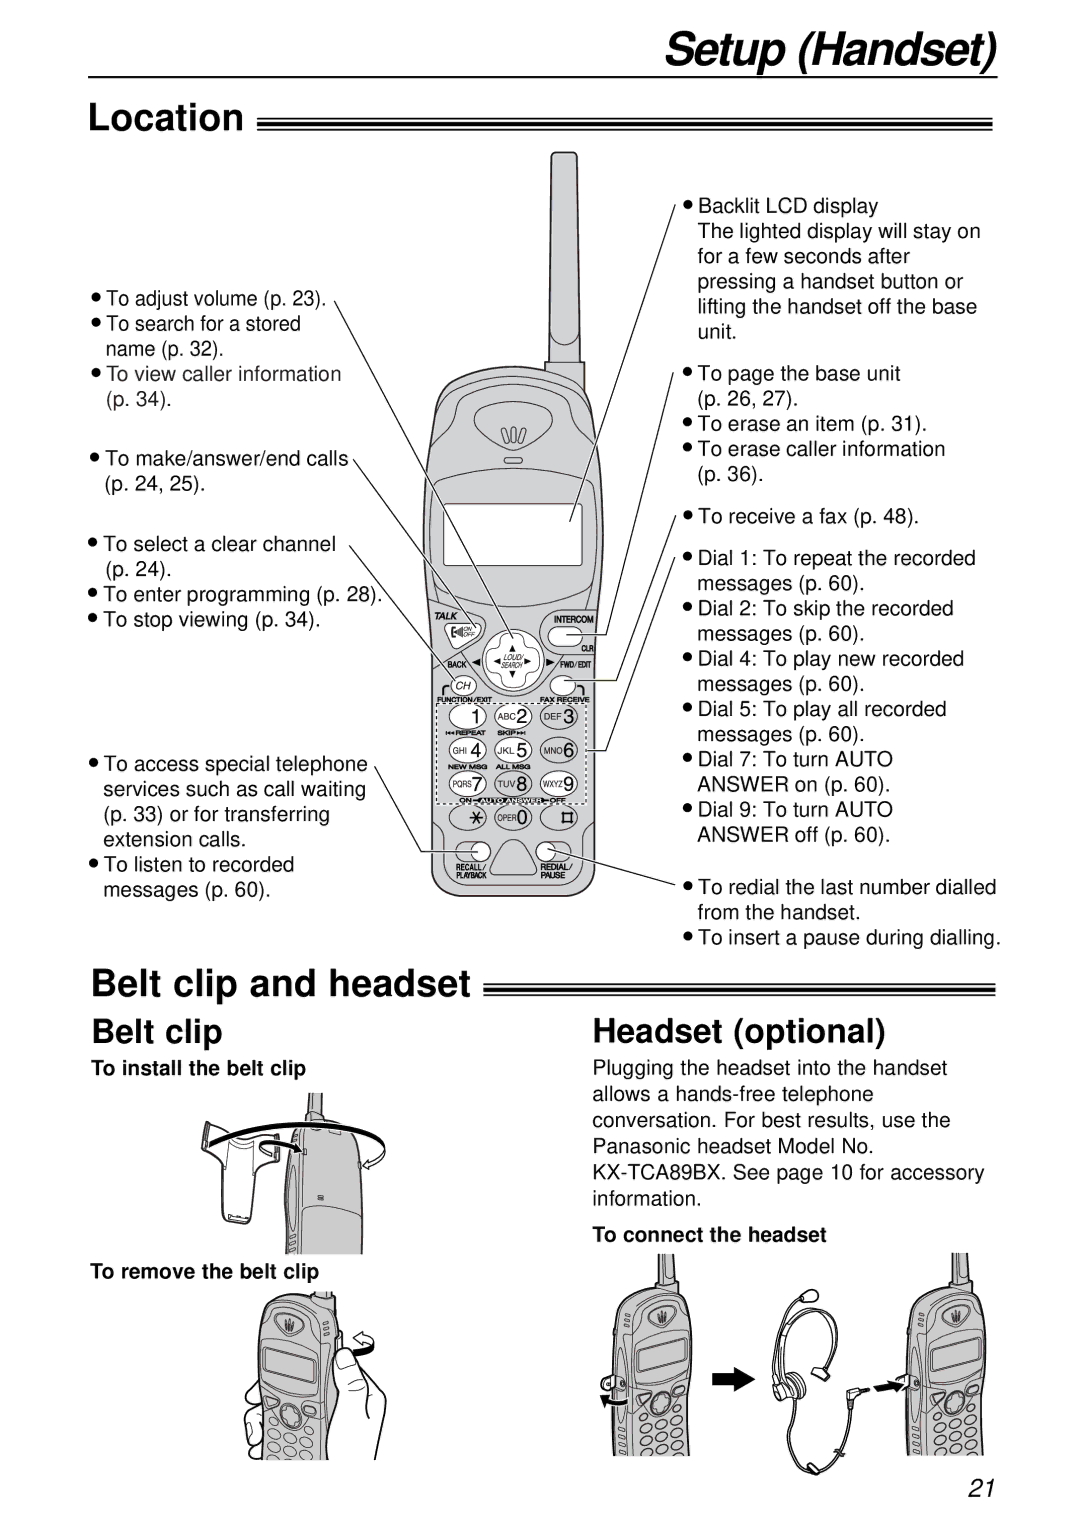
●To adjust volume (p. 23).
●To search for a stored name (p. 32).
●To view caller information (p. 34).
●To make/answer/end calls (p. 24, 25).
●To select a clear channel (p. 24).
●To enter programming (p. 28).
●To stop viewing (p. 34).
●To access special telephone services such as call waiting (p. 33) or for transferring extension calls.
●To listen to recorded messages (p. 60).
●Backlit LCD display
The lighted display will stay on for a few seconds after pressing a handset button or lifting the handset off the base unit.
●To page the base unit (p. 26, 27).
●To erase an item (p. 31).
●To erase caller information (p. 36).
●To receive a fax (p. 48).
●Dial 1: To repeat the recorded messages (p. 60).
●Dial 2: To skip the recorded messages (p. 60).
●Dial 4: To play new recorded messages (p. 60).
●Dial 5: To play all recorded messages (p. 60).
●Dial 7: To turn AUTO ANSWER on (p. 60).
●Dial 9: To turn AUTO ANSWER off (p. 60).
●To redial the last number dialled from the handset.
●To insert a pause during dialling.
Belt clip and headset!
Belt clip | Headset (optional) |
To install the belt clip | Plugging the headset into the handset |
| allows a |
| conversation. For best results, use the |
| Panasonic headset Model No. |
| |
| information. |
| To connect the headset |
To remove the belt clip |
|
21
