Preparation
If you subscribe to a DSL service
L Please attach a noise filter (contact your DSL provider) to the telephone line between the base unit and the telephone line jack in the event of the following:
–Noise is heard during conversations.
–Caller ID features (page 27) do not function properly.
Battery installation
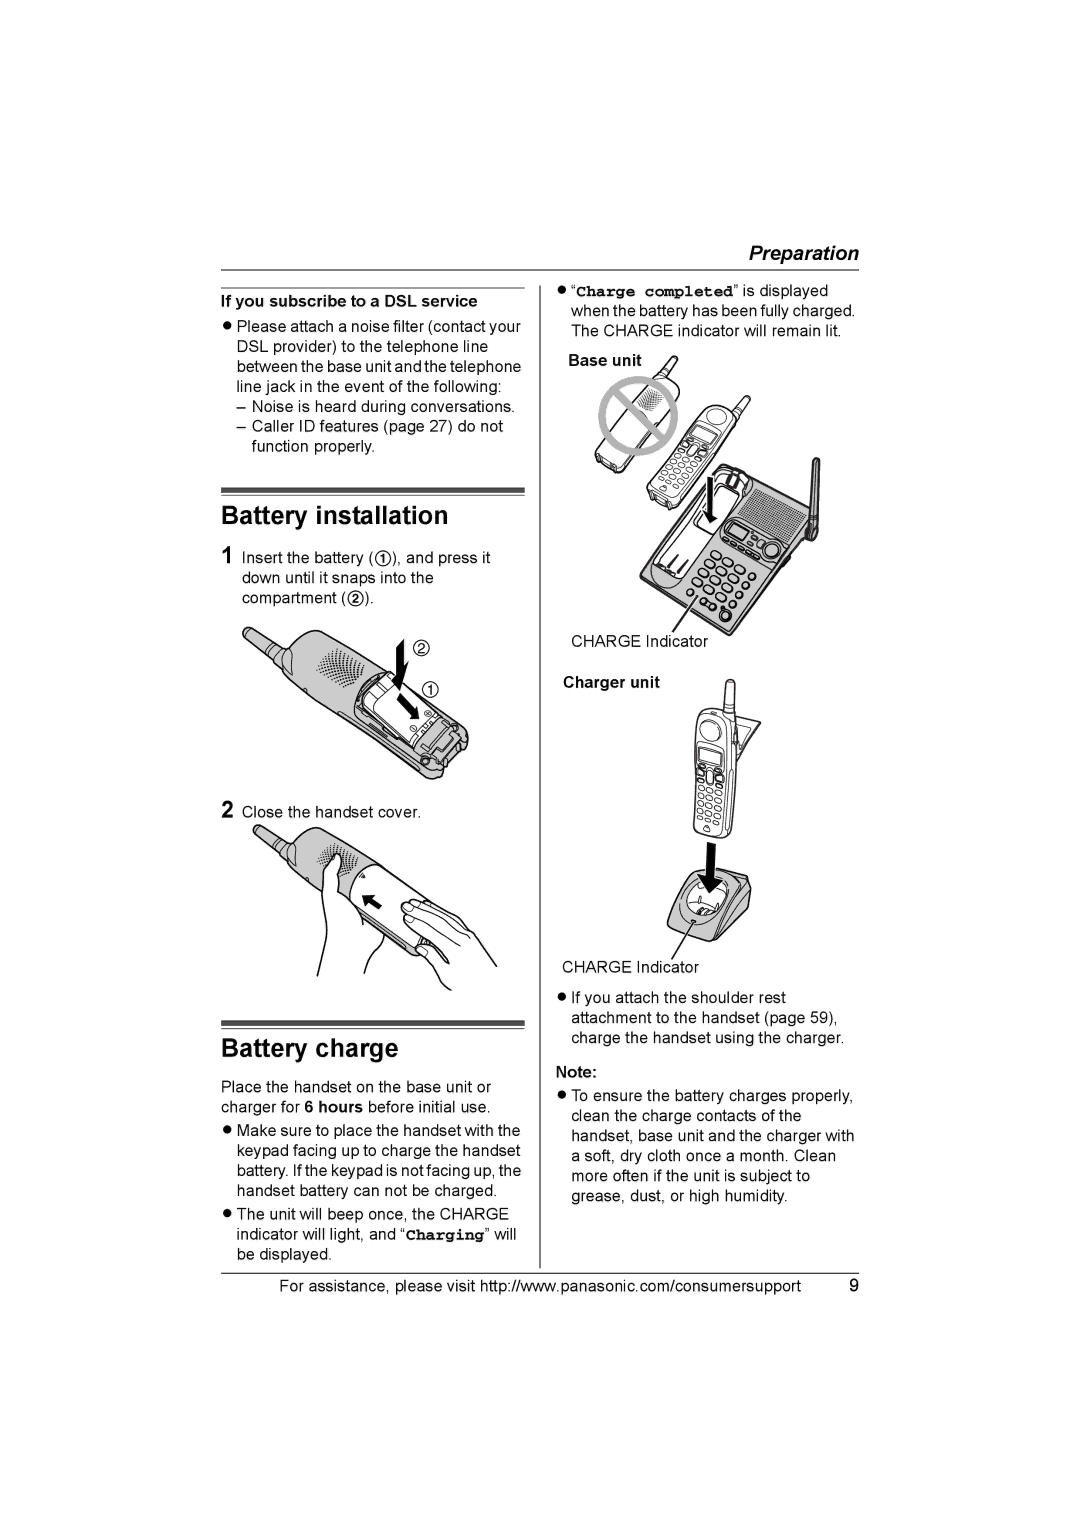
1 Insert the battery (1), and press it down until it snaps into the compartment (2).
2
1
2 Close the handset cover.
Battery charge
Place the handset on the base unit or charger for 6 hours before initial use.
L Make sure to place the handset with the keypad facing up to charge the handset battery. If the keypad is not facing up, the handset battery can not be charged.
L The unit will beep once, the CHARGE indicator will light, and “Charging” will be displayed.
L “Charge completed” is displayed when the battery has been fully charged. The CHARGE indicator will remain lit.
Base unit
CHARGE Indicator
Charger unit
CHARGE Indicator
L If you attach the shoulder rest attachment to the handset (page 59), charge the handset using the charger.
Note:
L To ensure the battery charges properly, clean the charge contacts of the handset, base unit and the charger with a soft, dry cloth once a month. Clean more often if the unit is subject to grease, dust, or high humidity.
For assistance, please visit http://www.panasonic.com/consumersupport | 9 |