Installation Setting
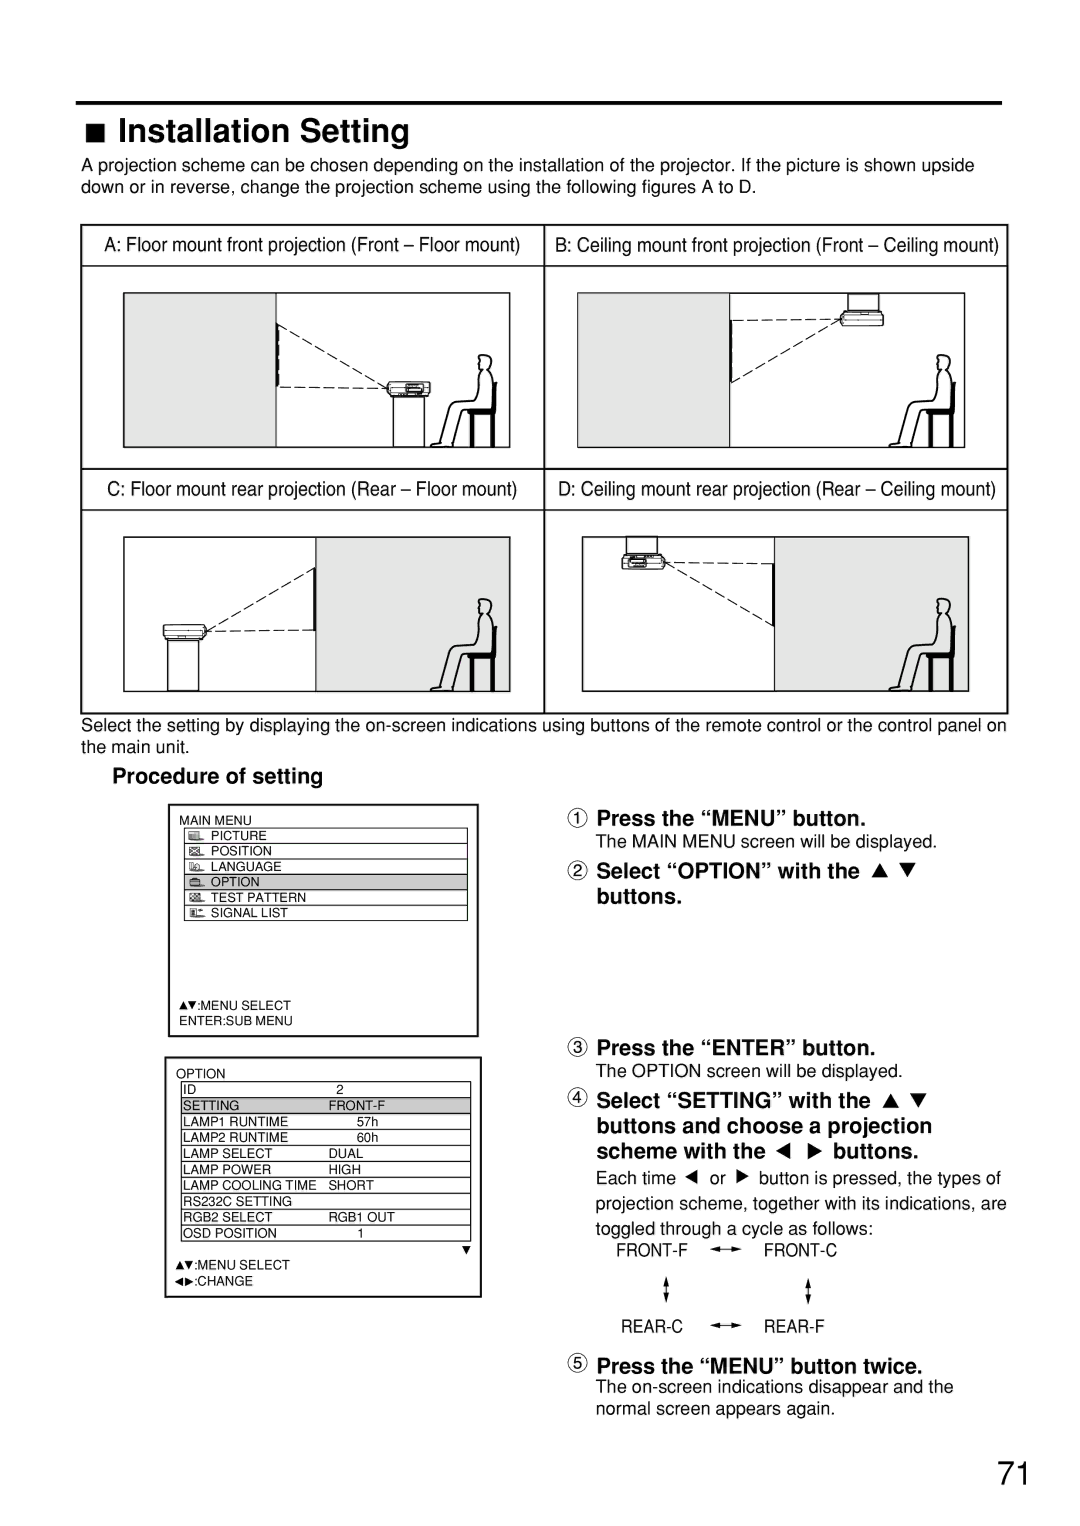
A projection scheme can be chosen depending on the installation of the projector. If the picture is shown upside down or in reverse, change the projection scheme using the following figures A to D.
A: Floor mount front projection (Front – Floor mount)
B: Ceiling mount front projection (Front – Ceiling mount)
C: Floor mount rear projection (Rear – Floor mount)
D: Ceiling mount rear projection (Rear – Ceiling mount)
Select the setting by displaying the
Procedure of setting
MAIN MENU
PICTURE
POSITION
LANGUAGE
![]() OPTION
OPTION
![]() TEST PATTERN
TEST PATTERN
![]() SIGNAL LIST
SIGNAL LIST
![]() :MENU SELECT
:MENU SELECT
ENTER:SUB MENU
OPTION
ID | 2 |
SETTING | |
LAMP1 RUNTIME | 57h |
LAMP2 RUNTIME | 60h |
LAMP SELECT | DUAL |
LAMP POWER | HIGH |
LAMP COOLING TIME | SHORT |
RS232C SETTING |
|
RGB2 SELECT | RGB1 OUT |
OSD POSITION | 1 |
:MENU SELECT |
|
:CHANGE |
|
 Press the “MENU” button.
The MAIN MENU screen will be displayed.
 Select “OPTION” with the buttons.
 Press the “ENTER” button.
The OPTION screen will be displayed.
![]() Select “SETTING” with the
Select “SETTING” with the ![]()
![]() buttons and choose a projection
buttons and choose a projection
scheme with the ![]()
![]() buttons.
buttons.
Each time ![]() or
or ![]() button is pressed, the types of projection scheme, together with its indications, are toggled through a cycle as follows:
button is pressed, the types of projection scheme, together with its indications, are toggled through a cycle as follows:
FRONT-F 

FRONT-C
REAR-C 

REAR-F
![]() Press the “MENU” button twice.
Press the “MENU” button twice.
The
71