Adjusting the position
 Size adjustment
Procedure of adjustment
MAIN MENU
PICTURE
POSITION
LANGUAGE
![]() OPTION
OPTION
![]() TEST PATTERN
TEST PATTERN
![]() SIGNAL LIST
SIGNAL LIST
![]() :MENU SELECT
:MENU SELECT
ENTER:SUB MENU
POSITION
SHIFT
SIZEVID AUTO
BLANKING
KEYSTONE
EDGE BLENDING
![]() :MENU SELECT
:MENU SELECT
![]()
![]() :CHANGE ENTER:SUB MENU
:CHANGE ENTER:SUB MENU
ZOOM
INTERLOCKED: | OFF |
V: | 100 % |
H: | 100 % |
HV: | 100 % |
![]() :MENU SELECT
:MENU SELECT ![]()
![]() :CHANGE
:CHANGE
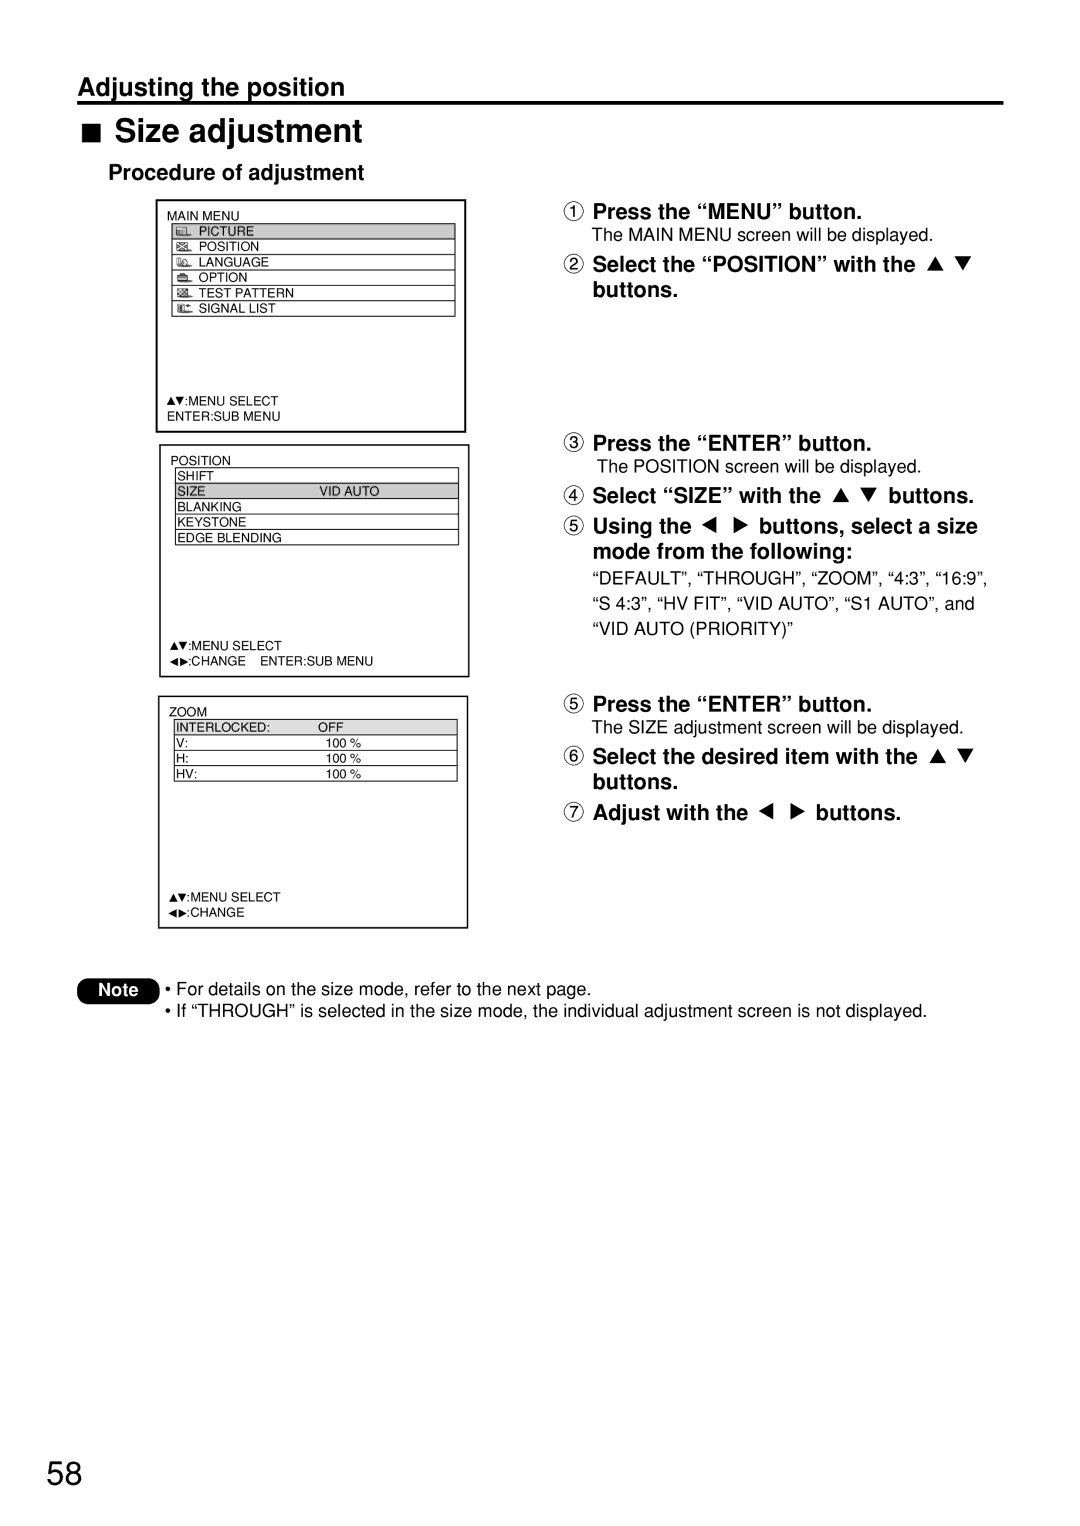
 Press the “MENU” button.
The MAIN MENU screen will be displayed.
![]() Select the “POSITION” with the buttons.
Select the “POSITION” with the buttons.
 Press the “ENTER” button.
The POSITION screen will be displayed.
![]() Select “SIZE” with the
Select “SIZE” with the ![]()
![]() buttons.
buttons.
![]() Using the
Using the ![]()
![]() buttons, select a size mode from the following:
buttons, select a size mode from the following:
“DEFAULT”, “THROUGH”, “ZOOM”, “4:3”, “16:9”, “S 4:3”, “HV FIT”, “VID AUTO”, “S1 AUTO”, and “VID AUTO (PRIORITY)”
 Press the “ENTER” button.
The SIZE adjustment screen will be displayed.
![]() Select the desired item with the buttons.
Select the desired item with the buttons.
![]() Adjust with the
Adjust with the ![]()
![]() buttons.
buttons.
Note • For details on the size mode, refer to the next page.
•If “THROUGH” is selected in the size mode, the individual adjustment screen is not displayed.
58
