CONTINUOUS RECORDING SCHEDULE
1.Select the “Continuous recording” radio button. (This is the default setting and should already be selected the first time you select a channel.) Refer to Figure 60.
2.Click Apply.
Recording is done at all times and no schedule is defined. The entire daily and weekly recording schedules are marked in light yellow, and any previous definitions on the schedules are removed.
DAILY RECORDING SCHEDULE
NOTE: To make sure there is no delay during scheduled recording, begin the recording at least five minutes before the actual recording time. For example, schedule a recording at 7:55 a.m. instead of 8:00 a.m.
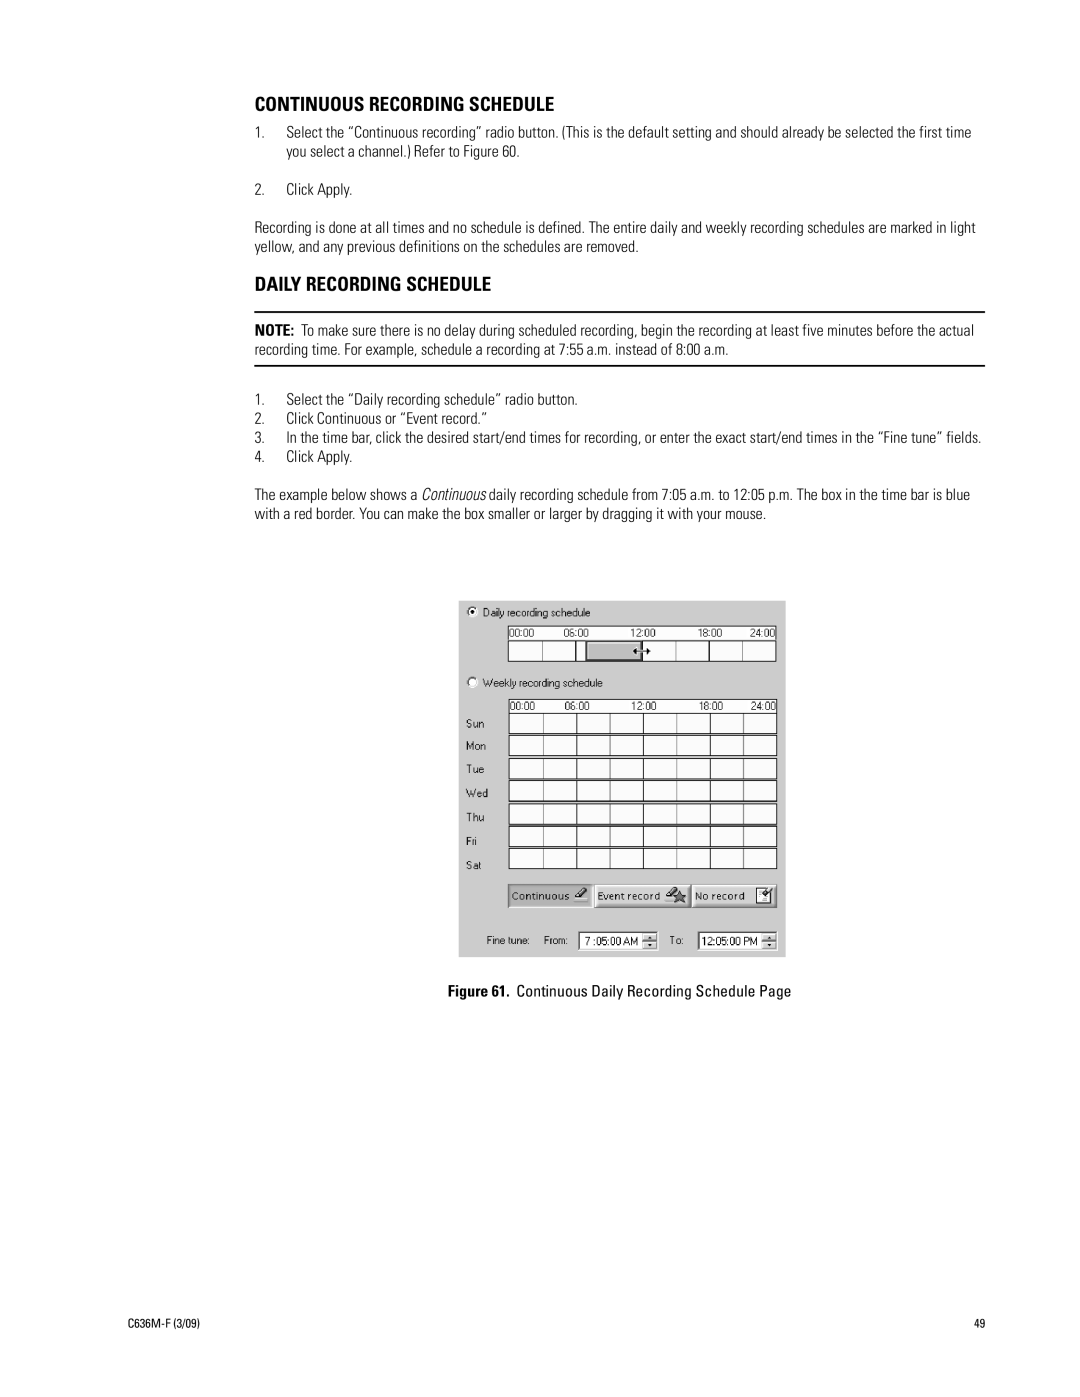
1.Select the “Daily recording schedule” radio button.
2.Click Continuous or “Event record.”
3.In the time bar, click the desired start/end times for recording, or enter the exact start/end times in the “Fine tune” fields.
4.Click Apply.
The example below shows a Continuous daily recording schedule from 7:05 a.m. to 12:05 p.m. The box in the time bar is blue with a red border. You can make the box smaller or larger by dragging it with your mouse.
Figure 61. Continuous Daily Recording Schedule Page
| 49 |