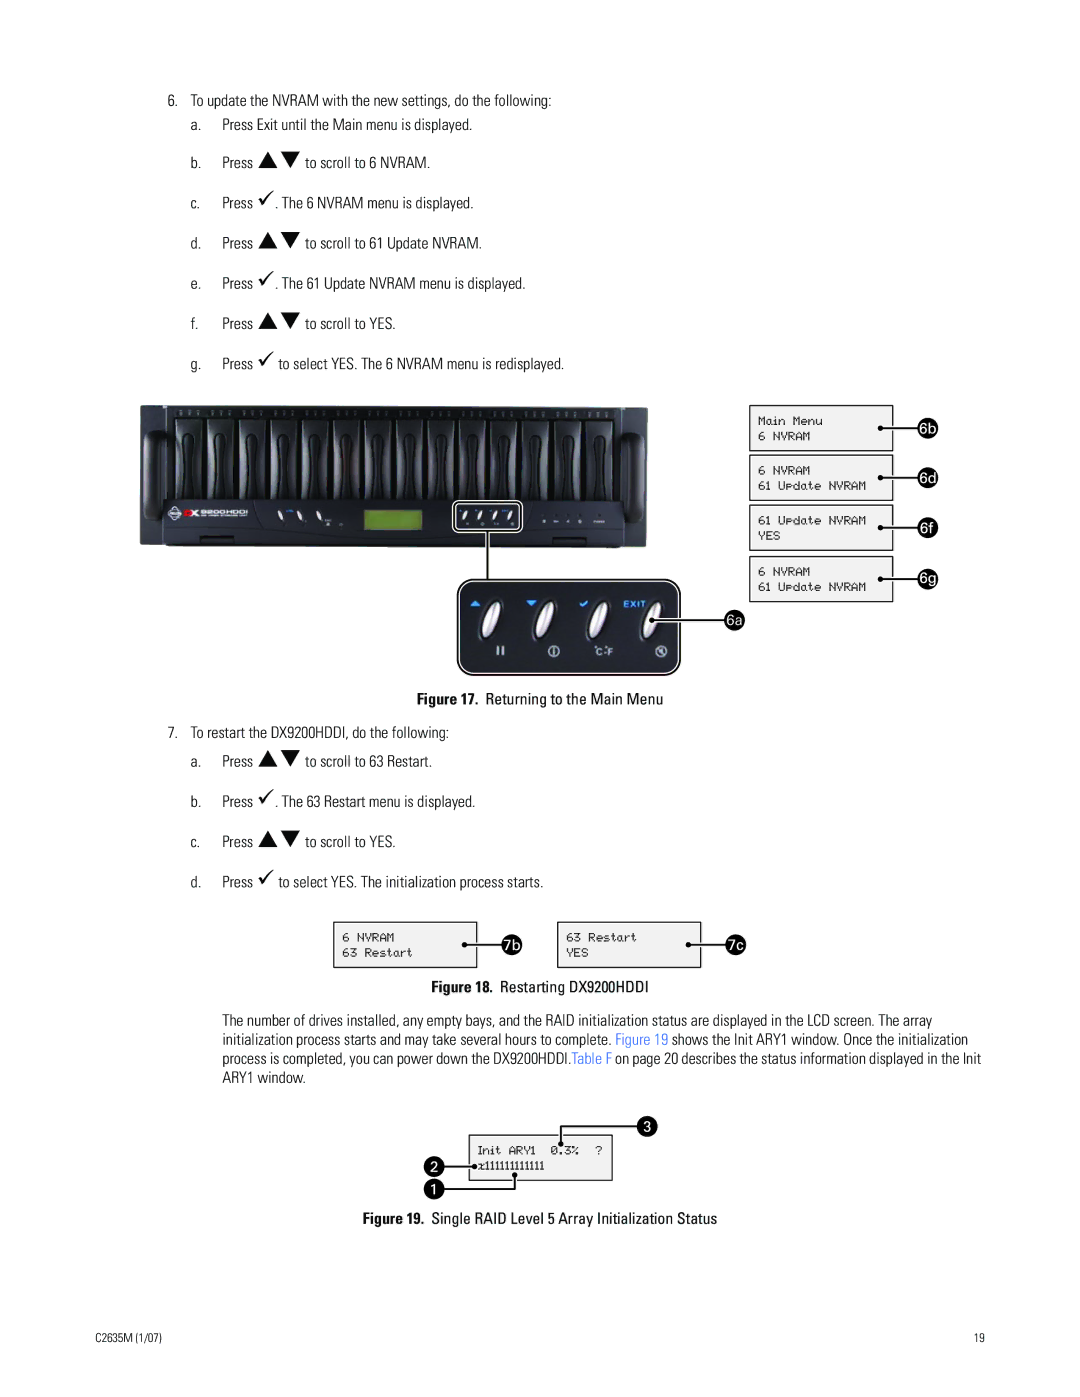
6.To update the NVRAM with the new settings, do the following:
a.Press Exit until the Main menu is displayed.
b.Press !"to scroll to 6 NVRAM.
c.Press !. The 6 NVRAM menu is displayed.
d.Press !"to scroll to 61 Update NVRAM.
e.Press !. The 61 Update NVRAM menu is displayed.
f.Press !"to scroll to YES.
g.Press ! to select YES. The 6 NVRAM menu is redisplayed.
Main Menu
6 NVRAM
6 NVRAM
61 Update NVRAM
61 Update NVRAM YES
6 NVRAM
61 Update NVRAM
Figure 17. Returning to the Main Menu
7.To restart the DX9200HDDI, do the following:
a.Press !"to scroll to 63 Restart.
b.Press !. The 63 Restart menu is displayed.
c.Press !"to scroll to YES.
d.Press ! to select YES. The initialization process starts.
6NVRAM
63Restart
63Restart
YES
Figure 18. Restarting DX9200HDDI
The number of drives installed, any empty bays, and the RAID initialization status are displayed in the LCD screen. The array initialization process starts and may take several hours to complete. Figure 19 shows the Init ARY1 window. Once the initialization process is completed, you can power down the DX9200HDDI.Table F on page 20 describes the status information displayed in the Init ARY1 window.
Init ARY1 0.3% ? ![]() x111111111111
x111111111111
Figure 19. Single RAID Level 5 Array Initialization Status
C2635M (1/07) | 19 |