Connecting the DX8100 to the DX9200HDDI
The DX9200HDDI can support one or two DX8100 DVRs (refer to Figure 20 and Figure 21). The optional
To connect a DX8100 to the DX9200HDDI:
1.Power down the DX9200HDDI unit.
2.Power down the DX8100 DVR.
3.If the DX9200HDDI and DX8100 are to be rack mounted, perform the physical installation procedures as specified in the respective installation manual for each unit.
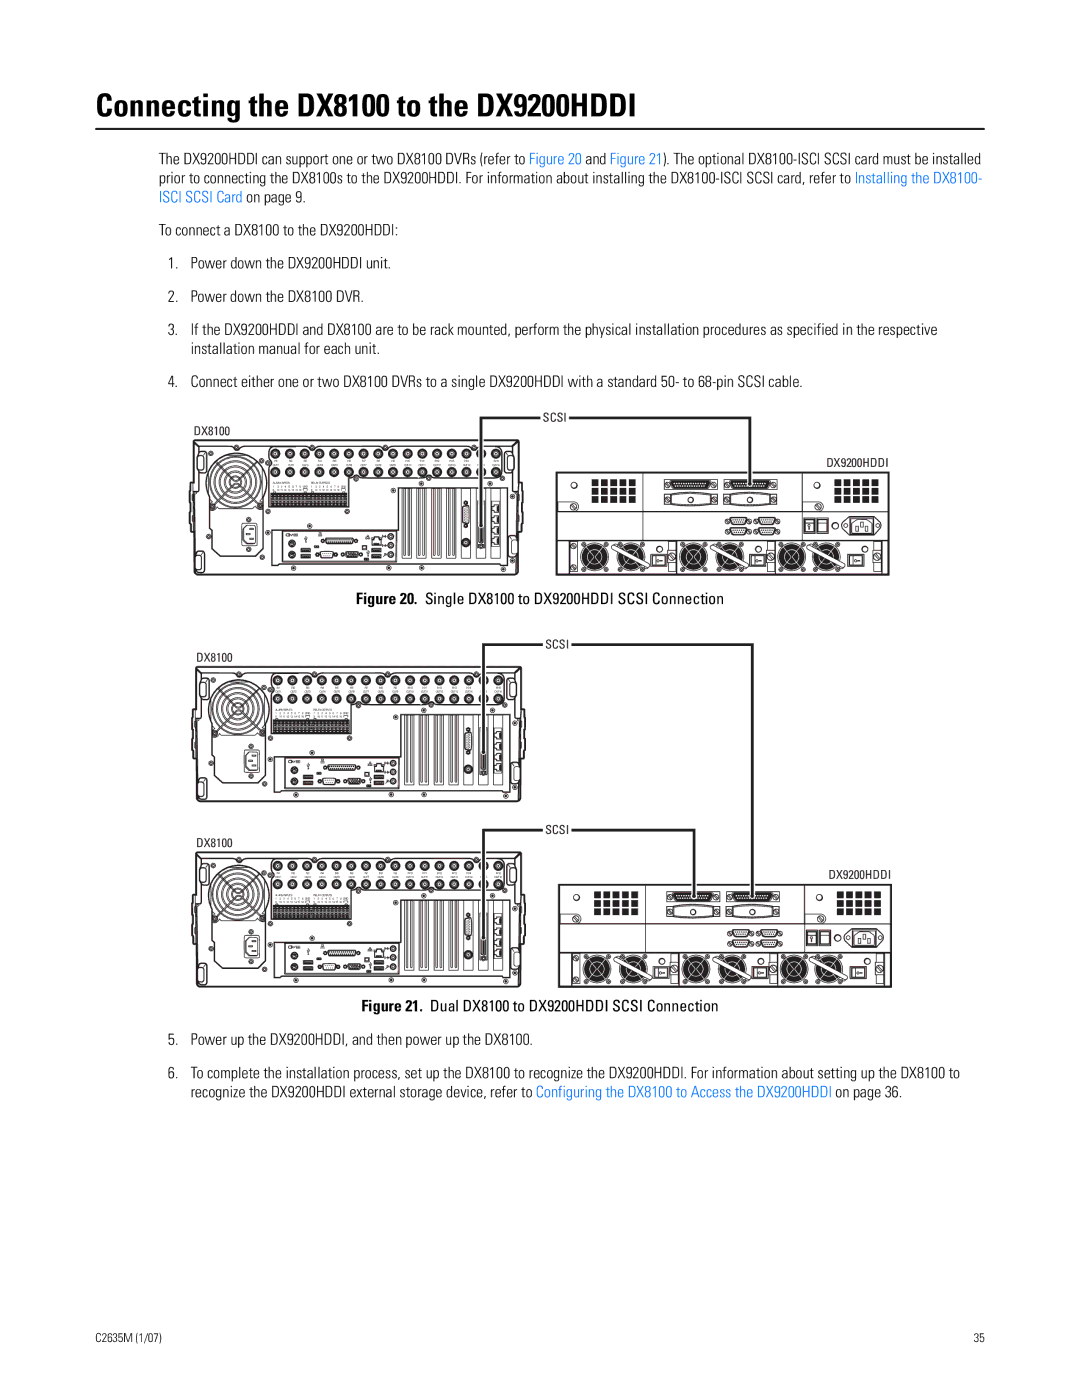
4.Connect either one or two DX8100 DVRs to a single DX9200HDDI with a standard 50- to
DX8100
| IN1 | IN2 | IN3 |
| IN4 | IN5 | IN6 | IN7 | IN8 | IN9 | IN10 | IN11 | IN12 | IN13 | IN14 | IN15 | IN16 |
OUT1 | OUT2 | OUT3 |
| OUT4 | OUT5 | OUT6 | OUT7 | OUT8 | OUT9 | OUT10 | OUT11 | OUT12 | OUT13 | OUT14 | OUT15 | OUT16 | |
ALARM INPUTS |
| RELAY OUTPUTS |
|
|
|
|
|
|
|
|
|
|
|
| |||
1 | 2 2 | 4 5 6 | 7 8 GND | 1 | 2 2 4 5 | 6 7 8 | GND |
|
|
|
|
|
|
|
|
|
|
9 | 10 11 12 13 14 | 15 16 | 9 | 10 11 12 13 14 15 16 |
|
|
|
|
|
|
|
|
|
|
| ||
SCSI
DX9200HDDI |
Figure 20. Single DX8100 to DX9200HDDI SCSI Connection
DX8100
| IN1 | IN2 | IN3 |
| IN4 | IN5 | IN6 | IN7 | IN8 | IN9 | IN10 | IN11 | IN12 | IN13 | IN14 | IN15 | IN16 |
OUT1 | OUT2 | OUT3 |
| OUT4 | OUT5 | OUT6 | OUT7 | OUT8 | OUT9 | OUT10 | OUT11 | OUT12 | OUT13 | OUT14 | OUT15 | OUT16 | |
ALARM INPUTS |
| RELAY OUTPUTS |
|
|
|
|
|
|
|
|
|
|
|
| |||
1 | 2 | 2 4 5 6 7 8 | GND | 1 | 2 2 4 5 | 6 7 8 | GND |
|
|
|
|
|
|
|
|
|
|
9 | 10 11 12 13 14 15 16 |
| 9 | 10 11 12 13 14 15 16 |
|
|
|
|
|
|
|
|
|
|
| ||
SCSI
SCSI
DX9200HDDI |
Figure 21. Dual DX8100 to DX9200HDDI SCSI Connection
5.Power up the DX9200HDDI, and then power up the DX8100.
6.To complete the installation process, set up the DX8100 to recognize the DX9200HDDI. For information about setting up the DX8100 to recognize the DX9200HDDI external storage device, refer to Configuring the DX8100 to Access the DX9200HDDI on page 36.
C2635M (1/07) | 35 |